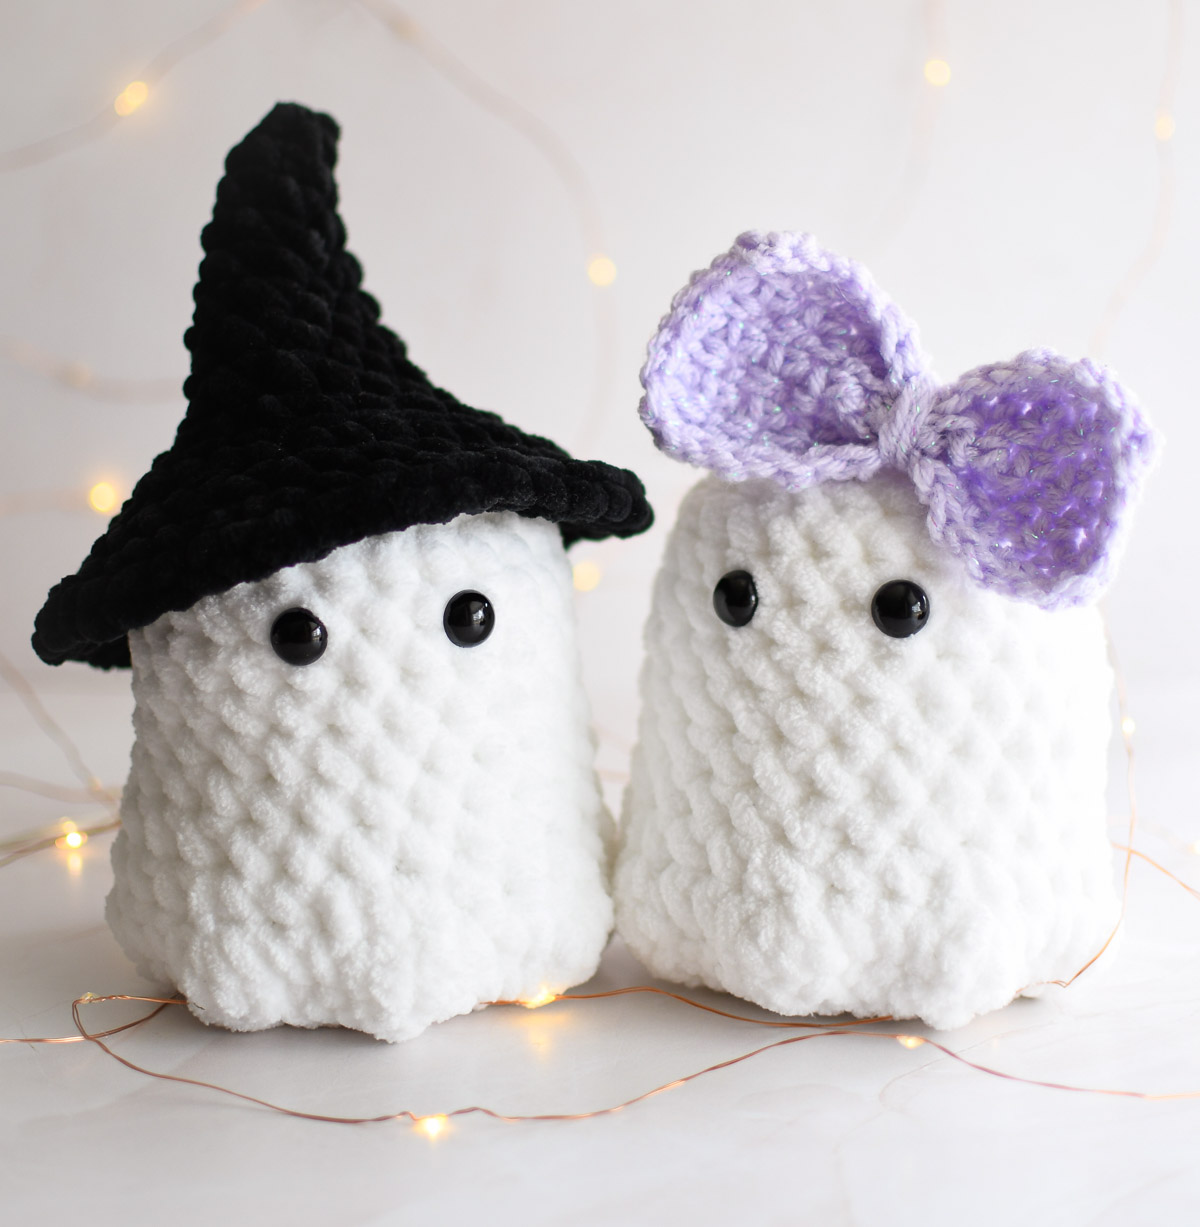
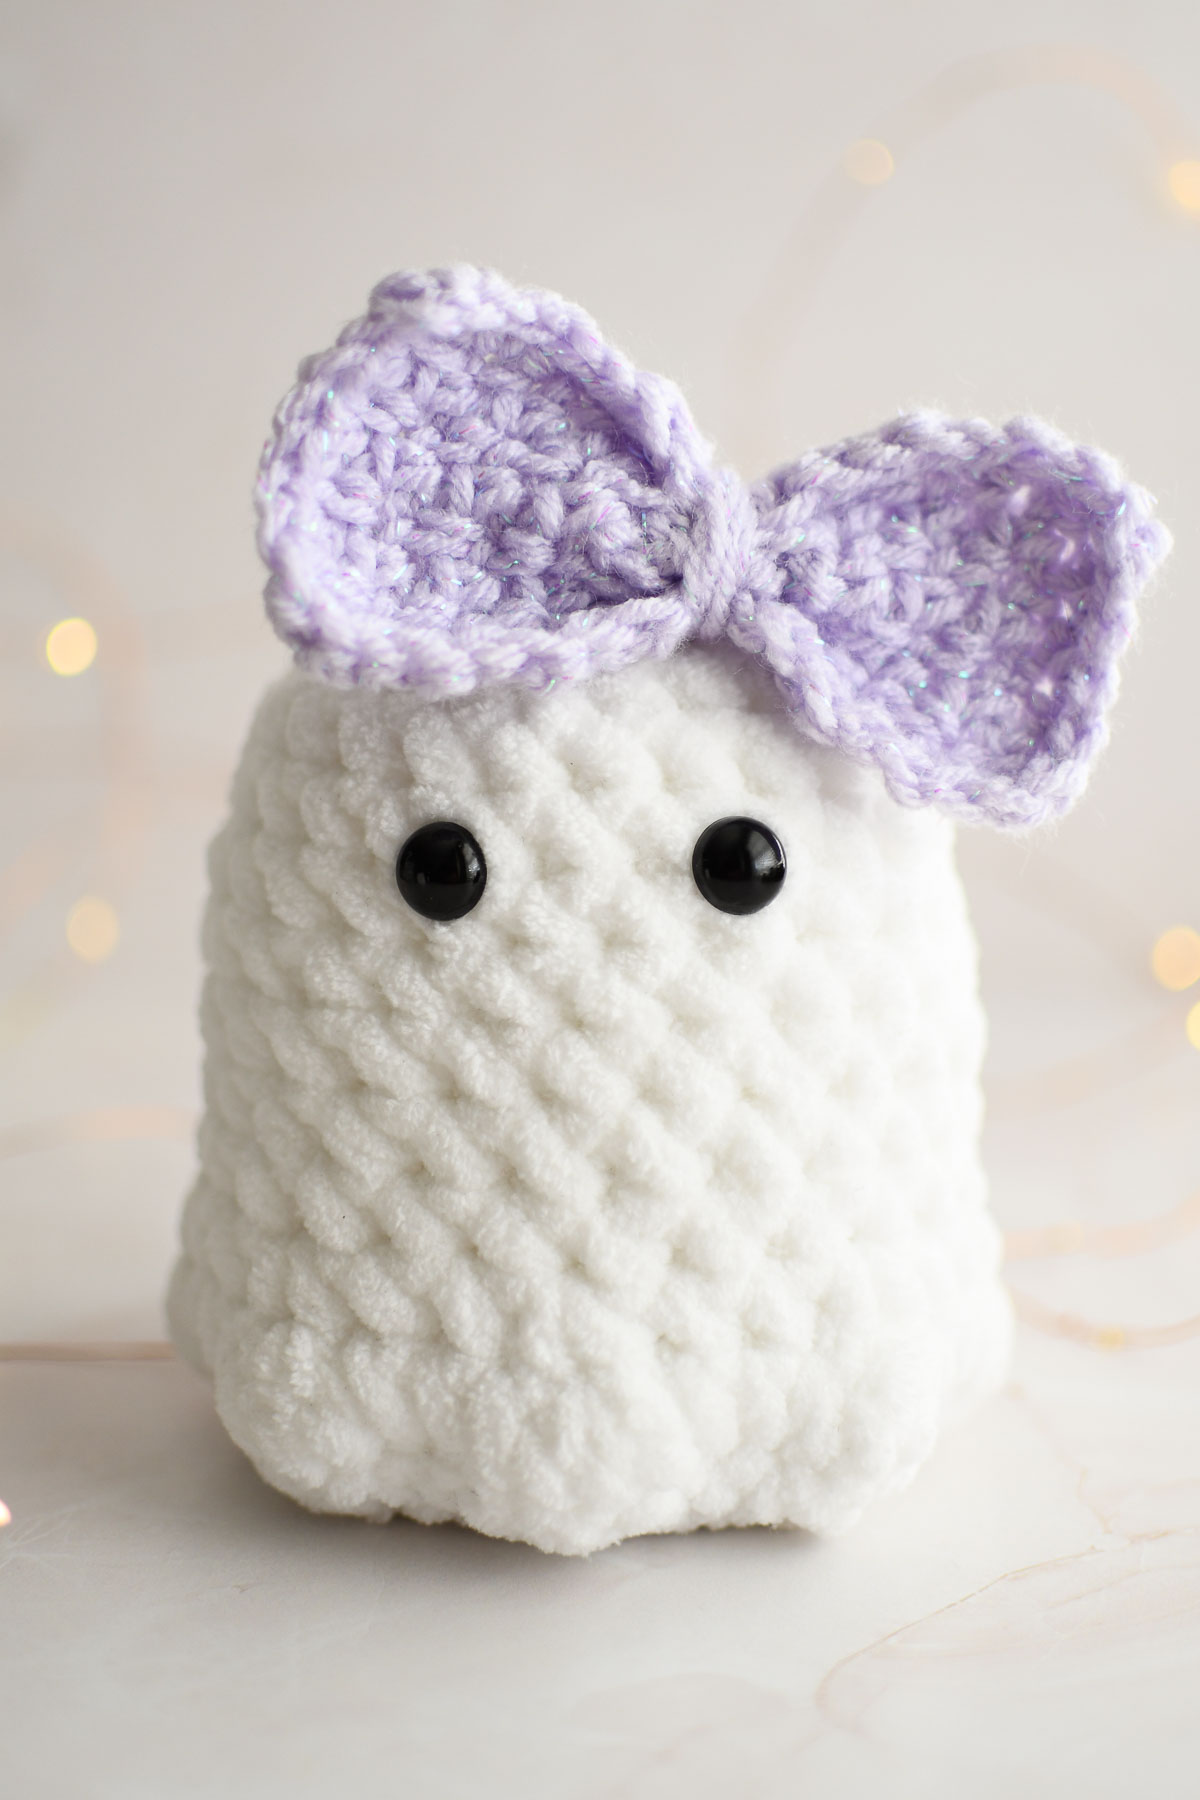
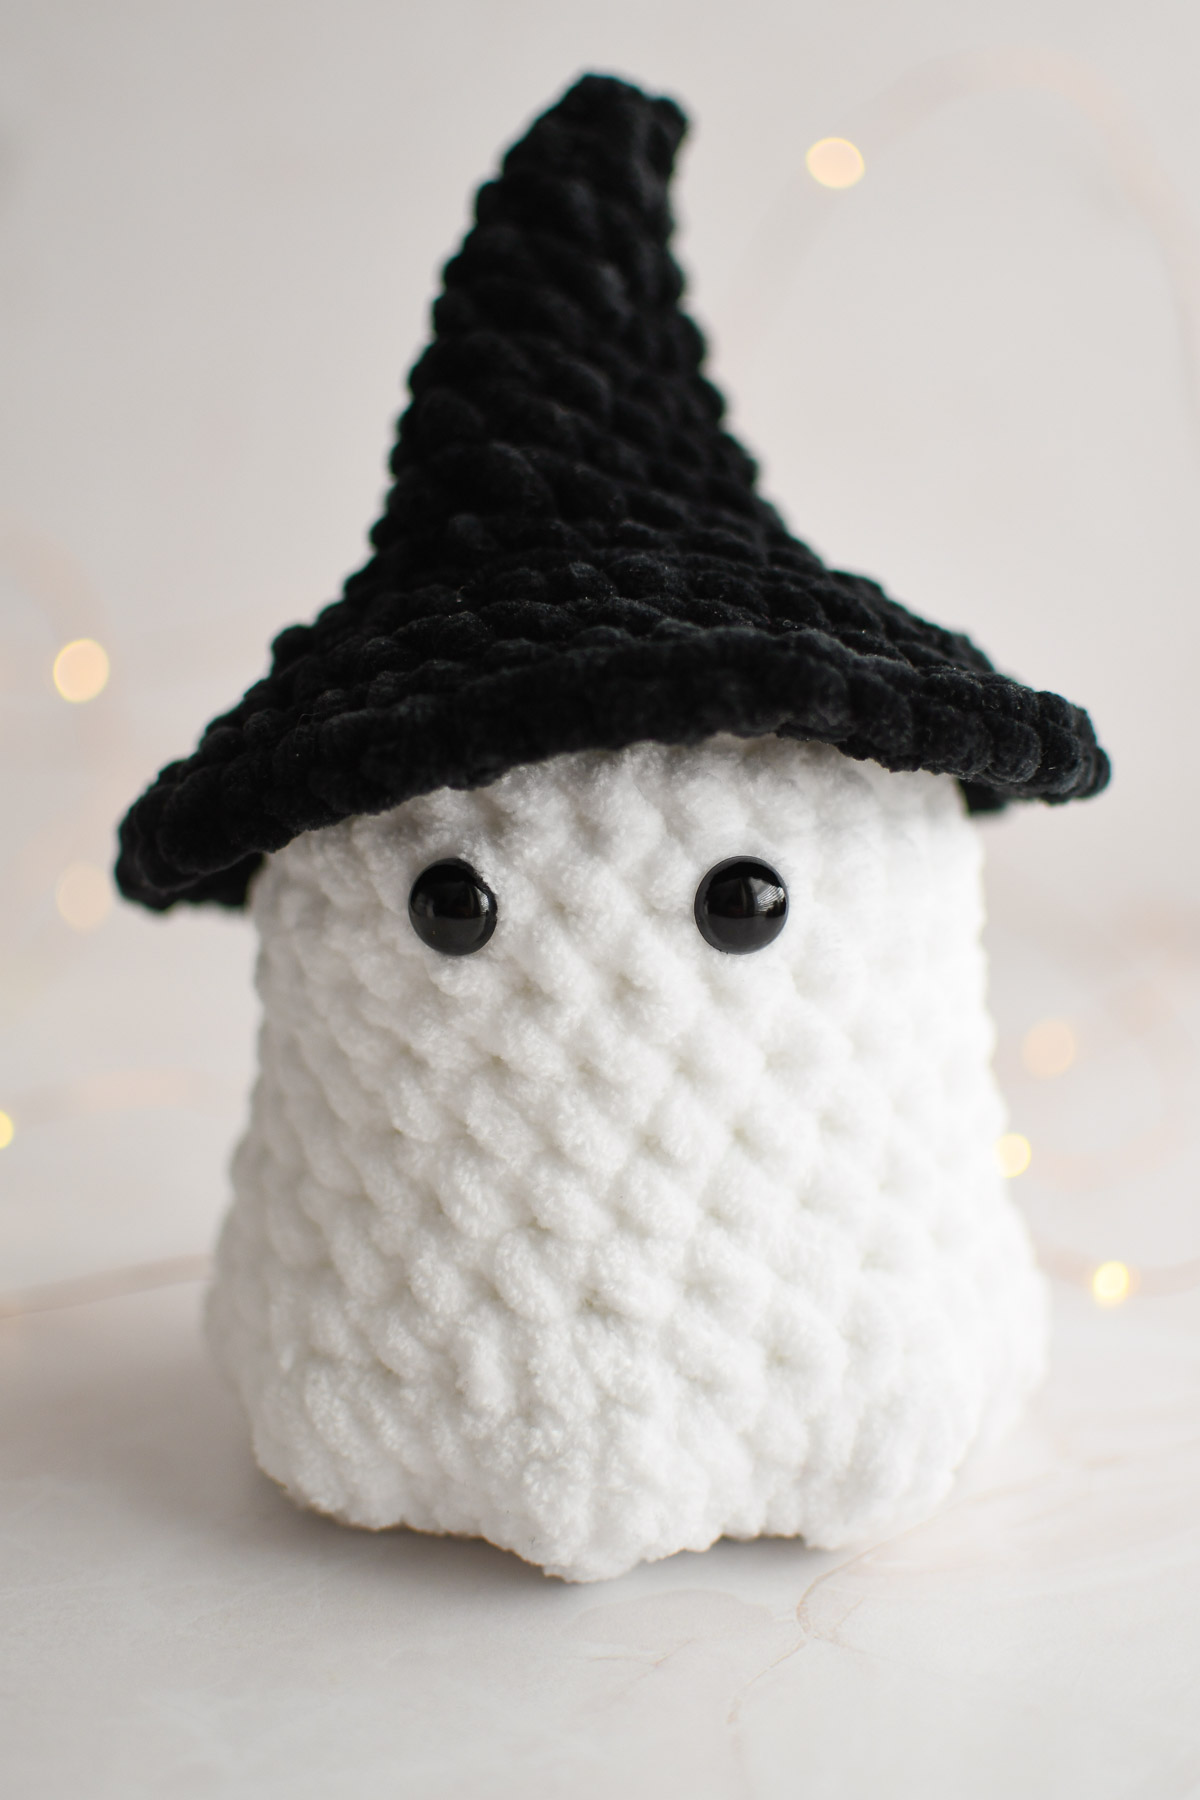
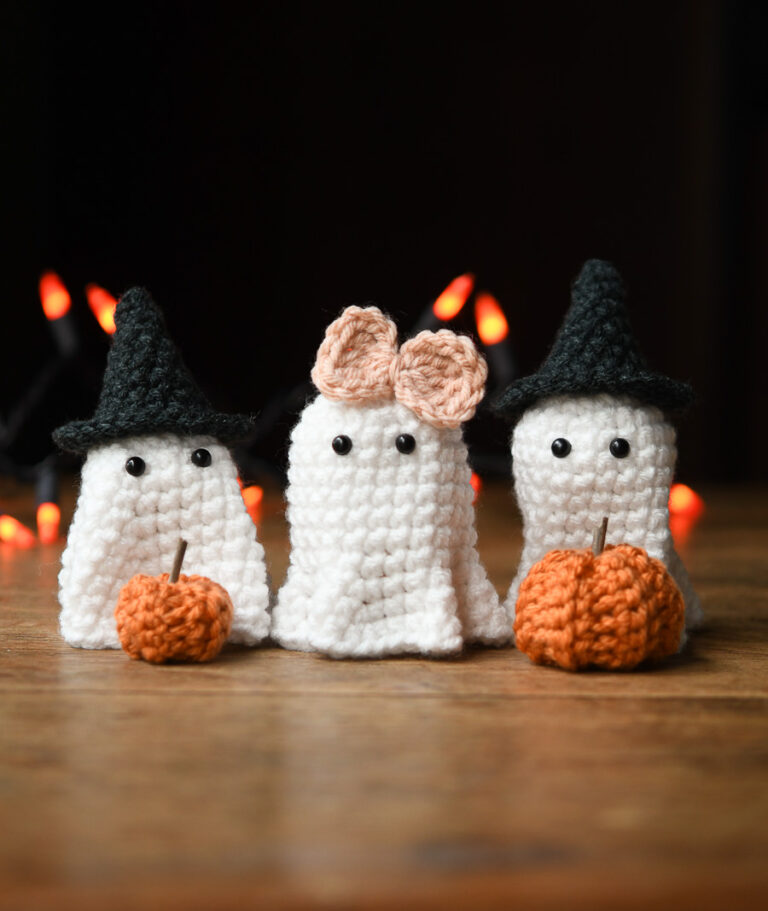
Plushie Ghost Crochet Pattern
Gather round, spooky pals! I’ve got a fun new plushie ghost crochet pattern to share with you all. They’re soft & squishy and adorable. These friendly ghosts work up quickly with bulky weight yarn and large hook.
For beginners and those who have difficulty reading crochet shorthand patterns, there are lots of step by step photos to help you along. Let’s get crafting!
If you love these plushie ghosts, you might also like my cute tiny crochet ghost trio or my super easy crochet pumpkin tutorial!
Getting Started
Supplies
- Hook: 7.0 mm and 4.0mm, my favorite are Clover Amour
- Eyes: 10 or 12 mm safety eyes
- Yarns: #6 super bulky and #4 worsted weight
- Ghost: Bulky weight-Bernat Blanket in White (Walmart, Michaels)
- Hat: Bulky weight-Chenille Home Slim in Black (Michaels)
- Bow: Worsted weight-I love this yarn in Lavender Sparkle (Hobby Lobby)
- Tools: Scissors, stitch marker, and tapestry needle
- Poly-fil stuffing: I recommend Poly-fil Ultra Plush
Stitches & Abbreviations
SC-single crochet
Ch-chain
Ch-sp-chain space. The space created underneath a chain 1.
Inc-increase by making 2 single crochets in one stitch.
Dec-decrease by inserting your hook into the front loop of the next 2 stitches, yarn under and pull up a loop. Yarn over and pull through both loops. 1 stitch decreased.
3 HDC inc-make 3 half double crochet stitches in the next stitch.
3 HDC dec-decrease by inserting your hook into the front loop of the next 3 half double crochet stitches, yarn under and pull up a loop. Then yarn over and through both loops on hook.
Sl st-slip stitch
SC in BLO-single crochet in back loop only.
Invisible fasten off for amigurumi-cut yarn leaving a 5 inch tail. Pull yarn straight up through the last stitch finished. Thread yarn on a tapestry needle and insert underneath the top loops of the 2nd stitch, then straight down through the middle of the last stitch of the round through to the back of the work. This creates a faux stitch that blends in with the tops of the last round.
Tip: Use the Yarn Under/Yarn Over method of single crochet for tighter stitches: Insert your hook into the stitch, yarn UNDER and pull up a loop (left photo), yarn OVER and pull through both loops (right photo). For the yarn UNDER it helps to turn your hook downward to grab the yarn easily.

Notes
- Ghosts and witch hats are worked in a continuous spiral; do not slip stitch to begin a new round.
- Take care not to crochet the first 2 rounds tightly to prevent the top of the head from being pointy.
- If you’re using a thick plush yarn, you may only need to work through Round 9 before beginning increases. If your plush yarn is on the thinner side or compresses easily, work until Round 11 (about 4 inches from the top of the work) before beginning the increase rounds. Even yarns of the same brand can vary with thickness.
Finished size: Ghosts are 5 inches tall without accessories.
Ghost Plushie Crochet Pattern (written only)
With a 7.0 mm hook
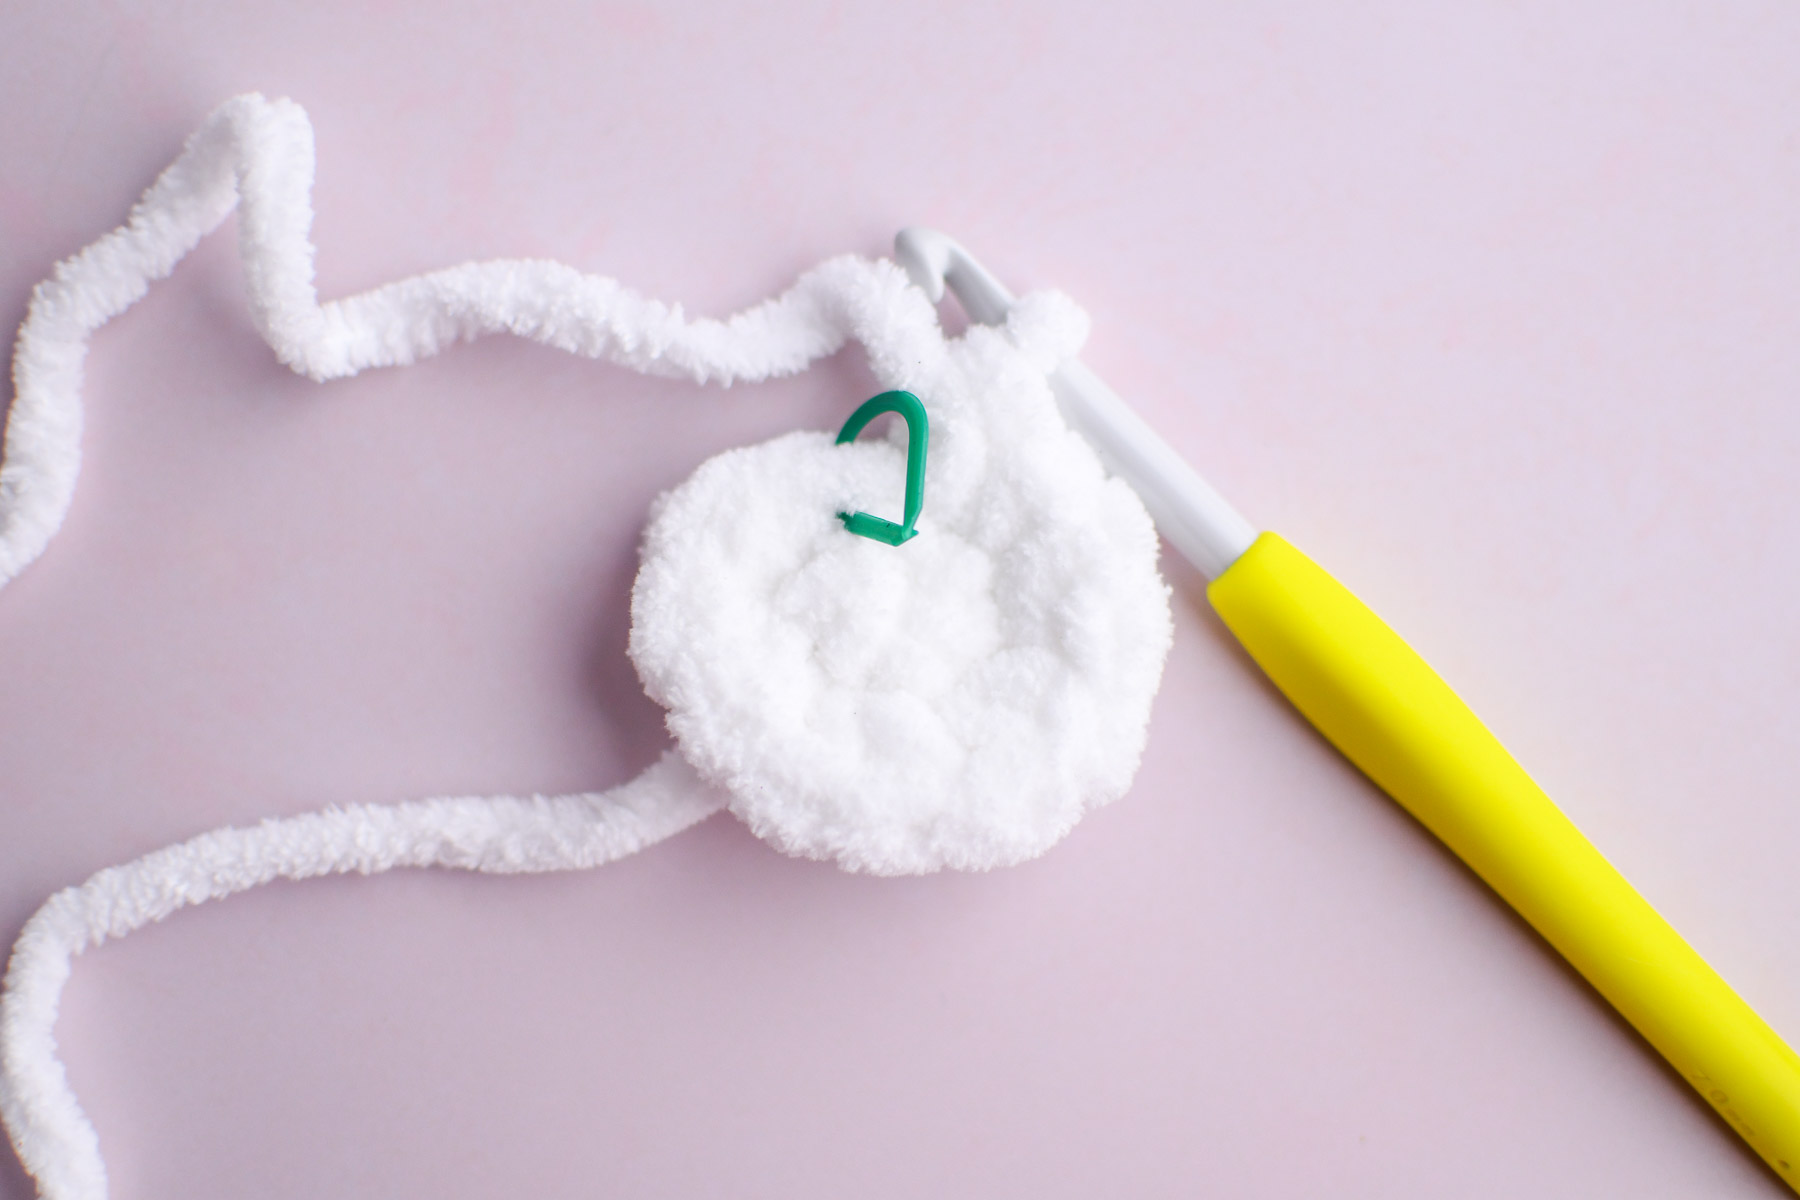
Round 1: In a Magic Ring, SC 6
Round 2: Inc in each stitch (12 stitches)
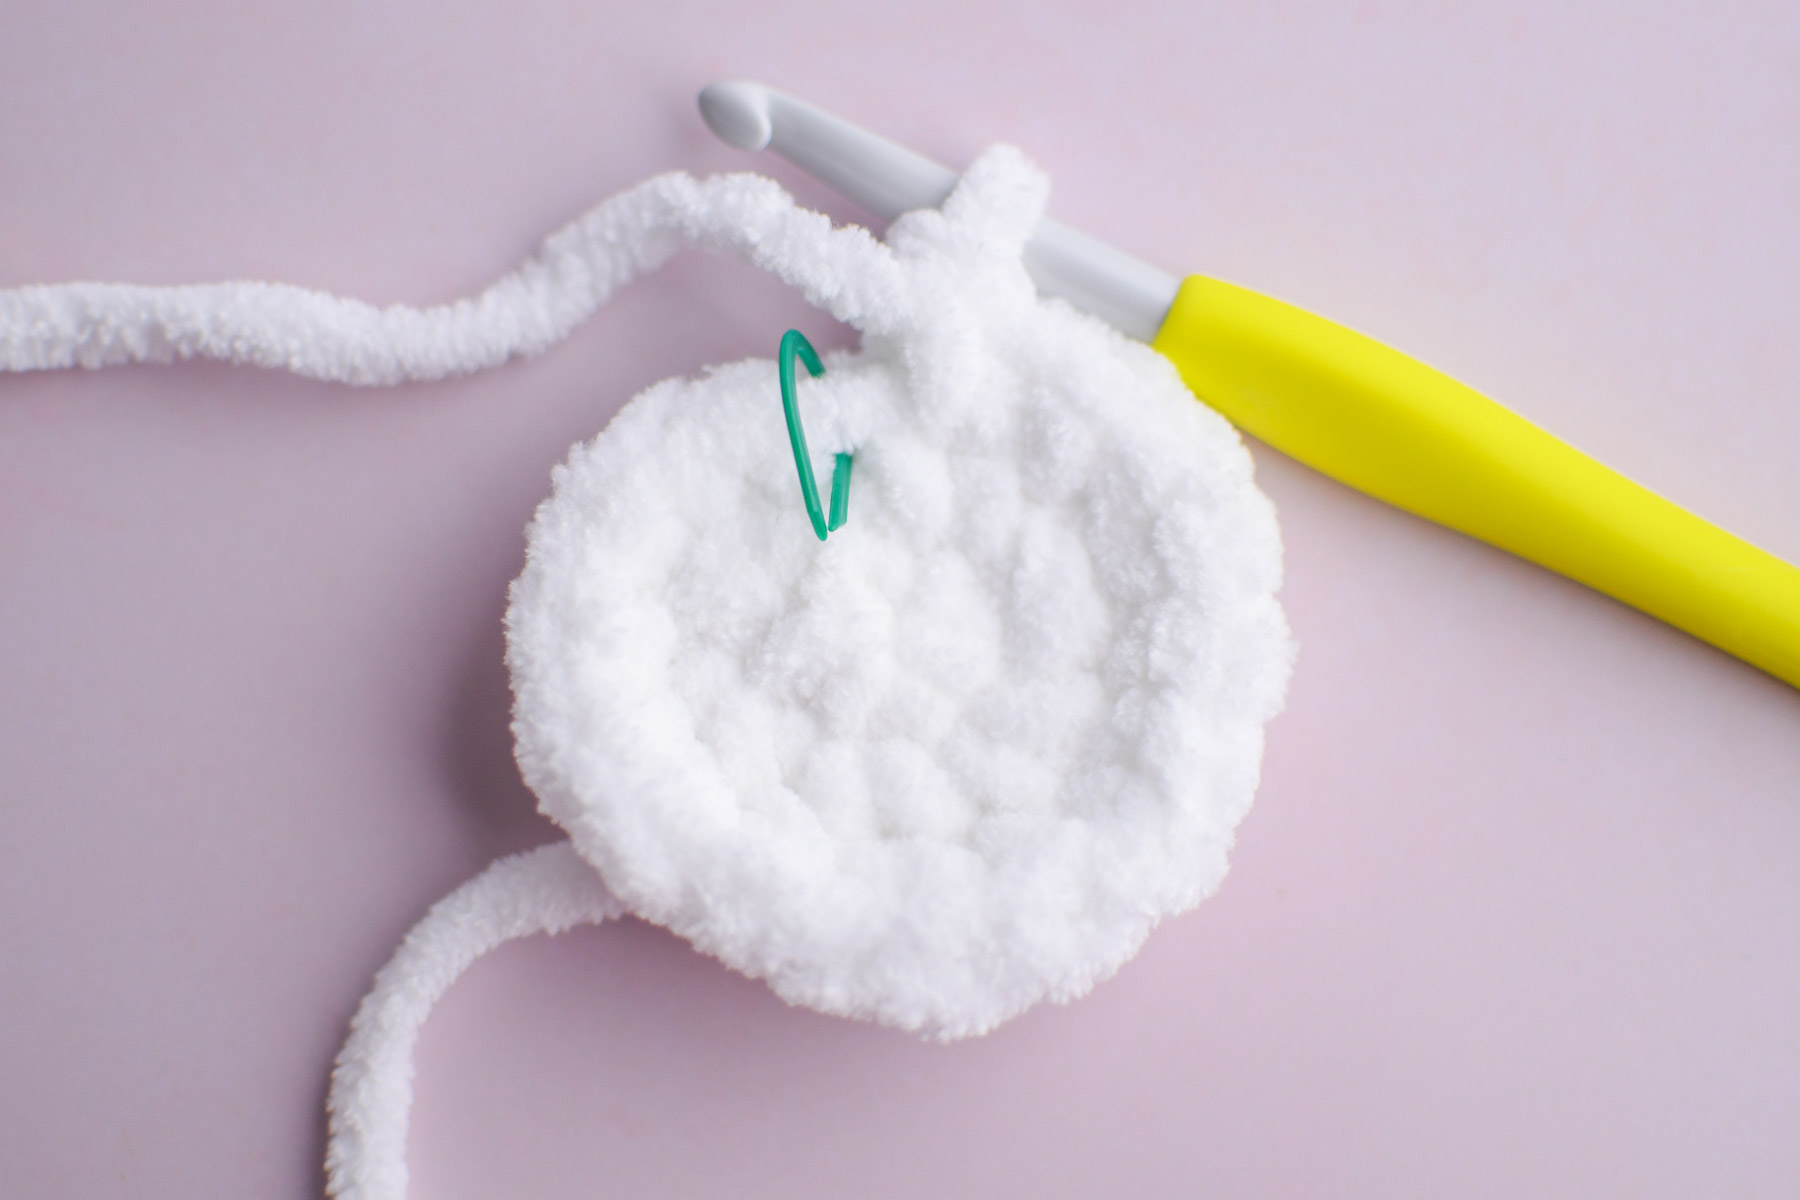
Round 3: (SC 1, inc) x6 (18)
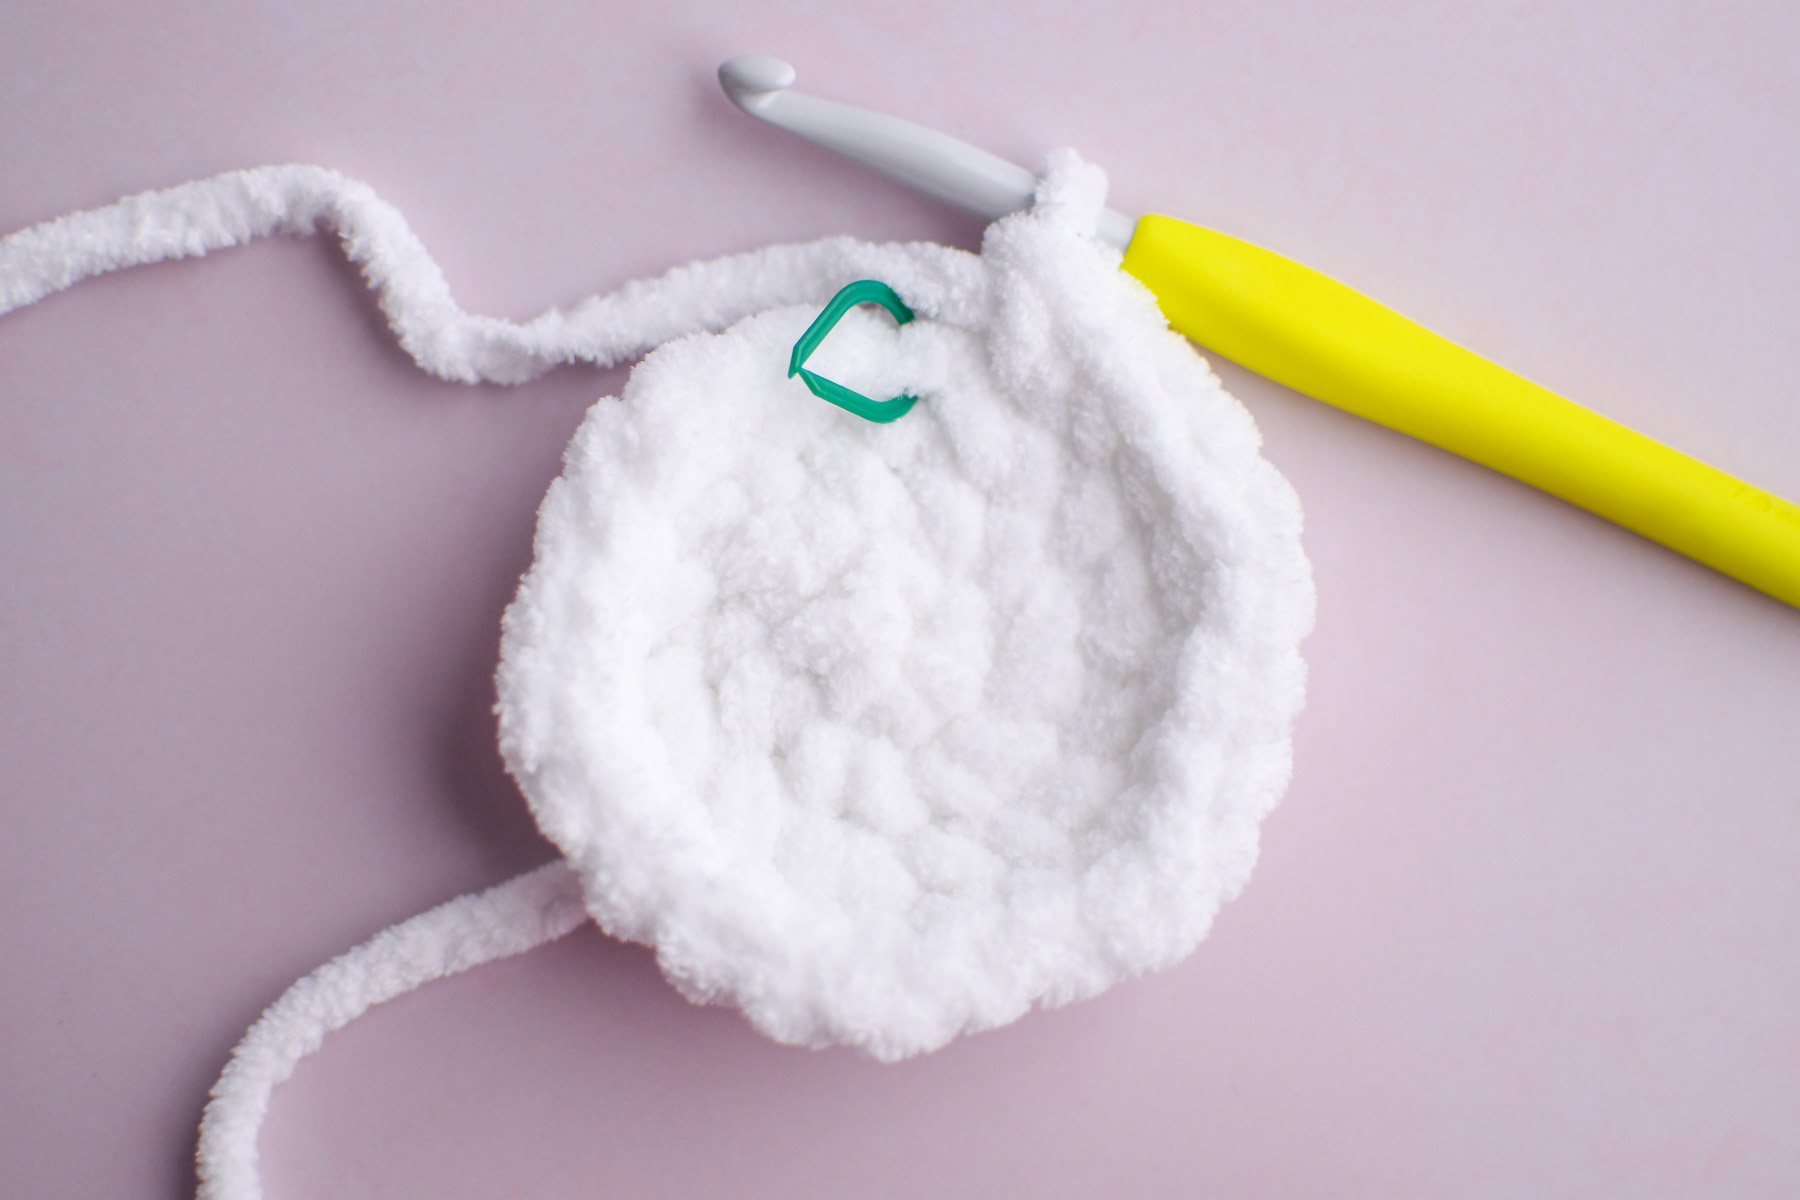
Round 4: (SC 2, inc) x6 (24)
Round 5-11: SC around (24)
Round 12: SC 2, Inc x8 (32)
Round 13: SC 3, 3HDC inc x8 (creates 8 ruffles) (48 stitches)
Round 14: SC 3, 3 HDC dec x8 (32)
Round 15: SC 2, dec x8 (24)
Push the ruffles to the front of the work. Turn the work so that the stitch marker is in the back center. Place eyes on front between Round 6 and 7, 3 stitches apart (opposite side of stitch marker, centered on the middle ruffle). Begin to stuff lightly.
Round 16: Dec around x12 (12)
Finish stuffing, taking care not to overstuff the bottom so that the ghost sits flat.
Round 17: Fasten off leaving a long tail, then weave the tail through the FLO of all stitches. Pull to close, weave in ends.
Ghost Plushie Step-by-Step Pattern
With a 7.0 mm hook
Round 1: In a Magic Ring, SC 6.
Make a Magic Ring, then chain 1 to lock it. Make 6 single crochet stitches in the ring. Place a stitch marker in the first stitch to mark the beginning of the round. Pull the tail to close the ring. (6 stitches)

Round 2: Inc in each stitch (12 stitches).
Remove the stitch marker and place 2 single crochet stitches in the first stitch. Put the stitch marker in the new first stitch of the round. Continue around, placing 2 single crochets in each stitch until you reach the beginning of the round. Make sure there are now 12 stitches.
Round 3: (SC 1, inc) x6 (18)
Remove the stitch marker and place 1 single crochet in the first stitch. Replace the stitch marker. In the next stitch, place 2 single crochet stitches. Repeat this pattern, (1 single crochet in the next stitch, then 2 single crochets in the next stitch) 6 times until you reach the beginning of the round. You’ll now have 18 stitches at the end.
Round 4: (SC 2, inc) x6 (24)
Remove the stitch marker and place 1 single crochet in the first stitch. Replace the stitch marker. Single crochet in the next stitch. In the third stitch, place 2 single crochet stitches. Repeat this pattern, (1 single crochet in the next 2 stitches, 2 single crochets in the third) 6 times until you reach the beginning of the round. 24 stitches at the end.
Crochet the Ghost Body
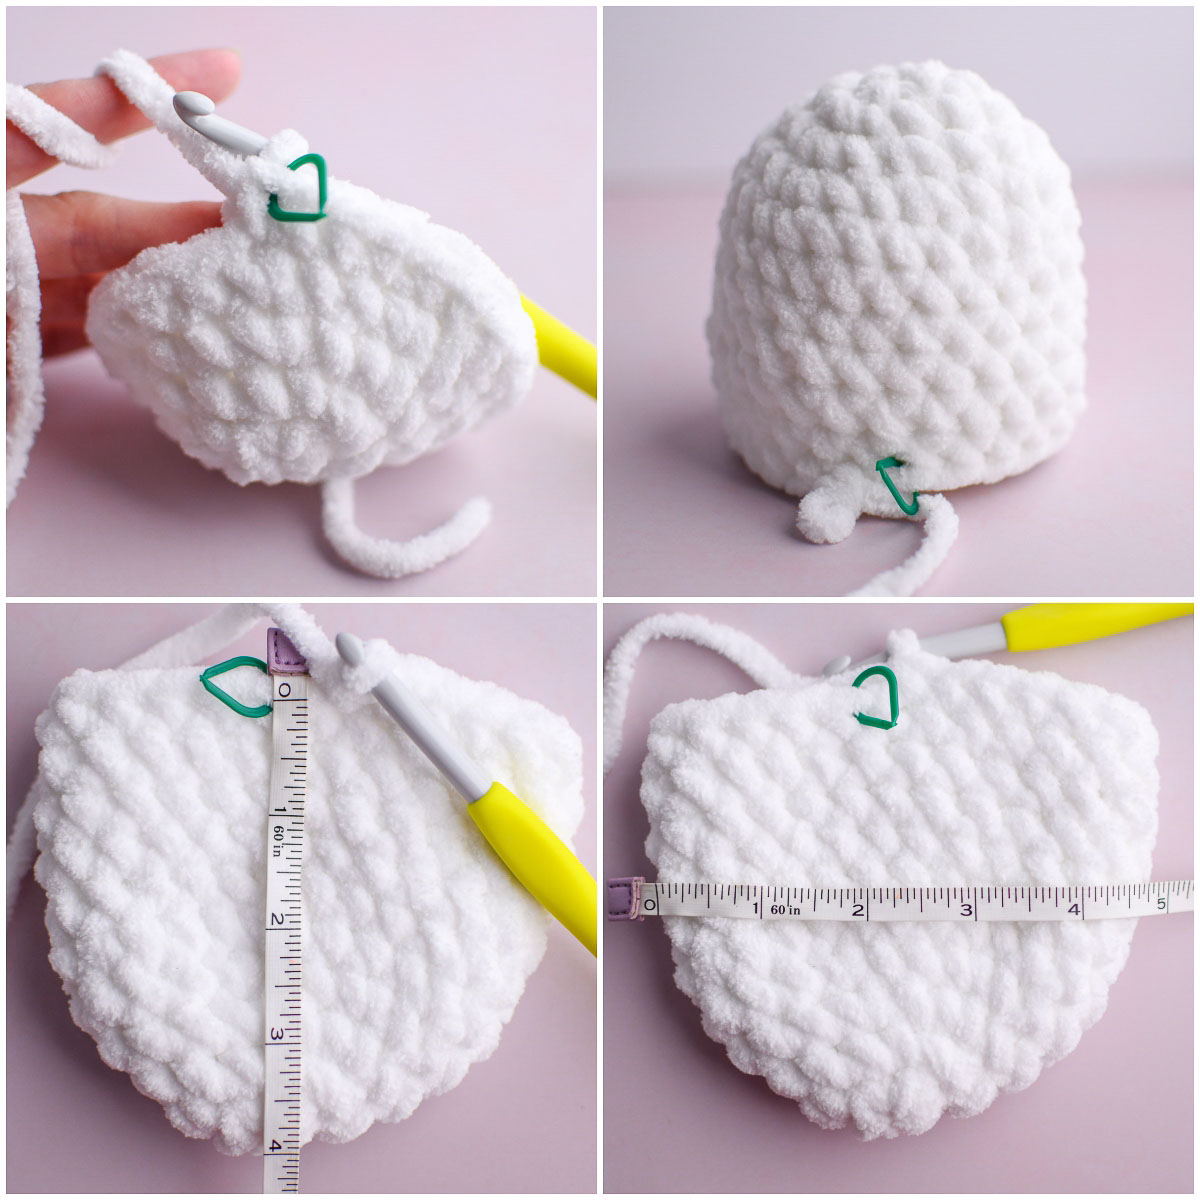
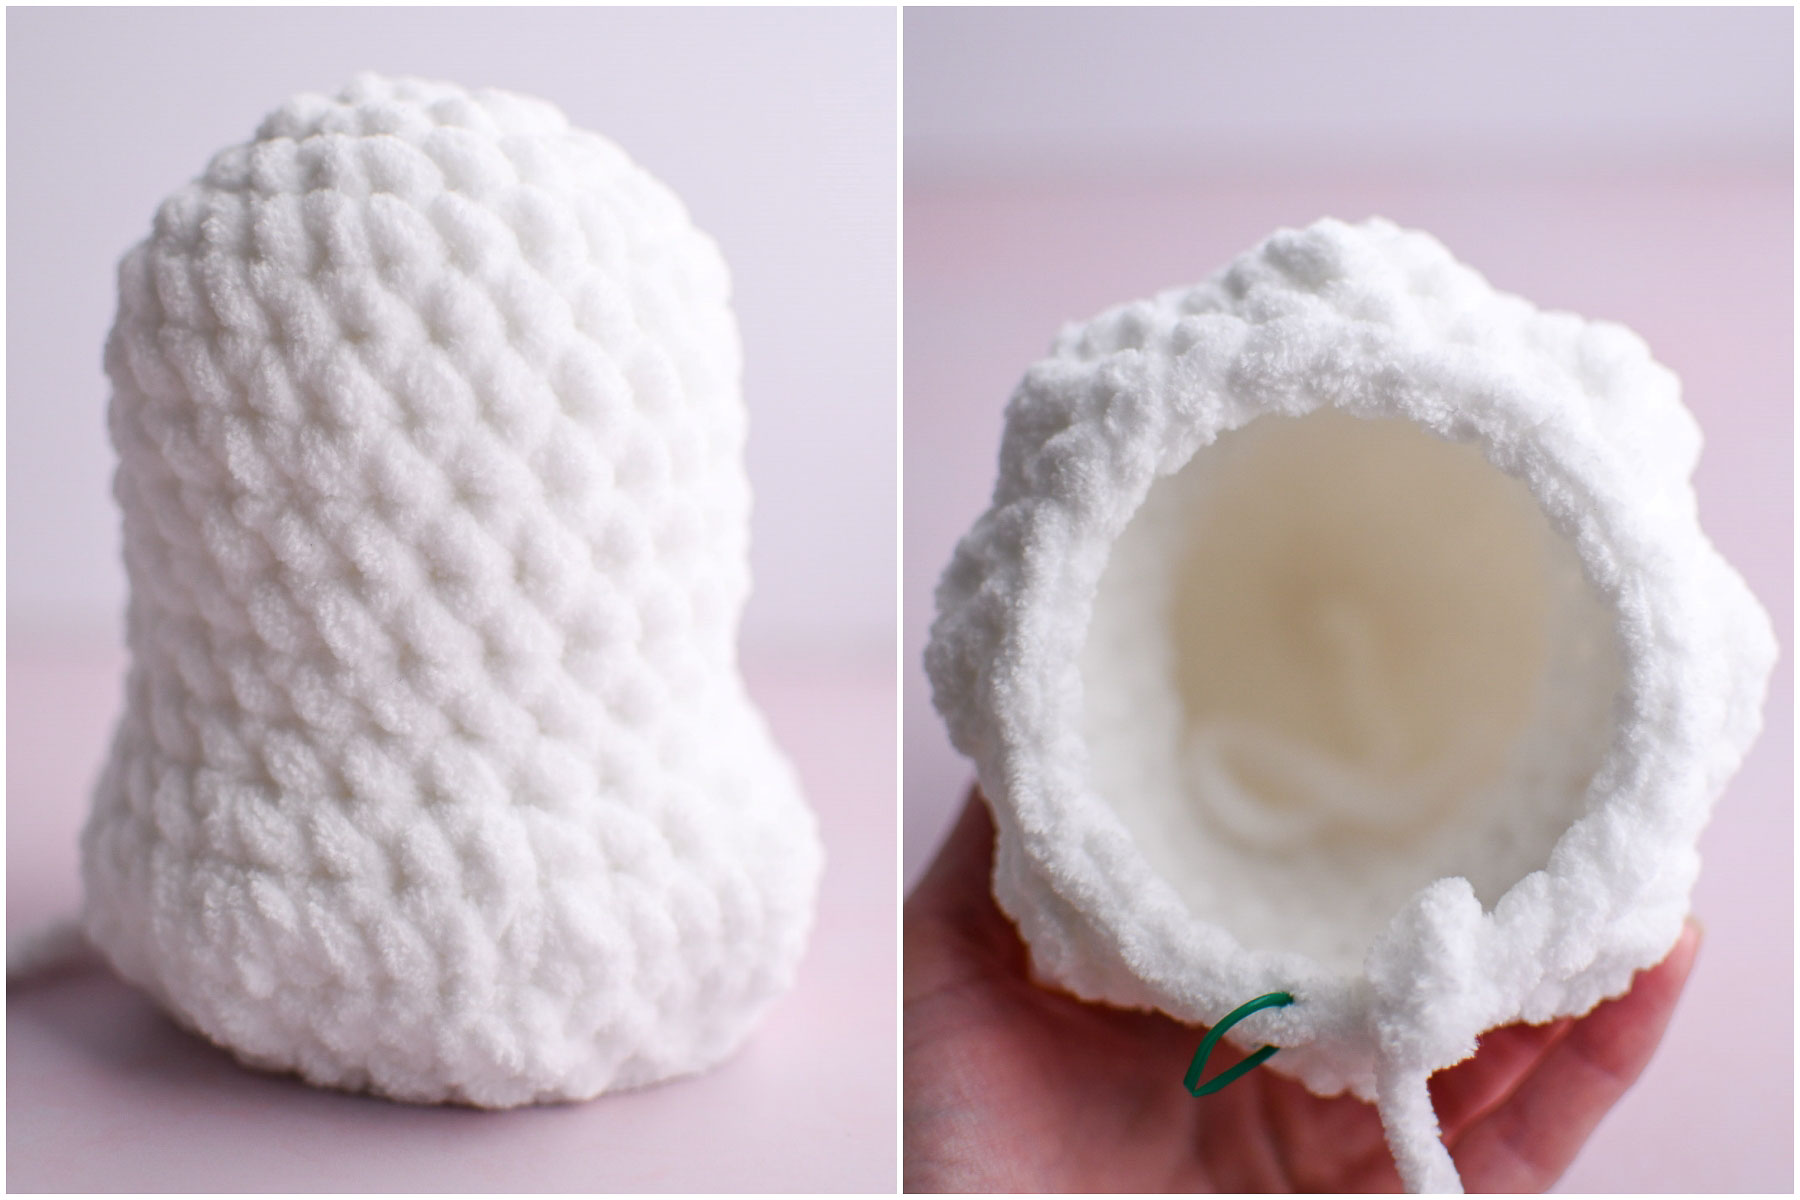
Round 5-11: SC around (24)
We have finished the beginning increases that shape our ghost and now will single crochet in every stitch for 7 rounds. Make sure to move the stitch marker at the beginning of each round. After Round 5 we have a bowl shape (top left). After Round 11 we have completed the ghost body (top right). At this point, my ghost measures 4 inches from the top to the stitch marker (I’m measuring under the loops because they’ll be hidden by the next round).
*It’s not necessary to measure unless you want to make sure your ghost is exactly the shape as this one.*
Create the Ruffles
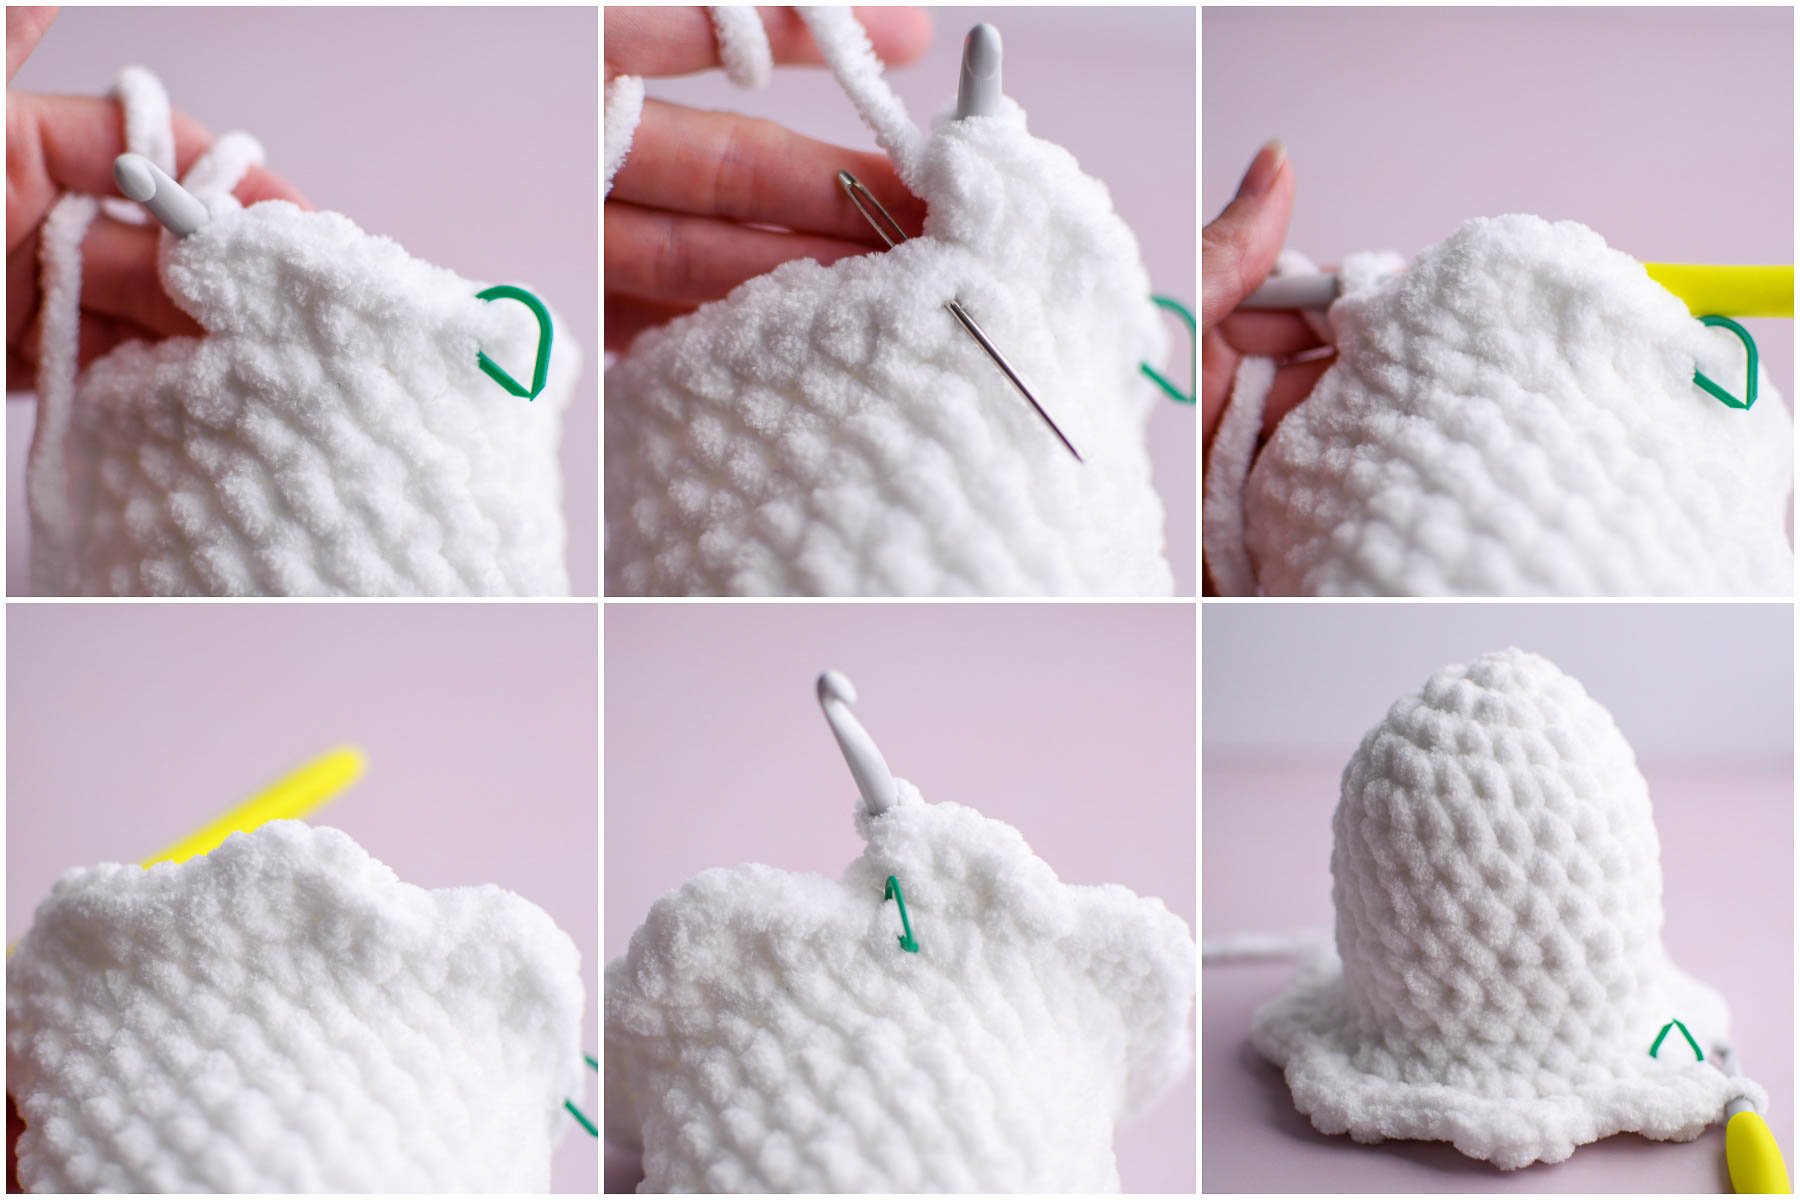
Round 12: SC 2, Inc x8 (32)
Remove the stitch marker and place 1 single crochet in the first stitch. Replace marker. In the next stitch, place 1 single crochet. In the following stitch, place 2 single crochets (left photo). Repeat this (One single crochet in the next 2 stitches, 2 single crochets in the next stitch) 8 times for a total of 32 stitches at the end.
Round 13: SC 3, 3HDC inc x8 (8 ruffles) (48 stitches)
This round begins our increase section for the “ruffles” at the bottom of the ghost.
Remove the stitch marker and place 1 single crochet in the first stitch. Replace marker. In the next 2 stitches, place 1 single crochet each. In the following stitch, place 3 half double crochets (top left). Repeat this (one single crochet in the next 3 stitches, 3 half double crochets in the next stitch) 8 times for a total of 48 stitches at the end.
Tip: Make sure after completing the 3 HDC increase that you don’t skip the next stitch. It can be hard to see because of the bulky HDC stitches. See top middle photo for placement of the first single crochet stitch following the increase. After a few repeats, you’ll start to see the ruffles form (top right and bottom left). The ghost now looks pretty silly, but trust the process!
Decrease Sections
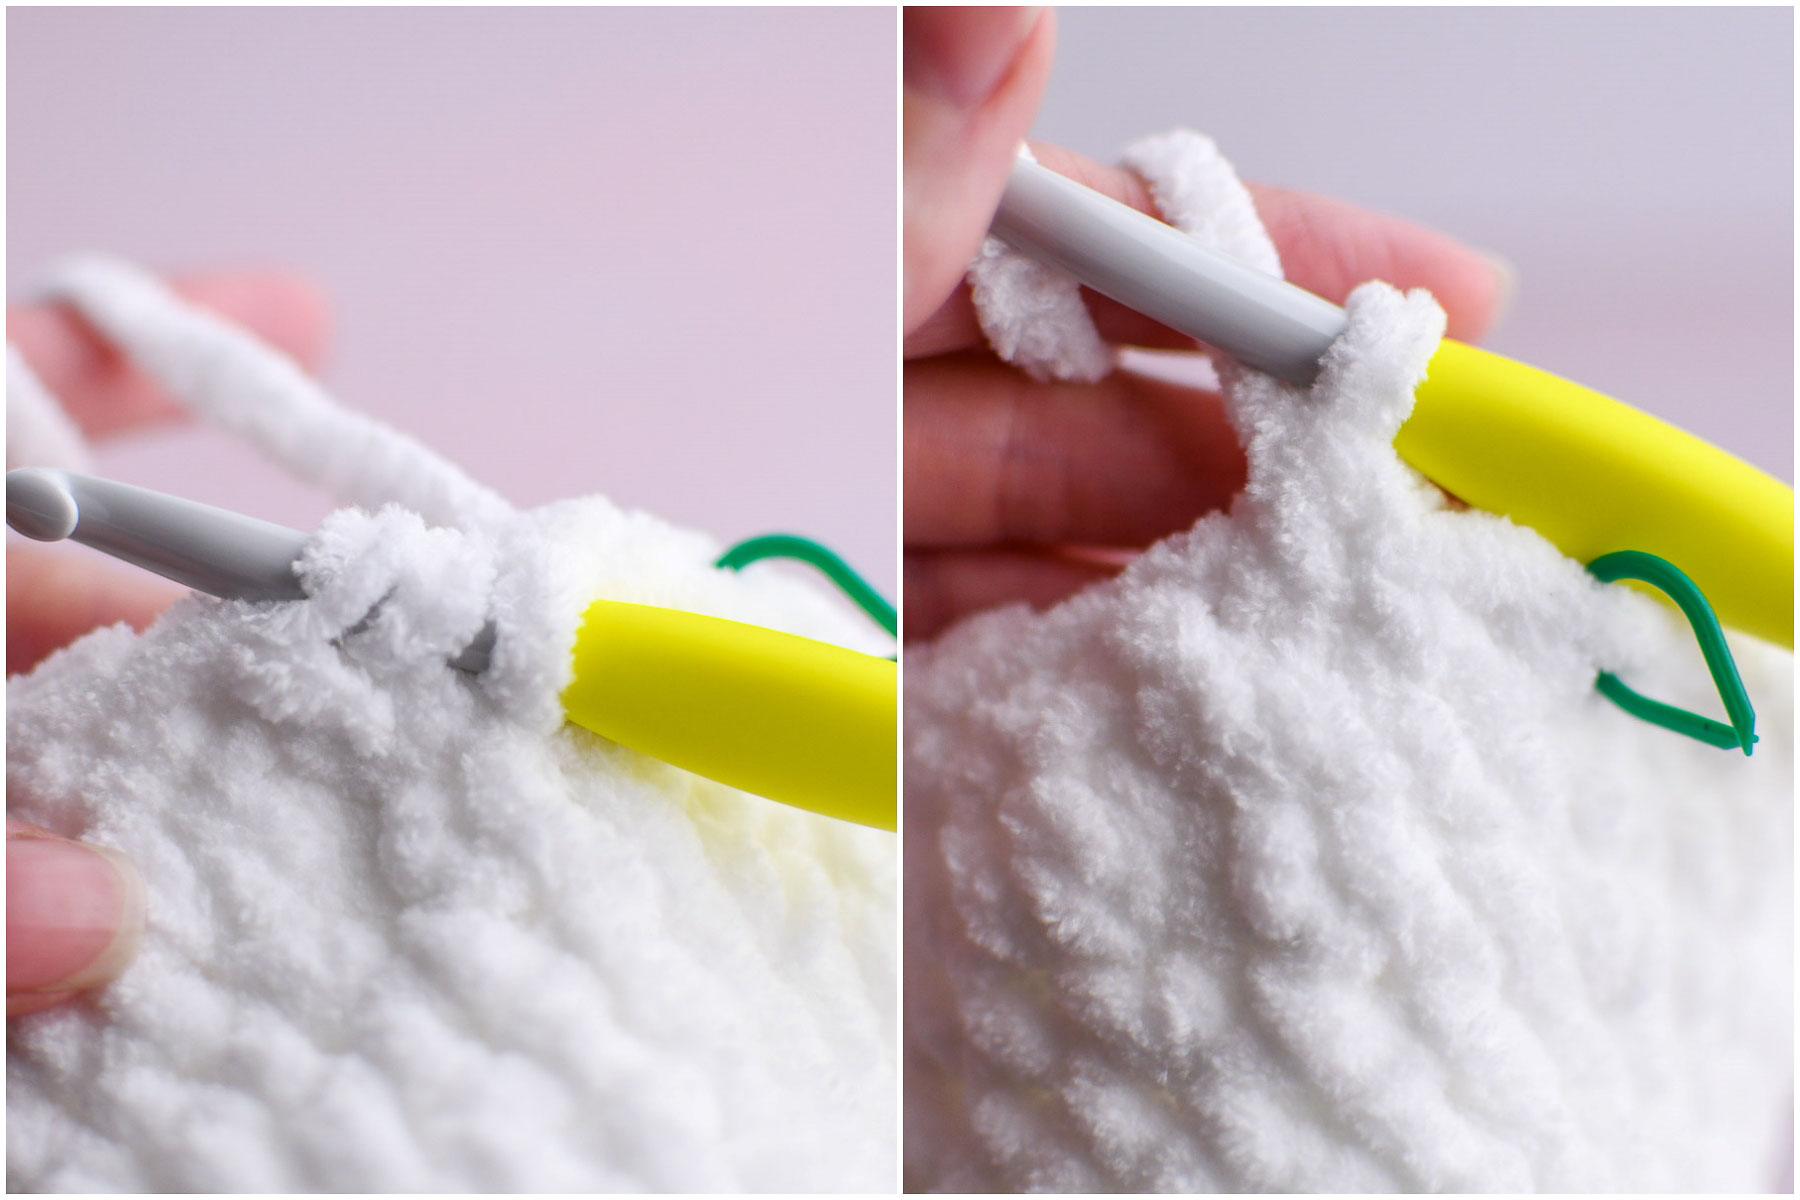
Round 14: SC 3, 3 HDC dec x8 (32)
On this round, we begin the decreases to complete the ruffles.
Remove the stitch marker and place 1 single crochet in the first stitch. Replace marker. In the next 2 stitches, place 1 single crochet each. To create the decrease, insert your hook into the front loop of the next 3 HDC stitches, yarn under and pull up a loop. Then yarn over and through both loops on hook.
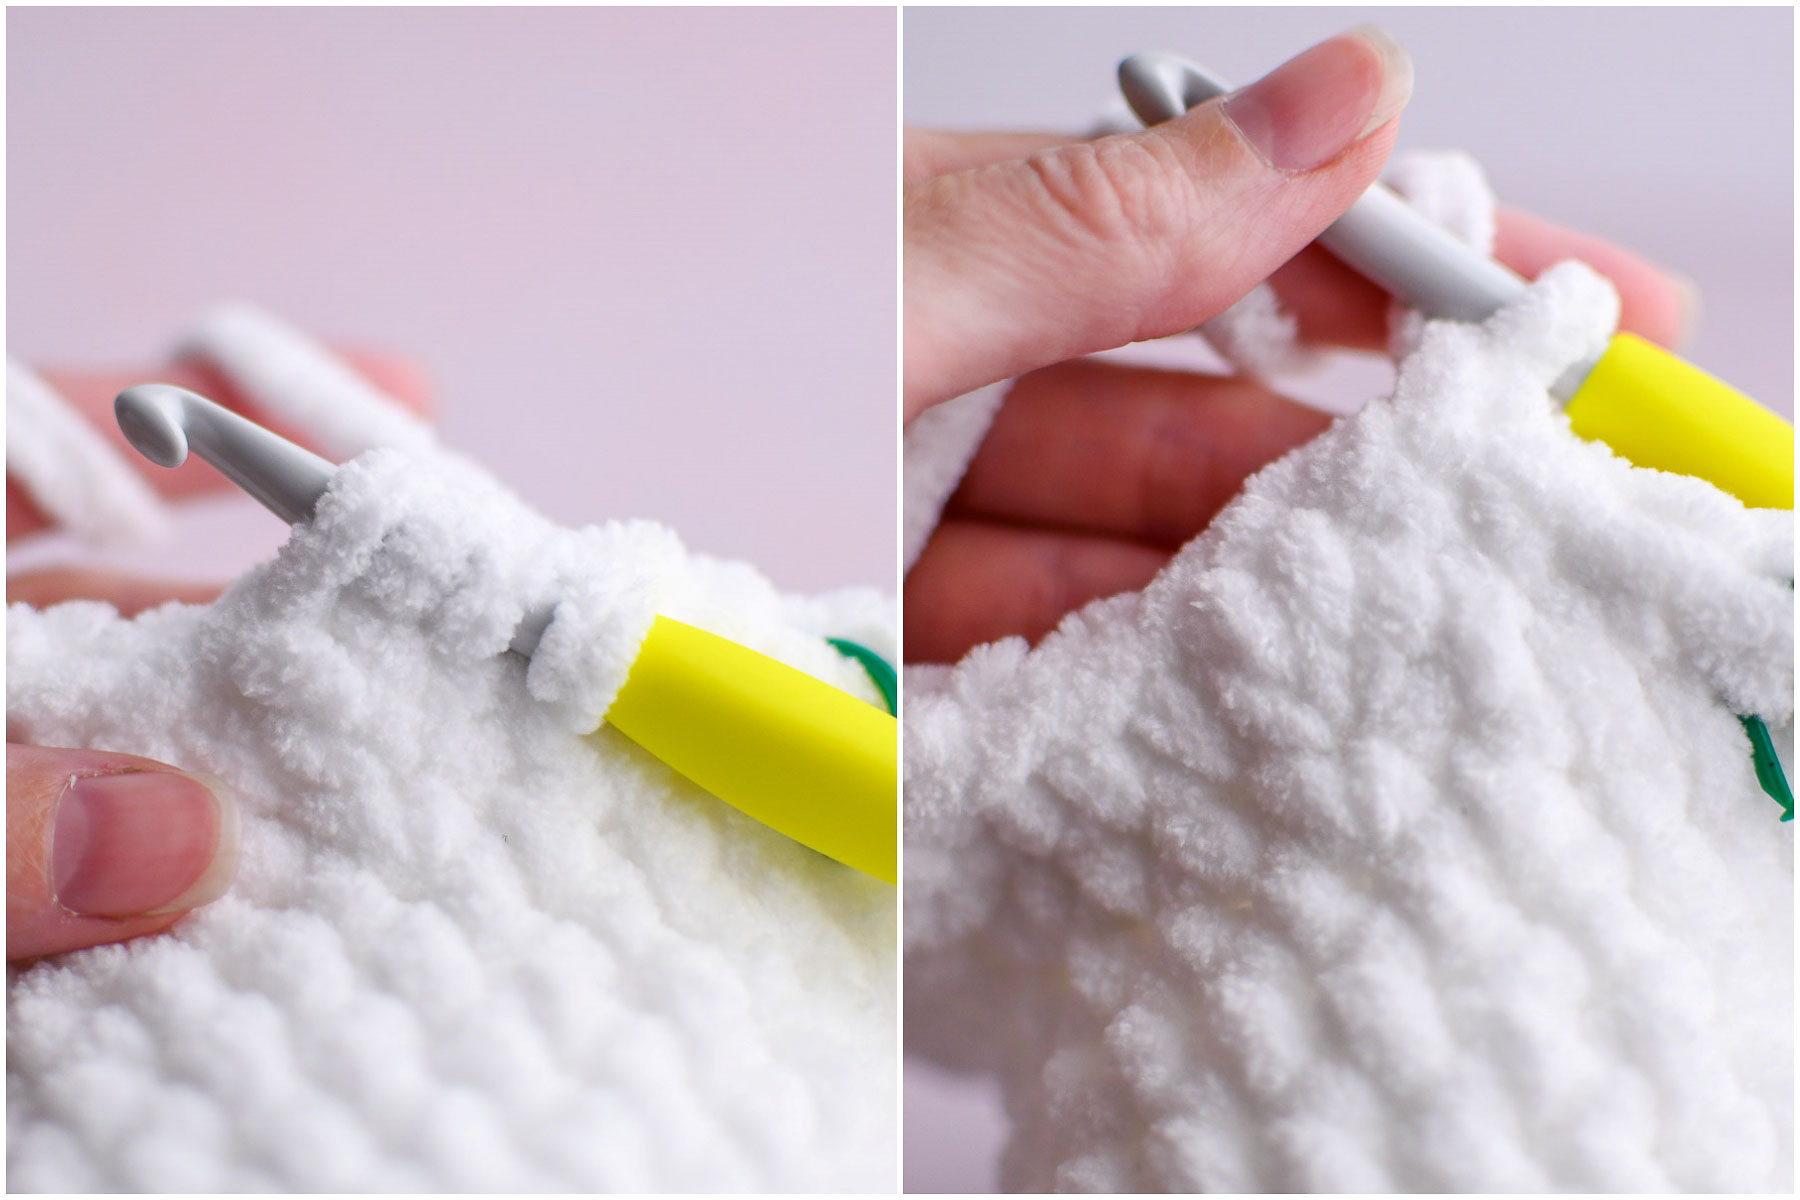
Repeat this section (one single crochet in the next 3 stitches, 3 HDC decrease over the next 3 stitches) 8 times for a total of 32 stitches at the end.
Tip: Check closely to make sure you don’t miss where to place the next single crochet after the decrease (top left photo). Look for the 3 HDC stitches and the stitch immediately to the left of them. Insert your hook where the needle is placed. You may have to push the HDC ruffle to the back of the work to get to the stitch easily.
Crochet the bottom of the Ghost
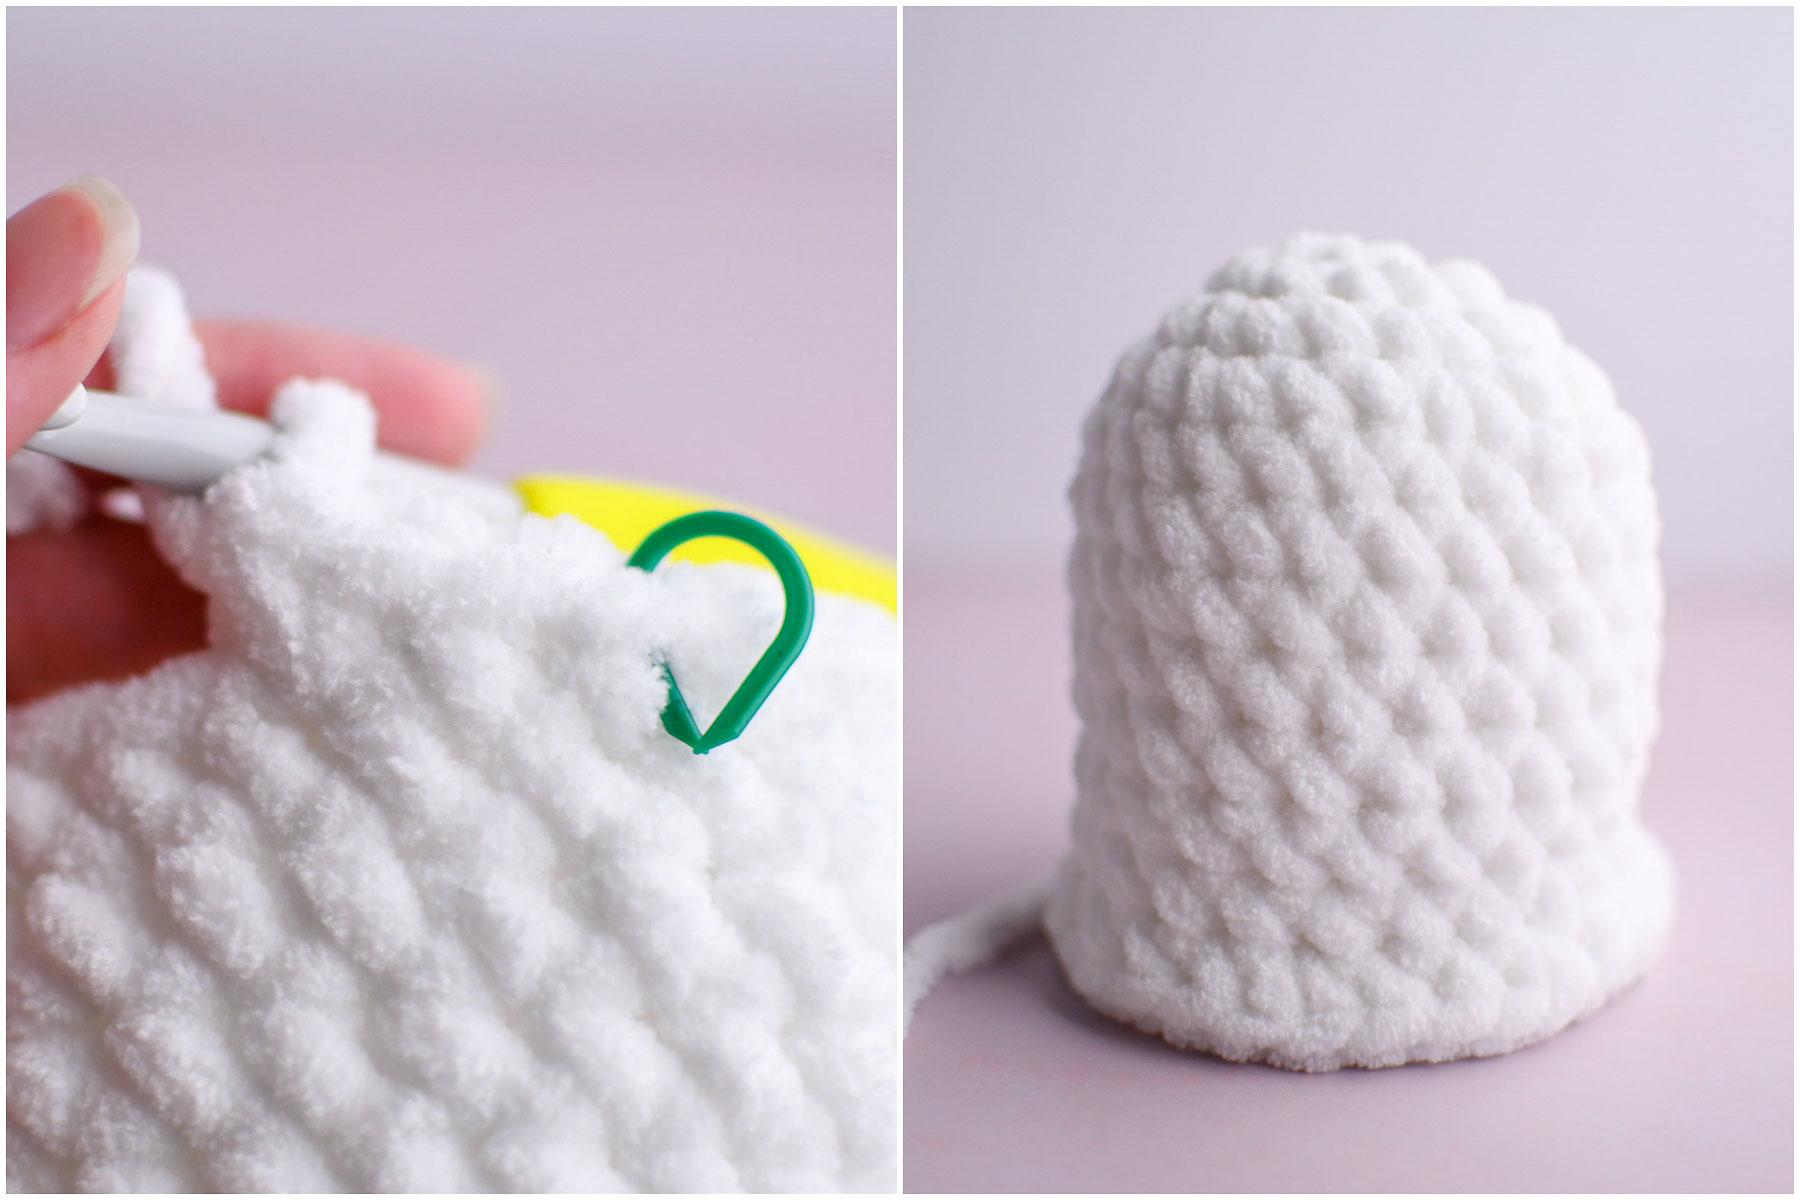
Round 15: SC 2, dec x8 (24)
Remove the stitch marker and place 1 single crochet in the first stitch. Replace marker. In the next stitch, place 1 single crochet. To create the decrease, insert your hook into the front loop of the next 2 stitches stitches, yarn under and pull up a loop. Then yarn over and through both loops on hook.
Repeat this section (one single crochet in the next 2 stitches, decrease over the next 2 stitches) 8 times for a total of 24 stitches at the end.
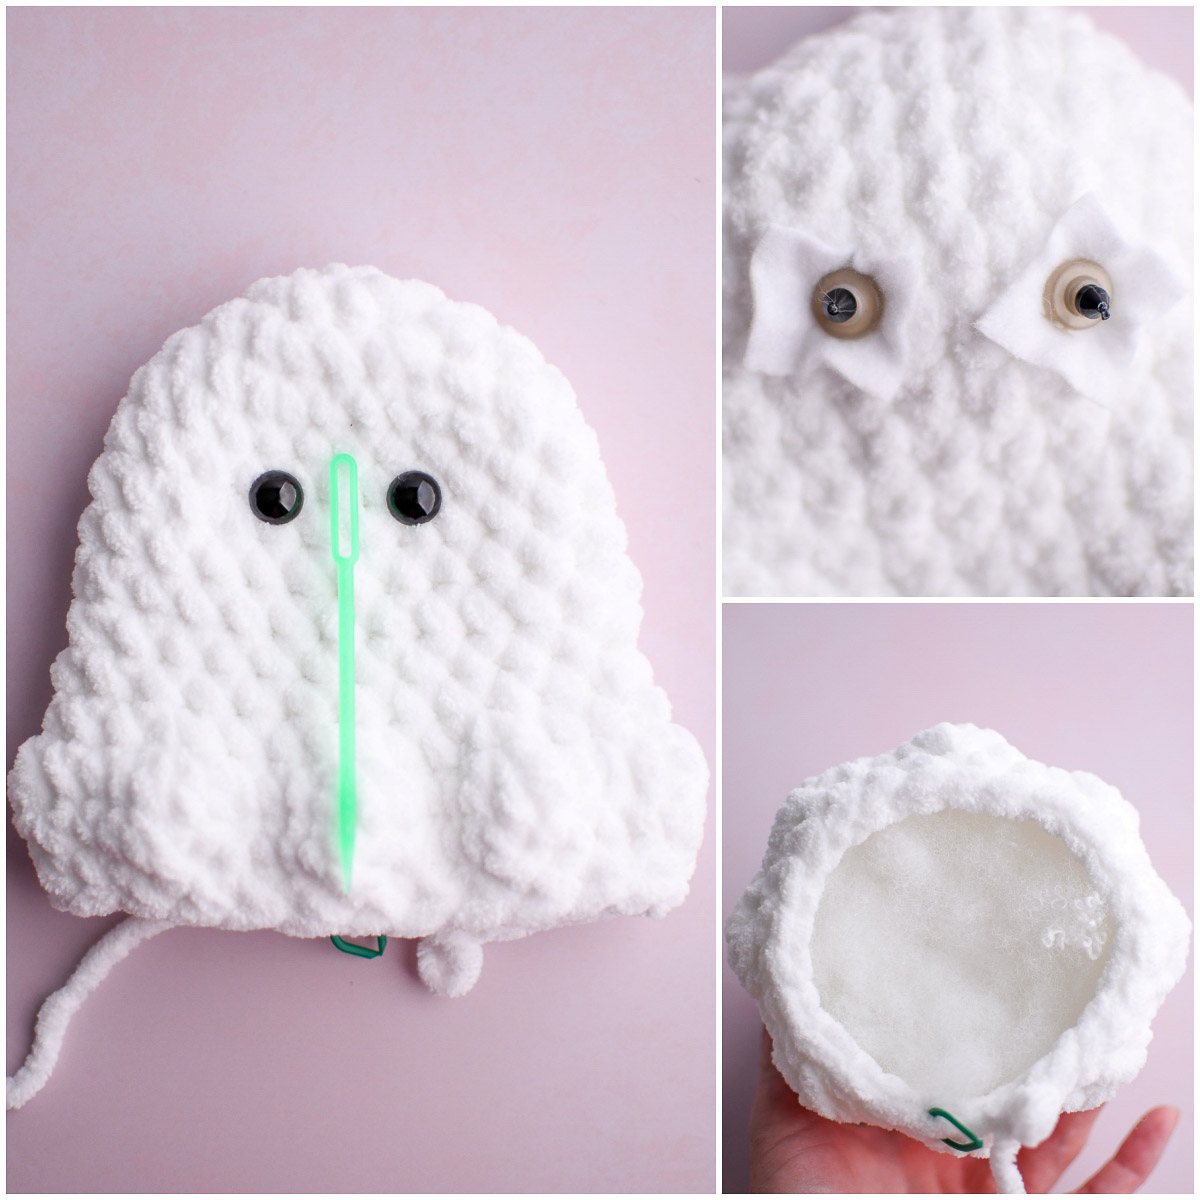
The beginning of the round will be the back of the ghost and the opposite side will be the front. Push all the ruffles to the front of the work. If you look at the bottom of the ghost, you should see 8 bubble shapes.
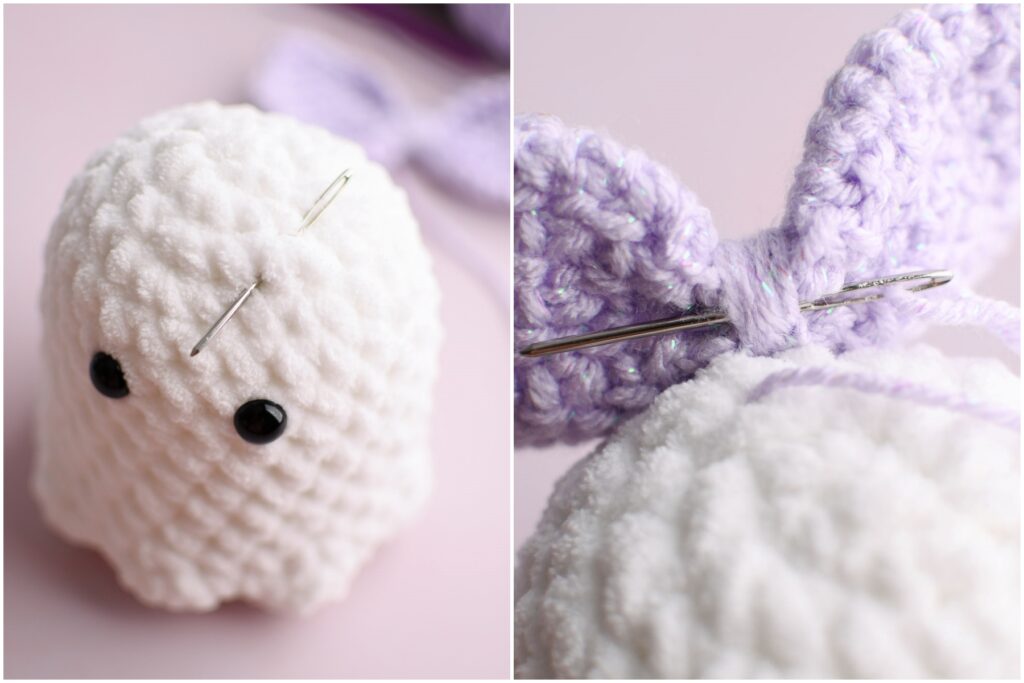
Turn the ghost so that the stitch marker is at the back center, then lay it down and flatten it slightly so we can mark the space for the eyes.
Lay a tapestry needle from the center of the front ruffle (and stitch marker in the back). In between Rows 6 and 7, place the eyes 3 stitches apart. Since these stitches are so large, you may want to attach the eyes through a piece of felt before attaching the safety backs so that they can’t be pulled out easily.
Begin to stuff lightly.
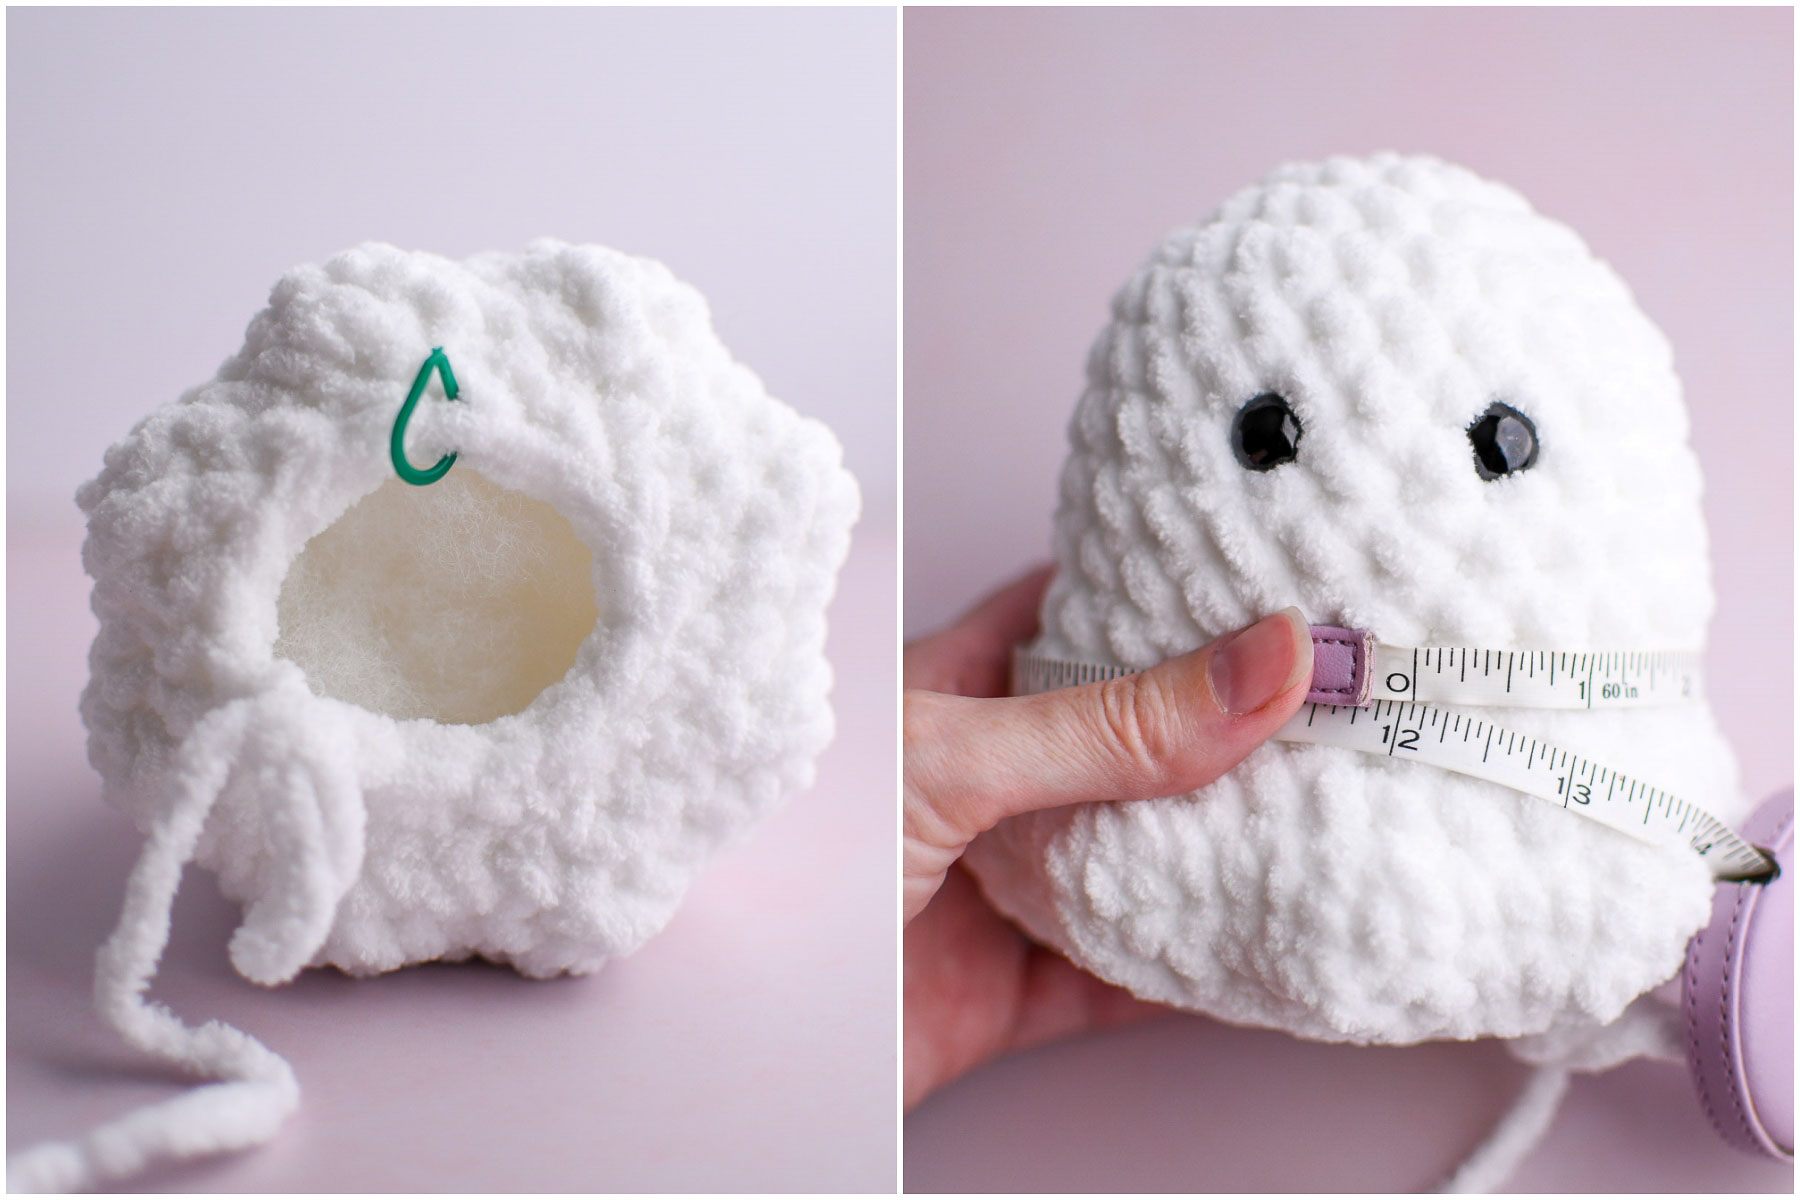
Round 16: Dec around x12 (12)
This is our final decrease round. Remove the stitch marker and insert your hook into the front loop of the next 2 stitches, yarn under and pull up a loop. Yarn over and pull through both loops. Replace the stitch marker. Continue decreasing until you reach about half way. Stop here, and add more stuffing, then finish the decreases.
We don’t want to firmly stuff the ghost, we’re going for light and squishy. If you add too much stuffing at the bottom, the ghost won’t sit flat. Push stuffing into each of the ruffles. I measure around the middle section of my ghost, it’s around 12 inches. This is just enough that the ghost stays soft and squishy but still holds the right shape.
Finishing and weaving ends
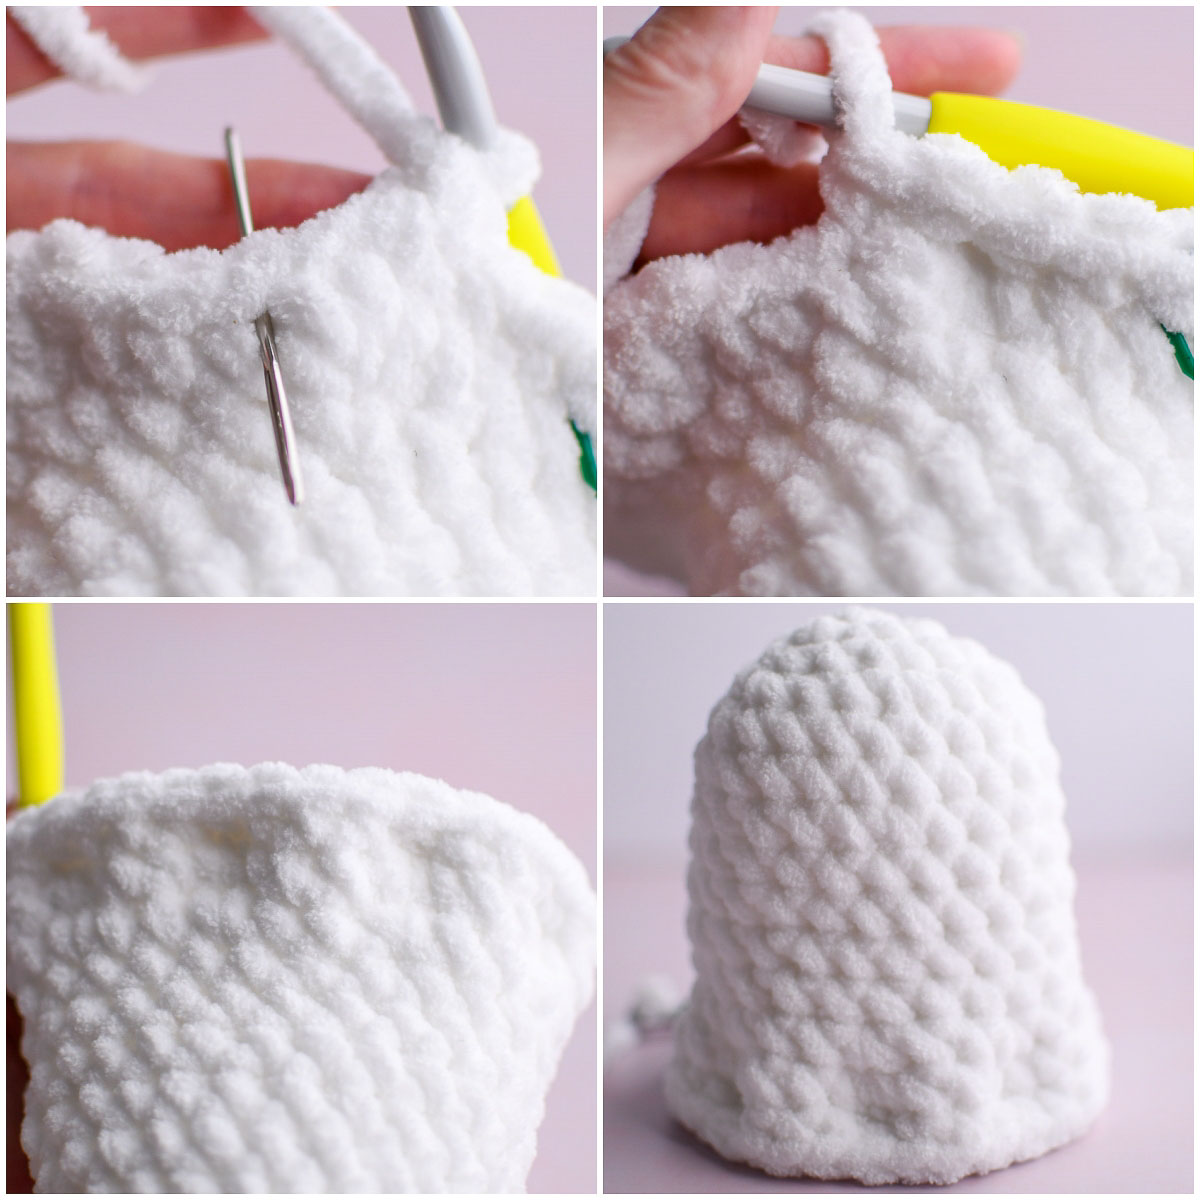
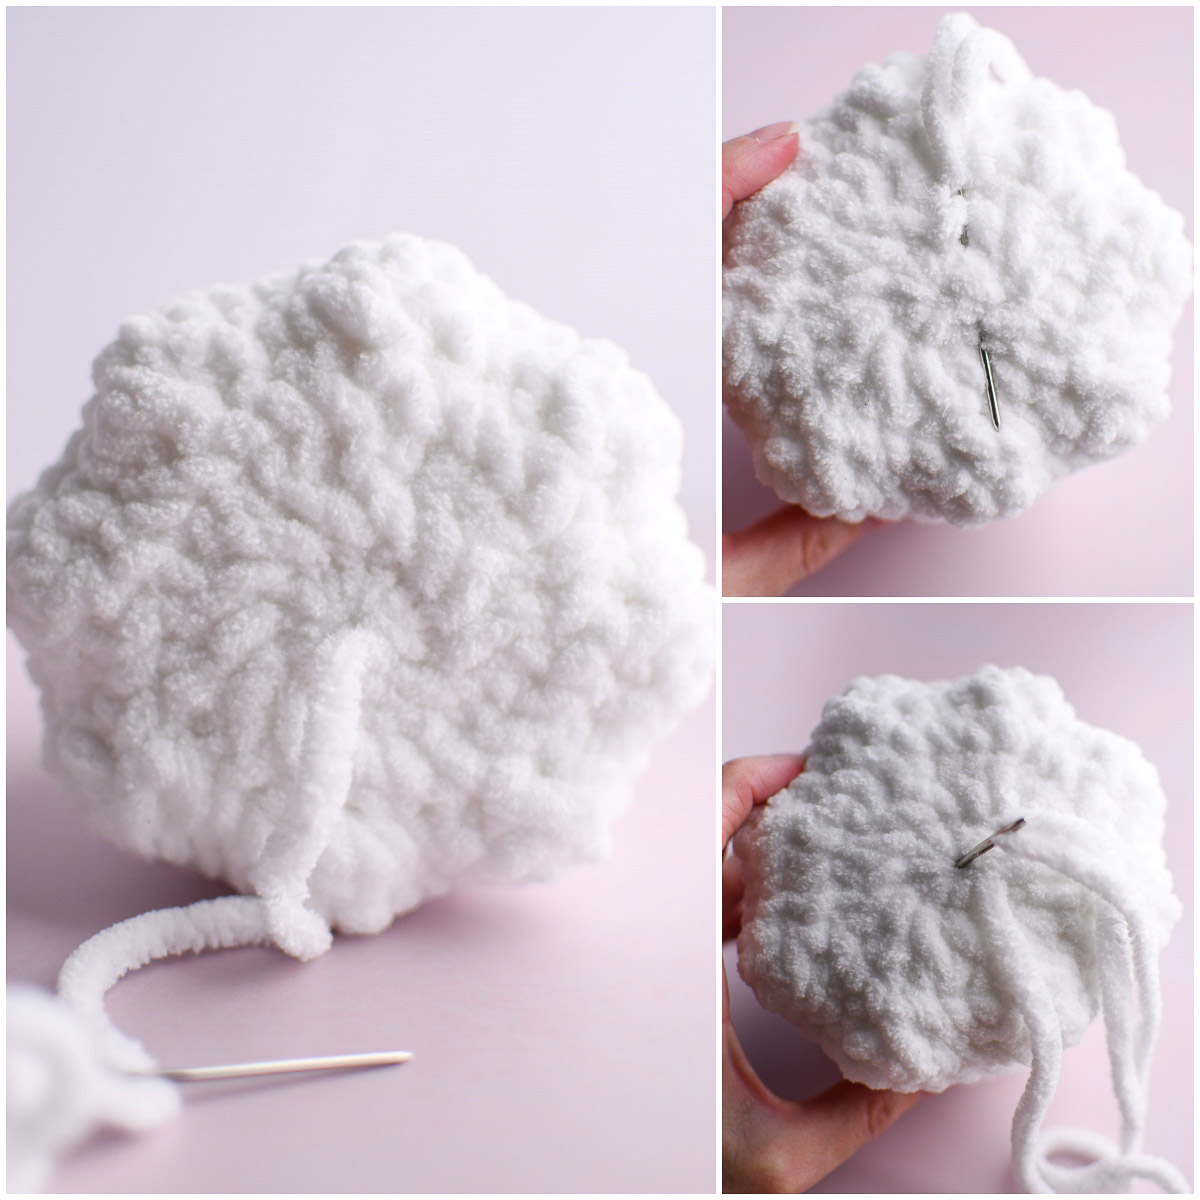
Round 17: Fasten off leaving a long tail for weaving in. Thread a tapestry needle. Go under the front loops of all the stitches all the way around. Start to pull to tighten. Add any last stuffing if needed.

Then pull tight to close. Tie a knot around one of the bottom stitches, then weave the yarn around to secure. Push the needle through the center and out the back of the ghost, then clip the yarn tail and push in any remaining tail to the inside of the ghost.
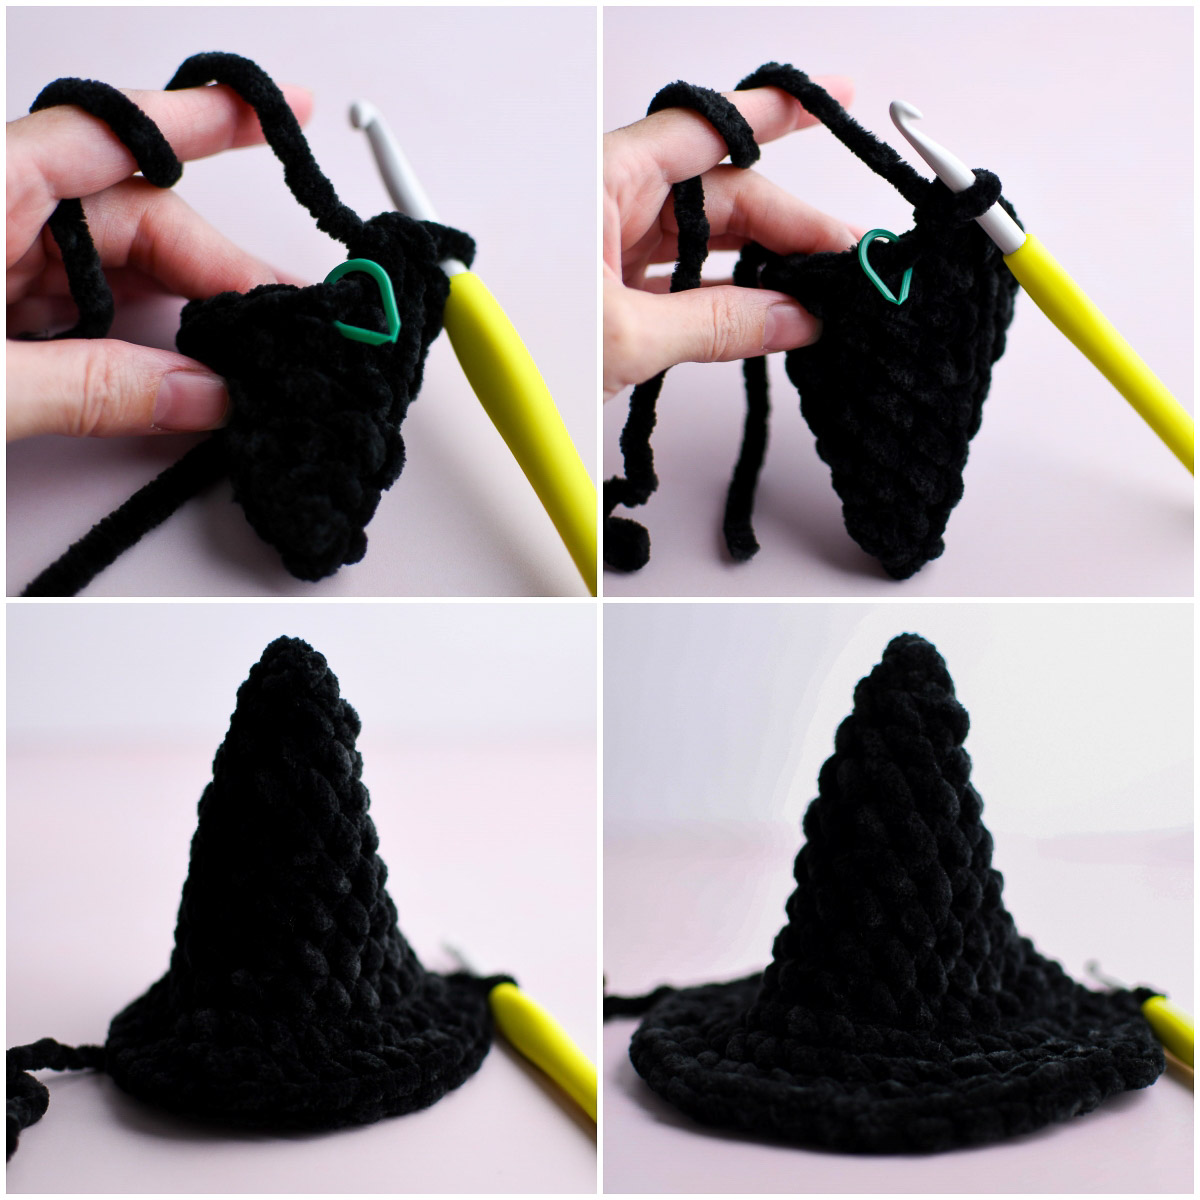
Plushie Witch Hat Pattern
With a 7.0mm hook and black chenille yarn
Round 1: In a Magic Ring, SC 4
Round 2: SC 1, Inc x2 (6 stitches)
Round 3: SC 2, Inc x2,(8)
Round 4: SC 3, Inc x2, (10)
Round 5: SC 4, Inc x2, (12)
Round 6: SC 5, Inc x2, (14)
Round 7: SC 6, Inc x2 (16)
Round 8: SC 7, Inc x2 (18)
Round 9: SC 8, Inc x2 (20)
Round 10: In BLO: SC 1, Inc x10, (30)
Round 11: SC around (30)
Round 12: Inc, SC 2 x 10, 40 stitches
Round 13: Sl-st in next 2 stitches, invisible fasten off, weave in ends
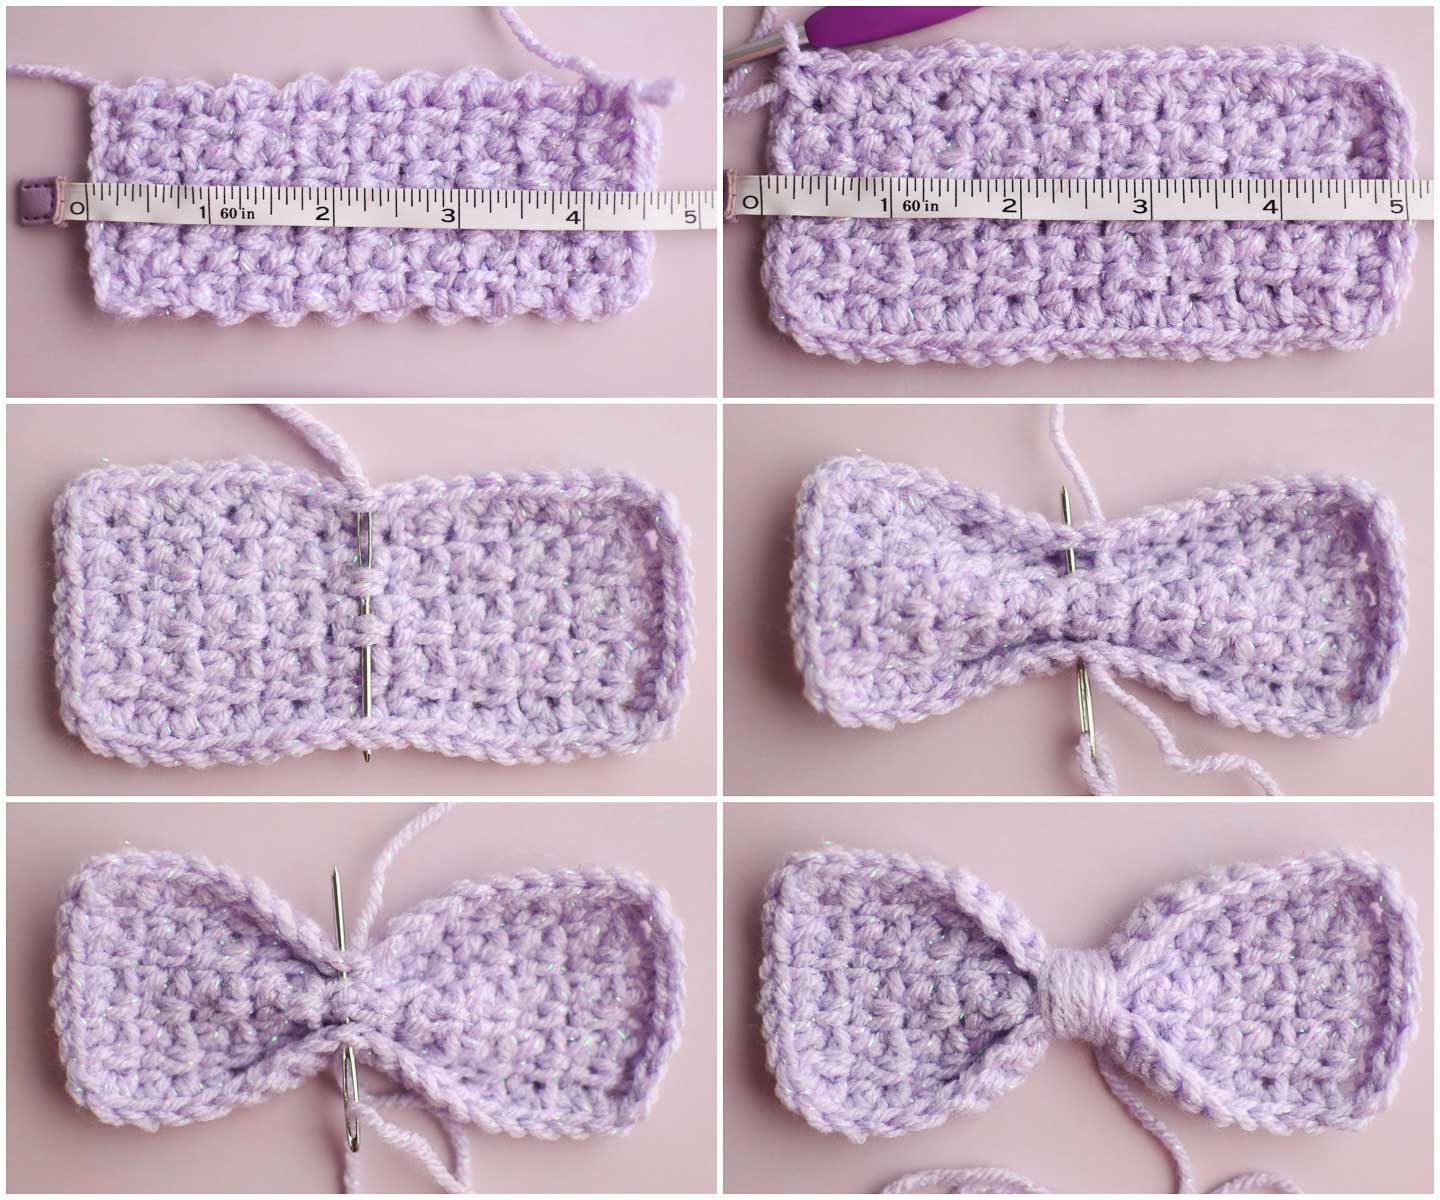
Moss Stitch Bow Pattern
With a 4mm hook and worsted yarn, Chain 10
Row 1: SC in 4th Ch from hook. *Ch 1, skip 1 Ch, SC in next* repeat to end. Ch 2, turn.
Row 2: SC in first Ch-sp. *Ch 1, SC in next Ch-sp* repeat to end, ending with a SC in the Ch-sp from the previous row.
- Continue until you have completed 18 rows and the piece measures about 4.5 inches.
- Single crochet evenly around the piece to create a border. Invisible fasten off at the end and weave in tails.
- Cut a long piece of yarn and thread on a tapestry needle. Find the center of the rectangle and sew back and forth the cinch the middle of the bow. Tie a knot to secure.
- Use the long tail to wrap around the middle, then knot it and weave back and forth under the wrap a few times. Sew the bow to the ghost using the tapestry marker as a guide for placement.
I’d love to hear from you!
If you try this pattern and love it, please leave a comment and let me know how it went. Happy Crocheting!


I decided to give this ghost a try and I love how it turned out! My daughter is going to love her new little ghost friend. Thank you for sharing this pattern! 🙂
So happy to hear that Stephanie! Hope she loves it!
Hi Katie,
I promised to send you a picture of what my students created, but I can’t seem to get them copied here.
Hi Carol, you can send them to my email! I can’t wait to see them!