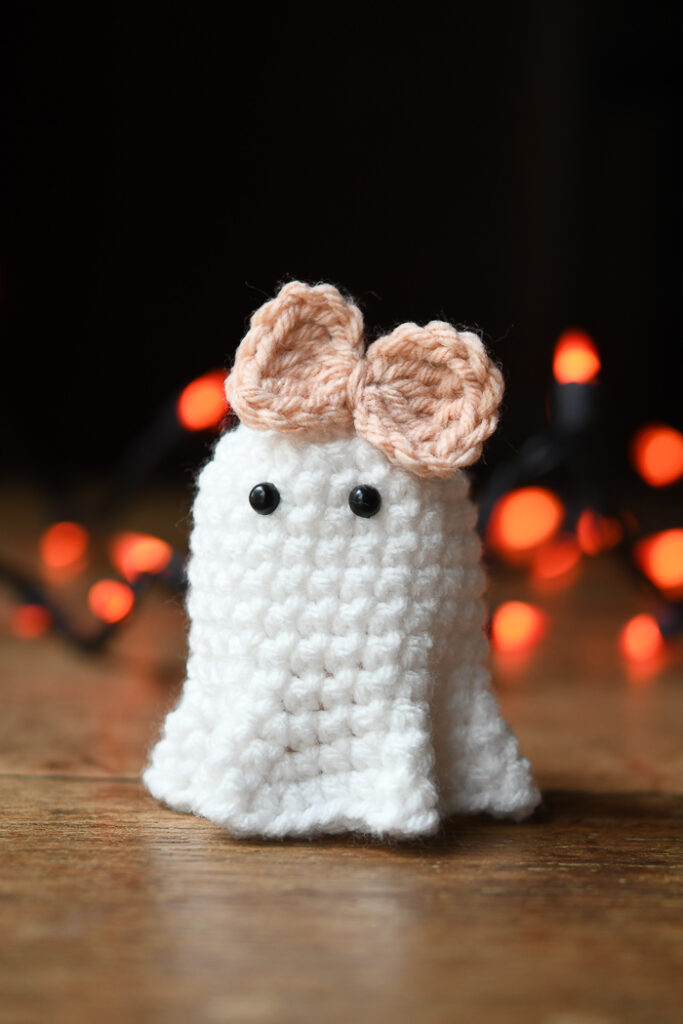
Cute Crochet Bunny Pattern
Spring is here I’ve got the cutest Crochet Bunny pattern for you! I’ve nicknamed these Squish Bunnies because you can’t help but squish and squeeze them. They’re egg shaped, fluffy, and adorable! These are perfect for spring markets and Easter basket fillers. And if you’re new to amigurumi, I’ve got you covered. This pattern is very beginner friendly, with lots of step-by-step photos included.
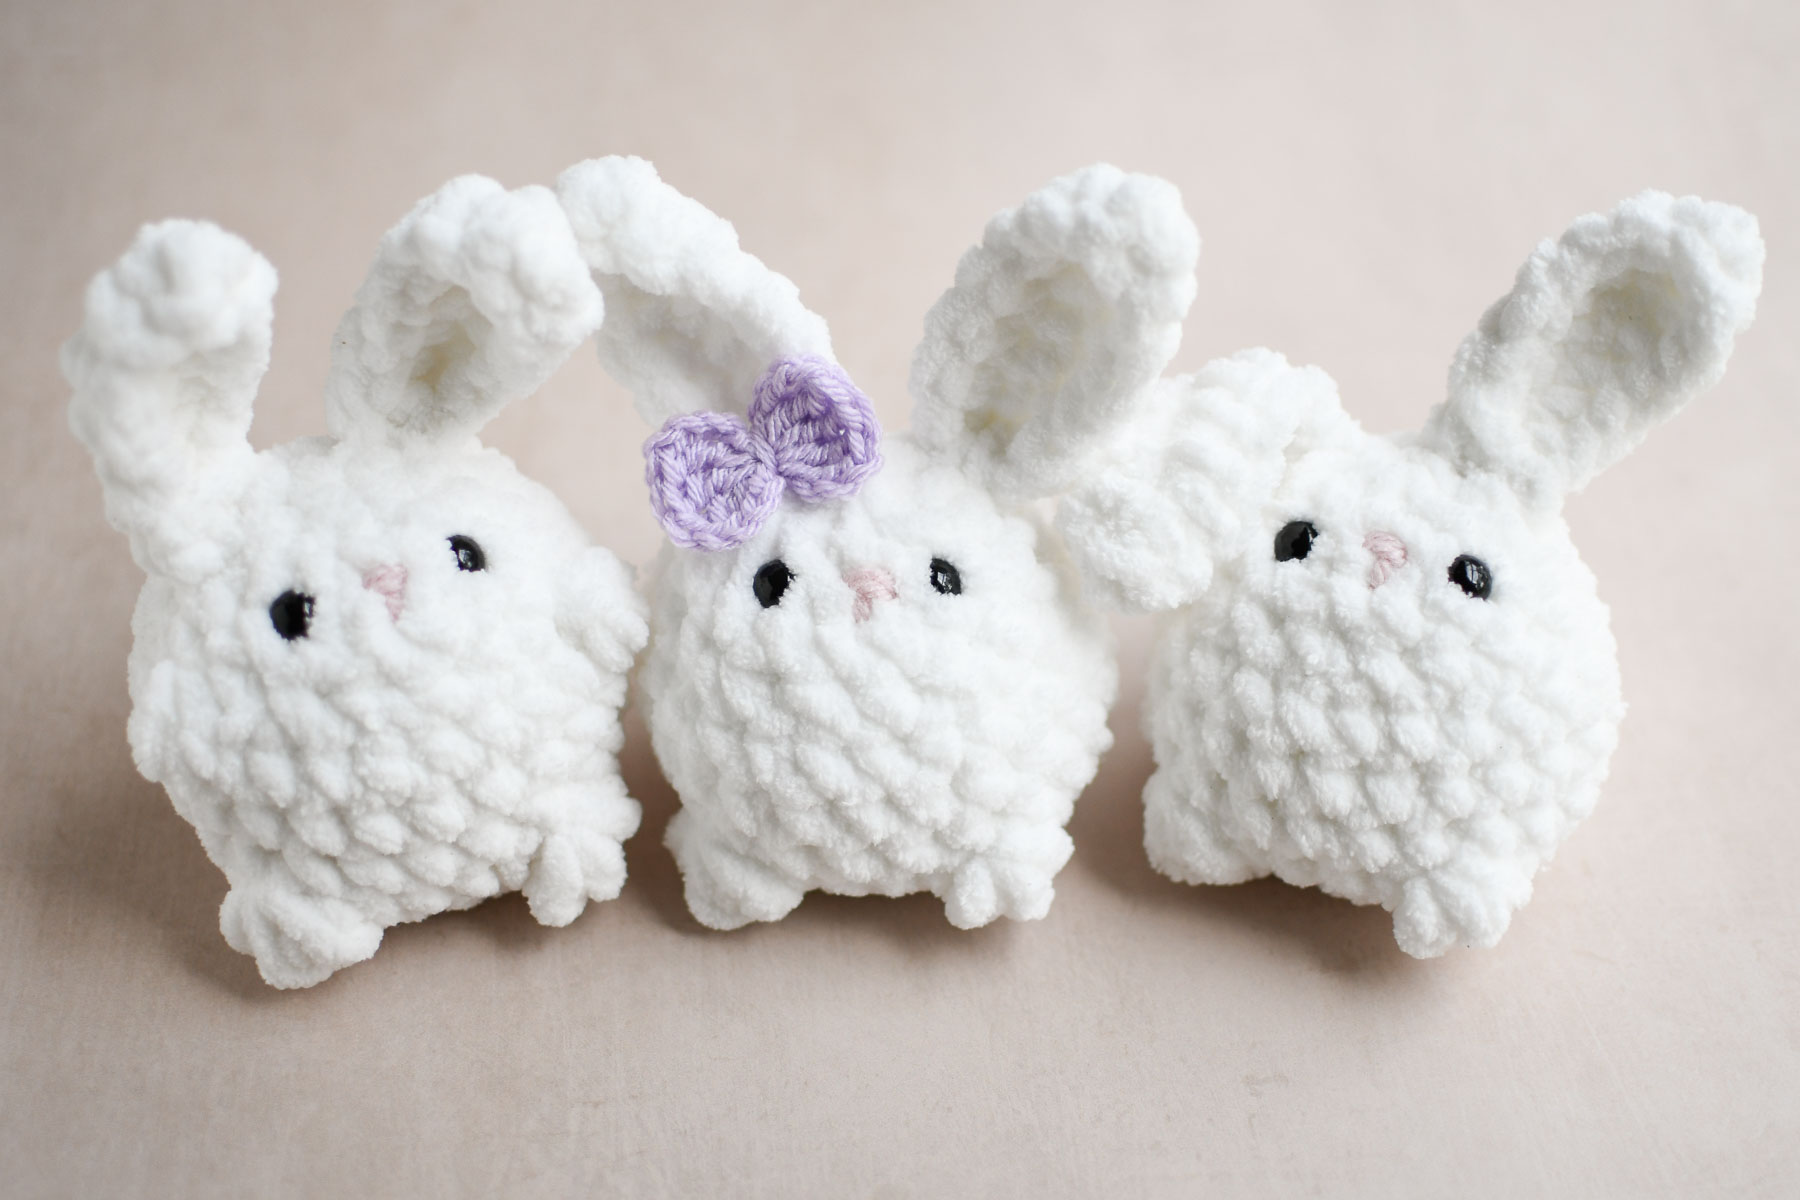
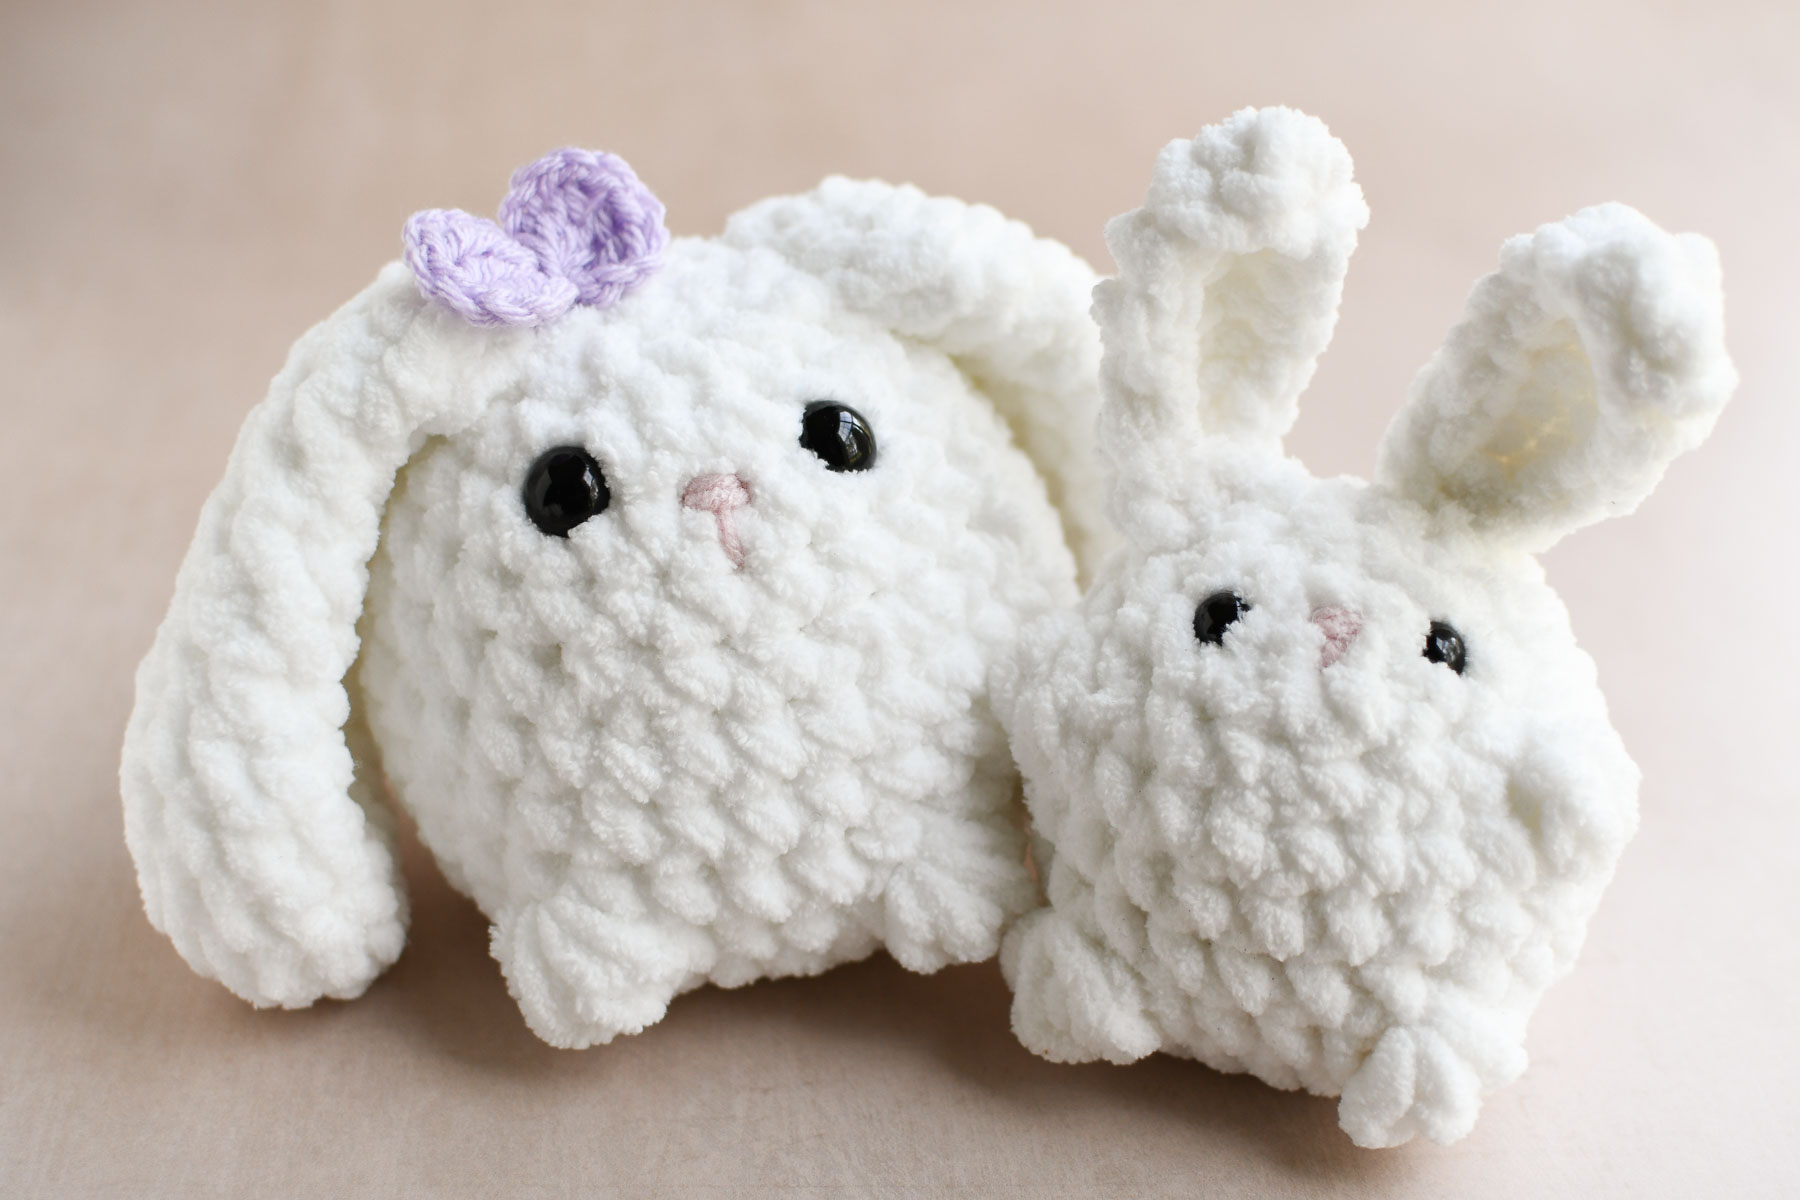
I love to give customization options with everything I make, so these crochet bunnies come in 2 sizes (regular or mini), with 2 ear options (upright or floppy), and with the options to include the arms and tail.
Choose which size and ear style, and whether or not you want arms on the bunny, and decide if you want to make a pompom tail or use the included large bobble tail and gather your supplies! Let’s make some Bunnies!
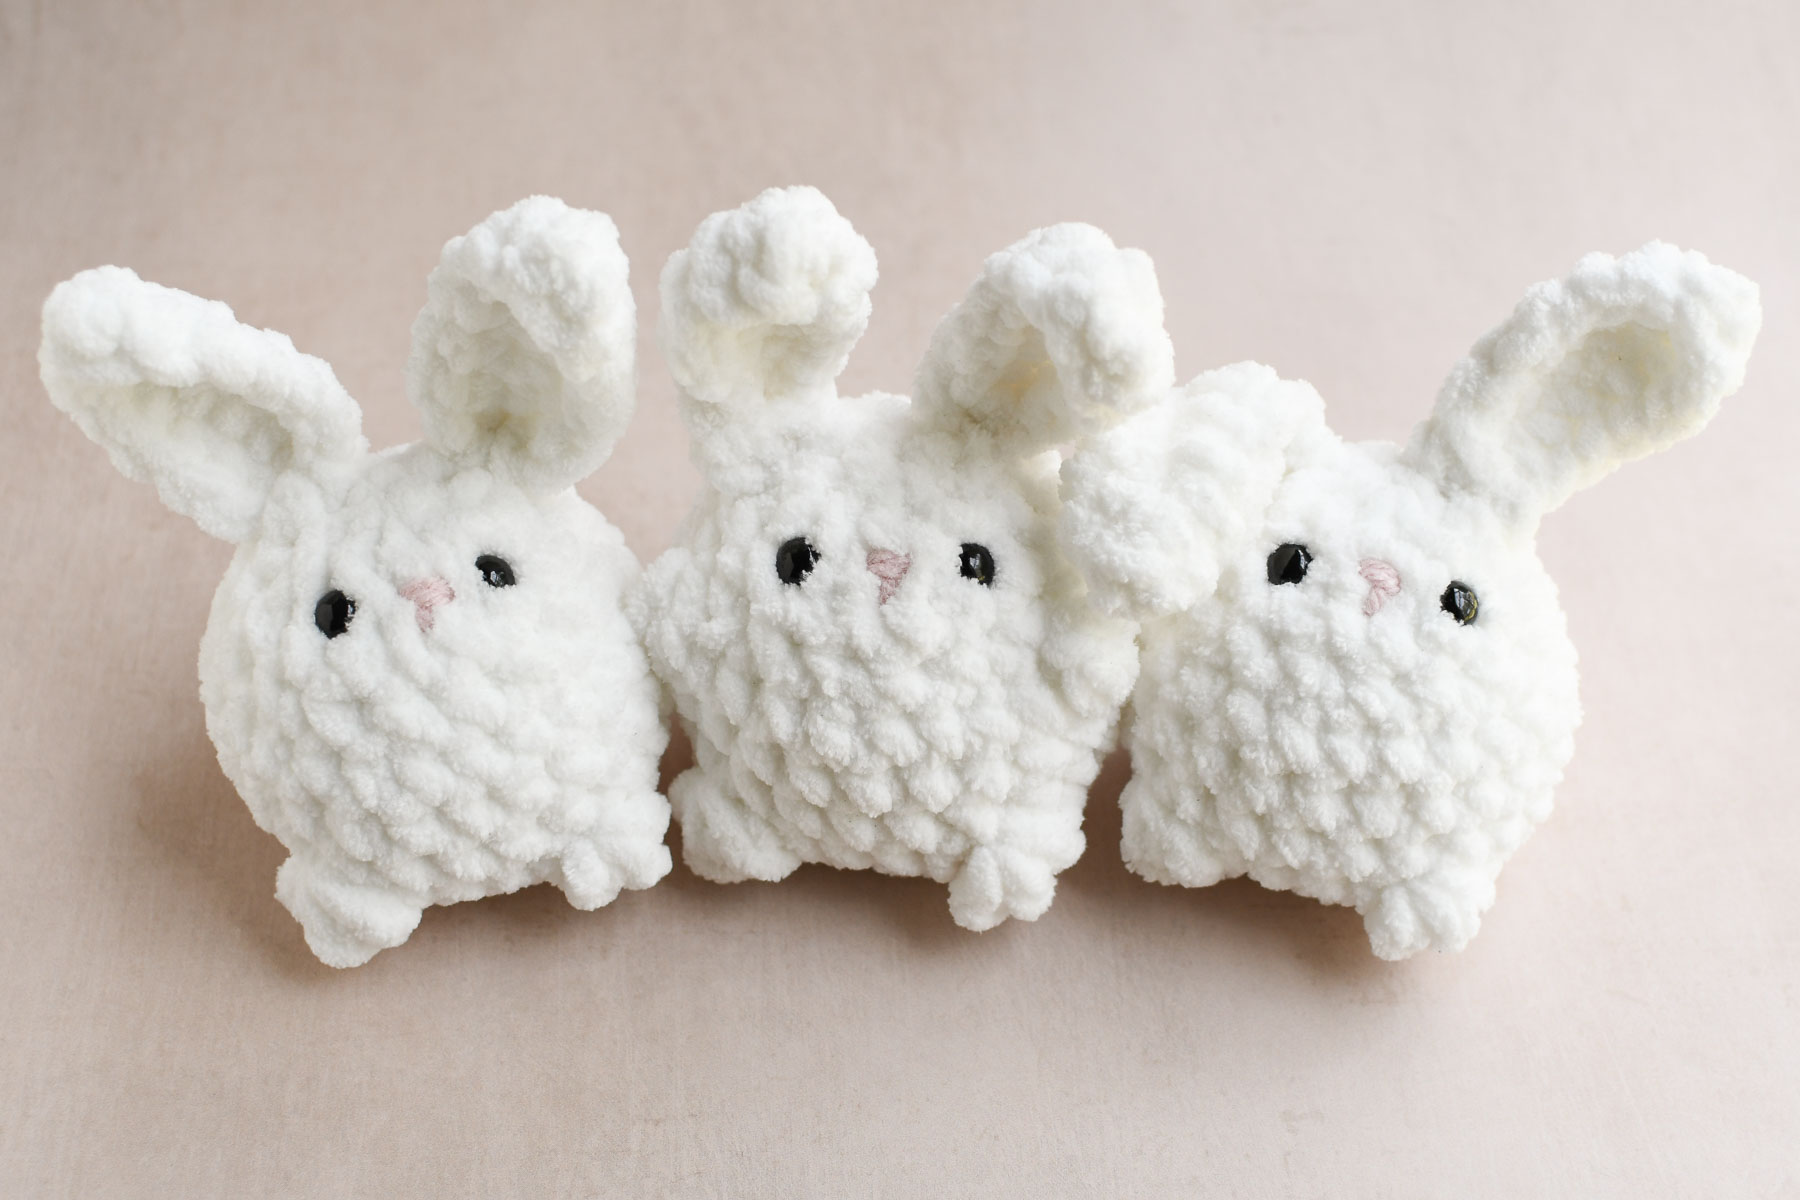
The mini bunnies can be whipped up in no time! I’ve timed myself and I can make one from start to finish in under 30 minutes. These are low sew, the only part that has to be sewn on are the ears and embroidering the nose.
Crochet Bunny Details:
As most amigurumi, these are worked in a continuous spiral. These bunny body is all one piece with the arms, legs, and tail crocheted as we go. The ears are made separately and sewn on at the end.
Getting Started
Supplies
- Hook: 7.0 mm and 4.5 mm
- Eyes: 10, 12, 14, or 16 mm safety eyes
- Yarns: #6 Bulky blanket yarn and a small amount of #4 worsted weight
- Bunny: Bernat Blanket in White
- Bow: Worsted weight in any color
- Nose: Pink worsted weight
- Tools: Scissors & Tapestry needle
- Polyfil stuffing
Gauge: Not important for this project
Finished size: Regular bunny: 5 inches tall (not including ears), Mini bunny: approx. 3 inches (not including ears)
Stitches & Abbreviations
SC-single crochet
Ch-chain
Inc-increase (make 2 single crochets in one stitch)
DC-double crochet
Dec-invisible decrease (insert hook into front loop only of next 2 stitches, yarn over and pull up a loop, YO and pull through both loops on hook. 1 stitch decreased)
Tr-treble stitch
Sl st-slip stitch
Special Stitches:
2 DC Bobble: *YO and insert hook into stitch, pull up a loop, YO and pull through 2 loops on hook.* Repeat once more, will have 2 DC plus the beginning loop on the hook. YO and pull through all 3 loops on hook.
3 DC Bobble: *YO and insert hook into stitch, pull up a loop, YO and pull through 2 loops on hook.* Repeat twice more, will have 3 DC plus the beginning loop on the hook. YO and pull through all 4 loops on hook.
4 DC Bobble: *YO and insert hook into stitch, pull up a loop, YO and pull through 2 loops on hook.* Repeat 3 more times, will have 4 DC plus the beginning loop on the hook. YO and pull through all 5 loops on hook.
4 Treble Bobble: *YO twice, insert hook into stitch, pull up a loop, YO and pull through 2 loops on hook, YO and Pull through 2 loops on hook again.* Repeat 3 more times, should look like 4 TR plus the beginning loop (5 loops on hook). YO and pull through all 5 loops on hook.
Tips: Use the Yarn Under/Yarn Over method of single crochet for tighter stitches: Insert your hook into the stitch, yarn UNDER and pull up a loop, yarn OVER and pull through both loops.
Important notes before you begin
- Keep your tension even, not too tight or too loose. The stitches shouldn’t be so tight that you can’t insert your hook. If they’re too loose then the stuffing will poke through.
- When using blanket yarn, it can be difficult to see into each stitch, so be sure to use a stitch marker to mark the first stitch of each round and use a row counter if needed.
- The first round is the most difficult, after that the stitches get easier to feel and see. Don’t make the first round in the magic ring too tight or the bottom won’t lay flat.
- After making the bobble stitch, single crochet in the next stitch to secure the bobble, then push the bobble to the FRONT of the work.
- When working the row after making bobble stitches, make sure to work in the top of the bobble stitch. Count the stitches as you go to make sure you’ve got the correct stitch count.
- Securing the safety eyes-use a small piece of felt or fabric on the back before attaching the washer to the eyes to make sure they’re securely attached and won’t pull through the large stitch holes.
- We want these to have a light squishy feel, so don’t overstuff.

Mini Crochet Bunny Written Only Pattern
The arms and tail are low sew options. You can omit the arms if you prefer. The tail can be omitted if you’d rather make a pom-pom version.
If you prefer the pattern with step by step photos, click here.
Body:
Round 1: In a Magic Ring, SC 8
Round 2: Inc in each stitch (16 stitches)
Round 3: (SC 1, inc) x8 (24)
Round 4 (Feet): SC 9, make a 3 DC bobble in the next stitch, SC 4, make a 3 DC bobble in the next stitch, SC 9. (24)
Round 5 (Tail): In first stitch, 4 TC bobble, then 23 SC around. (24)
Round 6: SC around (24)
-If you’re crocheting the optional arms, choose the Alternate Round 7, otherwise proceed with the the following-
Round 7 (No Arms): SC around (24)
**Alternate Round 7 (Arms): SC 8, make a 2 DC bobble in the next stitch, SC 8, make a 2 DC bobble in the next stitch, SC 6 (24)
Round 8: (SC 1, dec) x8 (16)
Round 9: SC around (16)
-Begin to stuff lightly-
Round 10: Dec around (8)
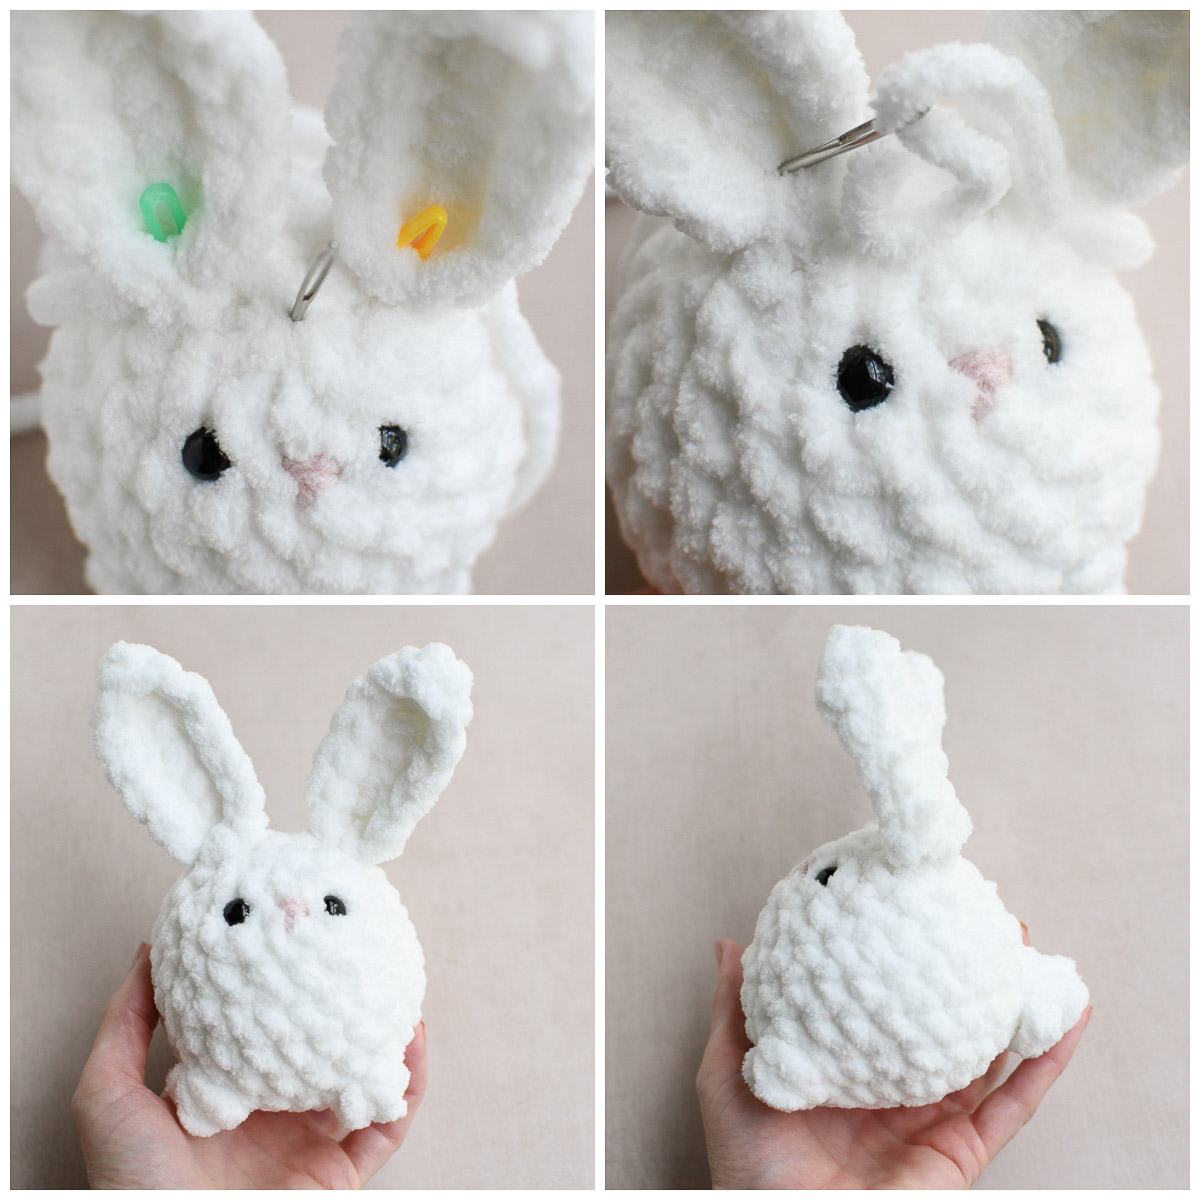
-Place eyes (I used 10 mm) between Rows 9 and 10, centered (use arms or feet as guide for center), 4 stitches apart (at least 1 inch), the nose will be stitched in between the eyes. Finish stuffing-
Round 11: Sl st in next 2 stitches, then fasten off and weave through the front loop of the stitches, pull tight to close. Weave end through the center of the bunny to the back and snip off any excess.
Embroidering the Nose (see photos): Using a light pink worsted weight yarn embroider nose centered between eyes for the baby bunny as pictured below in step by step section.
Mini Bunny Ear Patterns
Choose which style of ear to make: upright or floppy
Upright Ears: Make 2
Row 1: CH 8, SC in 2nd chain from hook (place marker) and in next 5 stitches. In the last stitch, SC, Sl st, SC. Do not turn work, instead rotate and continue to work down the bottom of the chain.
Row 2: Working across bottom of chain, SC 6, do not turn work (continue as working in the round).
Row 3: SC in first stitch of the row, place marker and in next 6 stitches, then Sl st in the Sl st from the previous row. Fasten off. Use tail to cinch the bottom together for a creased ear.
Floppy Ears: Make 2
Round 1: In a Magic Ring, SC 4
Round 2: Inc in each stitch (8)
Round 3: (SC 1, inc) x4 (12)
Round 4-5: SC around (12)
Round 6: (SC 1, dec) x4 (8)
Round 7: SC around (8)
Round 8: SC 1, dec, SC 2, dec, SC 1 (6)
Round 9-11: SC around (6)
Round 12: Sl st in 2 stitches, fasten off, leaving long tail
Bow Pattern
Use a worsted weight yarn and 4.5mm hook
Leaving a long tail, make a Magic Ring, then (Ch-4 , 3 Tr, Ch-4) and Sl st into ring. Again, (Ch-4, 3 Tr, Ch-4) Sl st into ring and fasten off, leaving a long tail for attaching.
- Thread the end tail through the center of the magic ring to the back of the bow. Tighten the magic ring to close.
- Take the beginning and end tail and go around the front in opposite directions and tie around back (like tying a gift).
- Cinch down tightly in center of bow before knotting.
- Use the tails to attach bow to one ear.
Mini Crochet Bunny Step by Step Photos:
Body:
Round 1: In a Magic Ring, SC 8
Round 2: Inc in each stitch (16 stitches)
Round 3: (SC 1, inc) x8 (24)
Round 4 (Feet): SC 9, make a 3 DC bobble in the next stitch, SC 4, make a 3 DC bobble in the next stitch, SC 9. (24)

Bobble Step by Step Photos: After completing the bobble stitch, you may need to push the bobble to the back of the work to find the next stitch, it can get hidden easily with the blanket yarn. Single crochet in the next stitch to secure the bobble, then push the bobble to the FRONT of the work.

Round 5 (Tail): In first stitch, 4 TC bobble, then 23 SC around. (24)

When working the next round after a row of bobble stitches, make sure to work in the top of the bobble stitch. See the photo below with the tapestry needle marking the top of the bobble stitch. The next photo shows how it should look once you’ve worked past that section. Count the stitches as you go to make sure you’ve got the correct stitch count.

Round 6: SC around (24)
-If you’re crocheting the optional arms, choose the Alternate Round 7, otherwise proceed with the the following-
Round 7 (No Arms): SC around (24)
**Alternate Round 7 (Arms): SC 8, make a 2 DC bobble in the next stitch, SC 8, make a 2 DC bobble in the next stitch, SC 6 (24)
Round 8: (SC 1, dec) x8 (16)
Round 9: SC around (16)
-Begin to stuff lightly-

Round 10: Dec around (8)
-Place eyes (I used 10 mm) between Rows 9 and 10, centered (use arms or feet as guide for center), 4 stitches apart (at least 1 inch), the nose will be stitched in between the eyes. Finish stuffing-

Round 11: Sl st in next 2 stitches, then fasten off and weave through the front loop of the stitches, pull tight to close. Weave end through the center of the bunny to the back and snip off any excess.

Upright Ears: Make 2
Row 1: CH 8, SC in 2nd chain from hook (place marker) and in next 5 stitches. In the last stitch, SC, Sl st, SC. Do not turn work, instead rotate and continue to work down the bottom of the chain. (Photo 1)
Row 2: Working across bottom of chain, SC 6, do not turn work (continue as working in the round). (Photo 2)
Row 3: SC in first stitch of the row, place marker (Photo 3) and in next 6 stitches, then Sl st in the Sl st from the previous row (Photo 4). Fasten off. Use tail to cinch the bottom together for a creased ear. (Photos 5-6)

Floppy Ears: Make 2
Round 1: In a Magic Ring, SC 4
Round 2: Inc in each stitch (8)
Round 3: (SC 1, inc) x4 (12)
Round 4-5: SC around (12)
Round 6: (SC 1, dec) x4 (8)
Round 7: SC around (8)
Round 8: SC 1, dec, SC 2, dec, SC 1 (6)
Round 9-11: SC around (6)
Round 12: Sl st in 2 stitches, fasten off, leaving long tail
Embroidering the Nose (see photos): Using a light pink worsted weight yarn embroider nose centered between eyes for the baby bunny as pictured below.
- Thread tapestry needle and enter from the side of Bunny’s head and push through to the middle 2 stitches between bunny’s eyes. Pull through, leaving a 3 inch tail to the side for tying off later. (Photos 1-3)
- Insert the needle 2 stitches to the right, exiting through the same stitch you originally started. (Photo 4)
- Again insert needle 2 stitches to the right, through the same stitch as before, but this time exit through a stitch to the bottom middle. (Photo 5)
- Insert the needle just under the two loops you’ve made at the top to form the line under the nose (Photo 6), then insert the needle through the hole to the right, then thread behind the eye and exit in the same hole the tail is in (Photo 7). Make sure there are no yarn threads in between the two tail threads.
- Tie the tails together gently, enough to secure the nose, but not make it sink into the body (Photo 8). Tie once again, and snip off ends (Photo 9). Using a tapestry needle, reach in and pull the knot down into the inside of the bunny to hide.

Finishing: Whip stitch the ears to the top of the head, to either side of the closing ring, about 3/4 of an inch apart, and about 3 stitches back from the eyes, weave in ends through the center of the bunny and to the bottom and cut yarn ends.
Crochet Bunny Pattern
This pattern is for the bigger size bunny. The arms and tail are low sew options. You can omit the arms if you prefer. The tail can be omitted if you’d rather make a pom-pom version.
Body:
Round 1: In a Magic Ring, SC 8
Round 2: Inc in each stitch (16 stitches)
Round 3: (SC, inc) x8 (24 stitches)
Round 4: (SC 2, inc) x8 (32 stitches)
Round 5: SC around (32)
Round 6: Feet Round: SC 13, make a 4 DC bobble in next stitch, SC in next 4 stitches, make a 4 DC bobble in next stitch, SC in next 13 (32)
Round 7: Tail Round: 4 TR Bobble in first stitch, SC in next 31 stitches (32)
Round 8: SC around (32)
-If you’re crocheting the optional arms, choose the Alternate Round 9, otherwise proceed with the the following-
Round 9 (No Arms): SC around
**Alternate Round 9 (Arms): SC 12, make a 3 DC bobble in next stitch, SC 8, make a 3 DC bobble in next stitch, SC 10**
Round 10: (SC 2, dec) x8 (24)
Round 11, 12: SC around (24)
-Begin to stuff-
Round 13: (SC 1, dec) x8 (16)
-Insert eyes (I used 14 or 16 mm eyes) between row 12-13, 5 stitches apart, using feet as a guide to center the eyes (nose will be stitched right in between them), continue to stuff
Round 14: Dec x8 (8)
Round 15: Sl st 2 stitches, tie off, weave through and close
Crochet Bunny Ear Patterns
Upright Ears: Make 2
Row 1: Ch 10, HDC in 2nd chain from hook (place marker). HDC in next 3 stitches, SC in last 4 stitches. In the last stitch, SC, Sl st, SC. Do not turn work, instead rotate and continue to work down the bottom of the chain.
Row 2: working across bottom of chain, SC 4, HDC in last 4 stitches. Do not turn work (continue as working in the round).
Row 3: HDC in next 4 stitches, SC in next 5, then fasten off. Use tail to cinch sides closed.
Attach ears in between rows 13 and 14 about 1 to 1.5 inches apart on top (depending on preference)
Floppy Ears: Make 2
Round 1: In a Magic Ring, SC 6
Round 2: Inc in each stitch (12 stitches)
Round 3: (SC 1, inc) x6 (18)
Round 4-6: SC around (18)
Round 7: (SC 1, dec) x6 (12)
Round 8, 9: SC around (12)
Round 10: (SC 1, dec) x4 (8)
Round 11-13: SC around (8)
Round 14: Sl st in 2 stitches, fasten off, leaving long tail for sewing to head
Attach ears to top of head, around row 13, about 1.75 inches apart, and about 2 stitches back from the eyes. See placement in photos below.

Finishing: Use these instructions with photos for embroidering the nose, but for the bigger bunny, use the center stitch between the eyes as the stitch to embroider around. See placement photos below.

Look how cute! Now it’s time to sit back and enjoy your finished Bunny. Or make a hundred more of them, whatever makes you happy!

I’d love to hear from you!
If you try this pattern and love it, please leave a comment and let me know how it went! If you have any questions, I’m glad to assist. Happy Crocheting!
More patterns you’ll love (try this next!)