
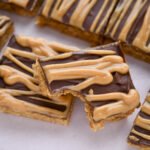
Peanut Butter Fingers
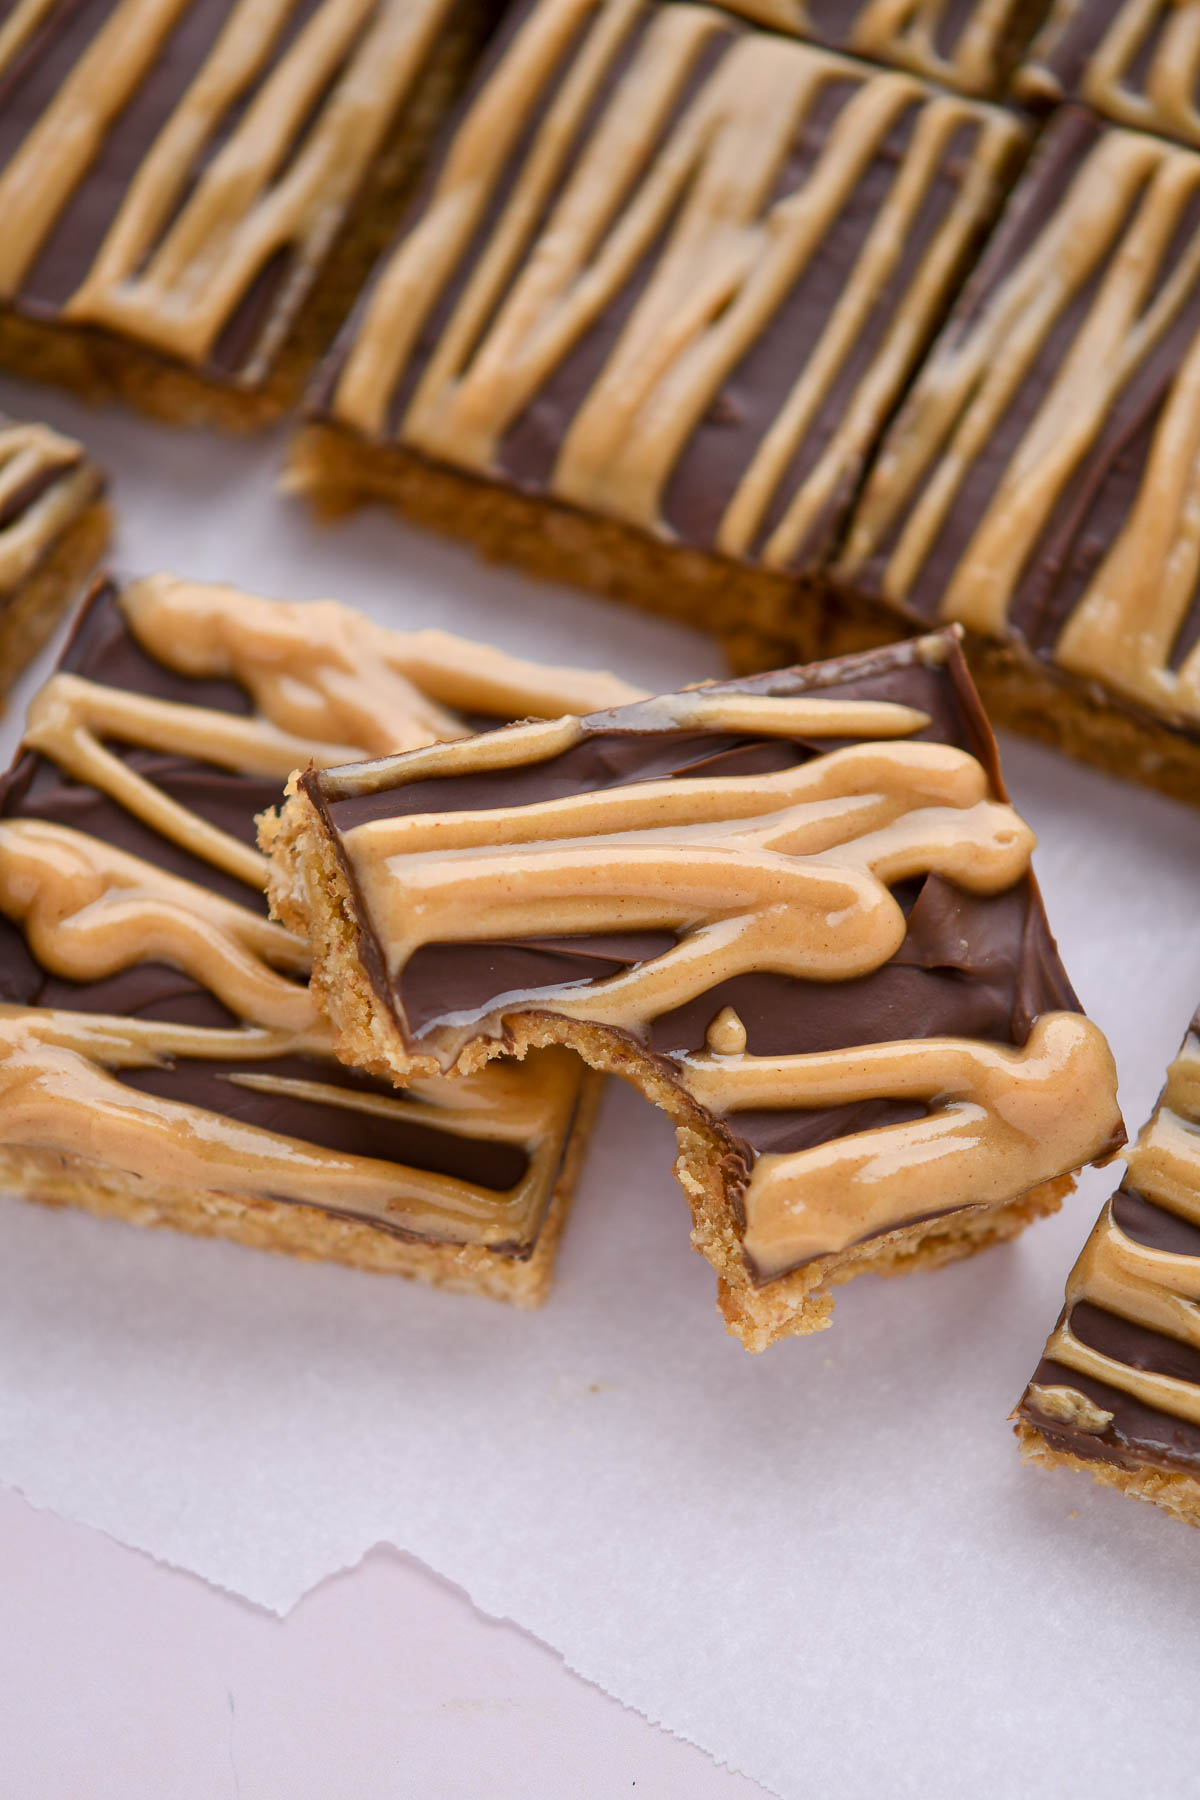
Peanut Butter Fingers are soft and chewy oatmeal peanut butter cookie bars topped with a melted chocolate chip layer and peanut butter icing. They’re an old fashioned dessert straight from Grandma’s kitchen.
Today’s recipe comes from my mom’s friend, Miss Brenda, who was known for her delicious cooking and baking. This recipe joins the Southern Grandma series if you want more comfort recipes!
These bars taste like a rich peanut butter cookie topped with peanut butter cup flavors. A nostalgic treat that’s definitely worth getting into the kitchen for!
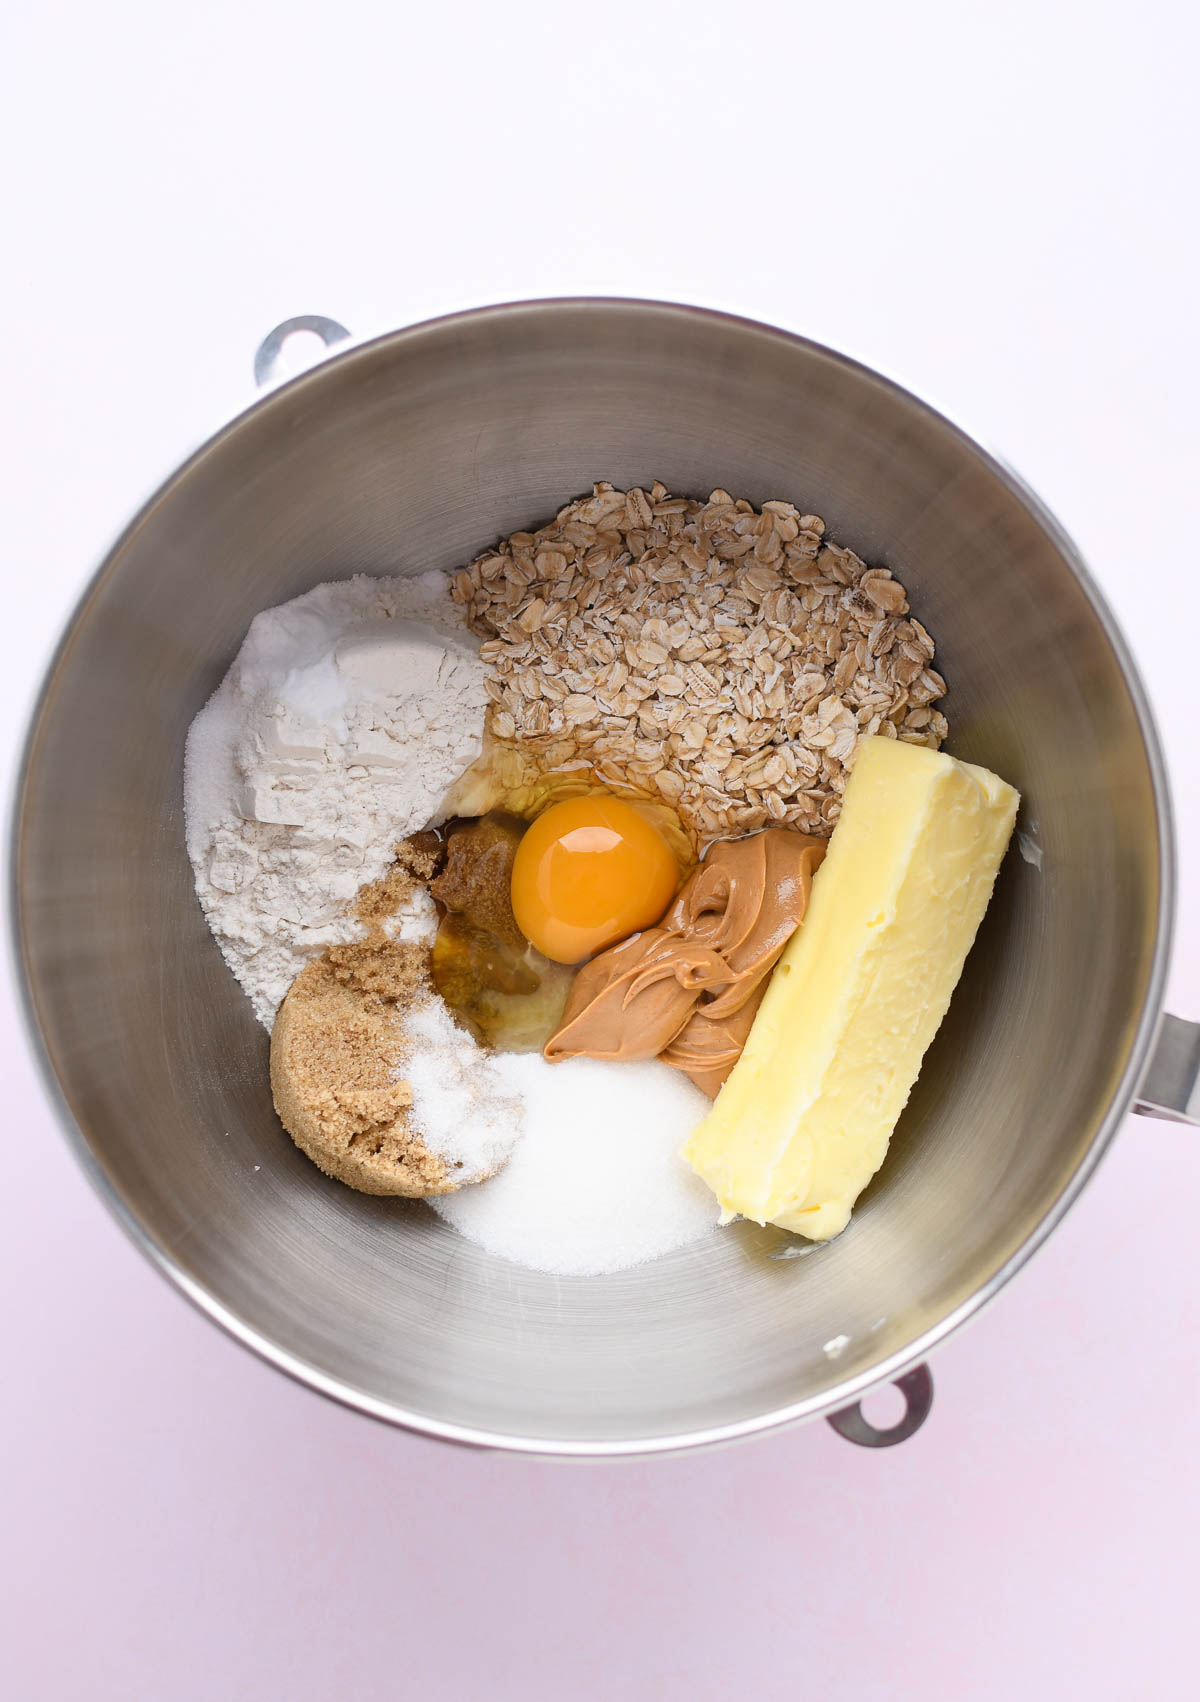
And my favorite part of this recipe: you just add all the cookie ingredients in one bowl and mix. No creaming butter and sugars and then adding everything in stages. We aren’t wasting anytime getting to the good stuff!
Let’s bake!

Ingredients for peanut butter fingers
- all purpose flour
- baking soda
- salt
- granulated sugar
- brown sugar
- butter (I use salted)
- one large egg
- peanut butter
- old fashioned or quick cooking oats
- chocolate chips (I used semi sweet and milk chocolate)
- for the icing: peanut butter, confectioner’s sugar, and milk
Kitchen tools you’ll need
Mixing bowls, mixer, and 9×13 pan
How to make Peanut Butter Fingers
There are 3 parts to making these bars, but each one is pretty quick!
- Cookie layer: mix all the ingredients in a bowl, then press and bake!
- Chocolate chip layer: add chocolate chips right on top, let them melt then spread them out.
- Peanut butter icing: Whisk together the icing ingredients and drizzle over the top.
First let’s make the cookie base. Add all cookie ingredients to a large mixing bowl. Mix on low speed until everything is combined.
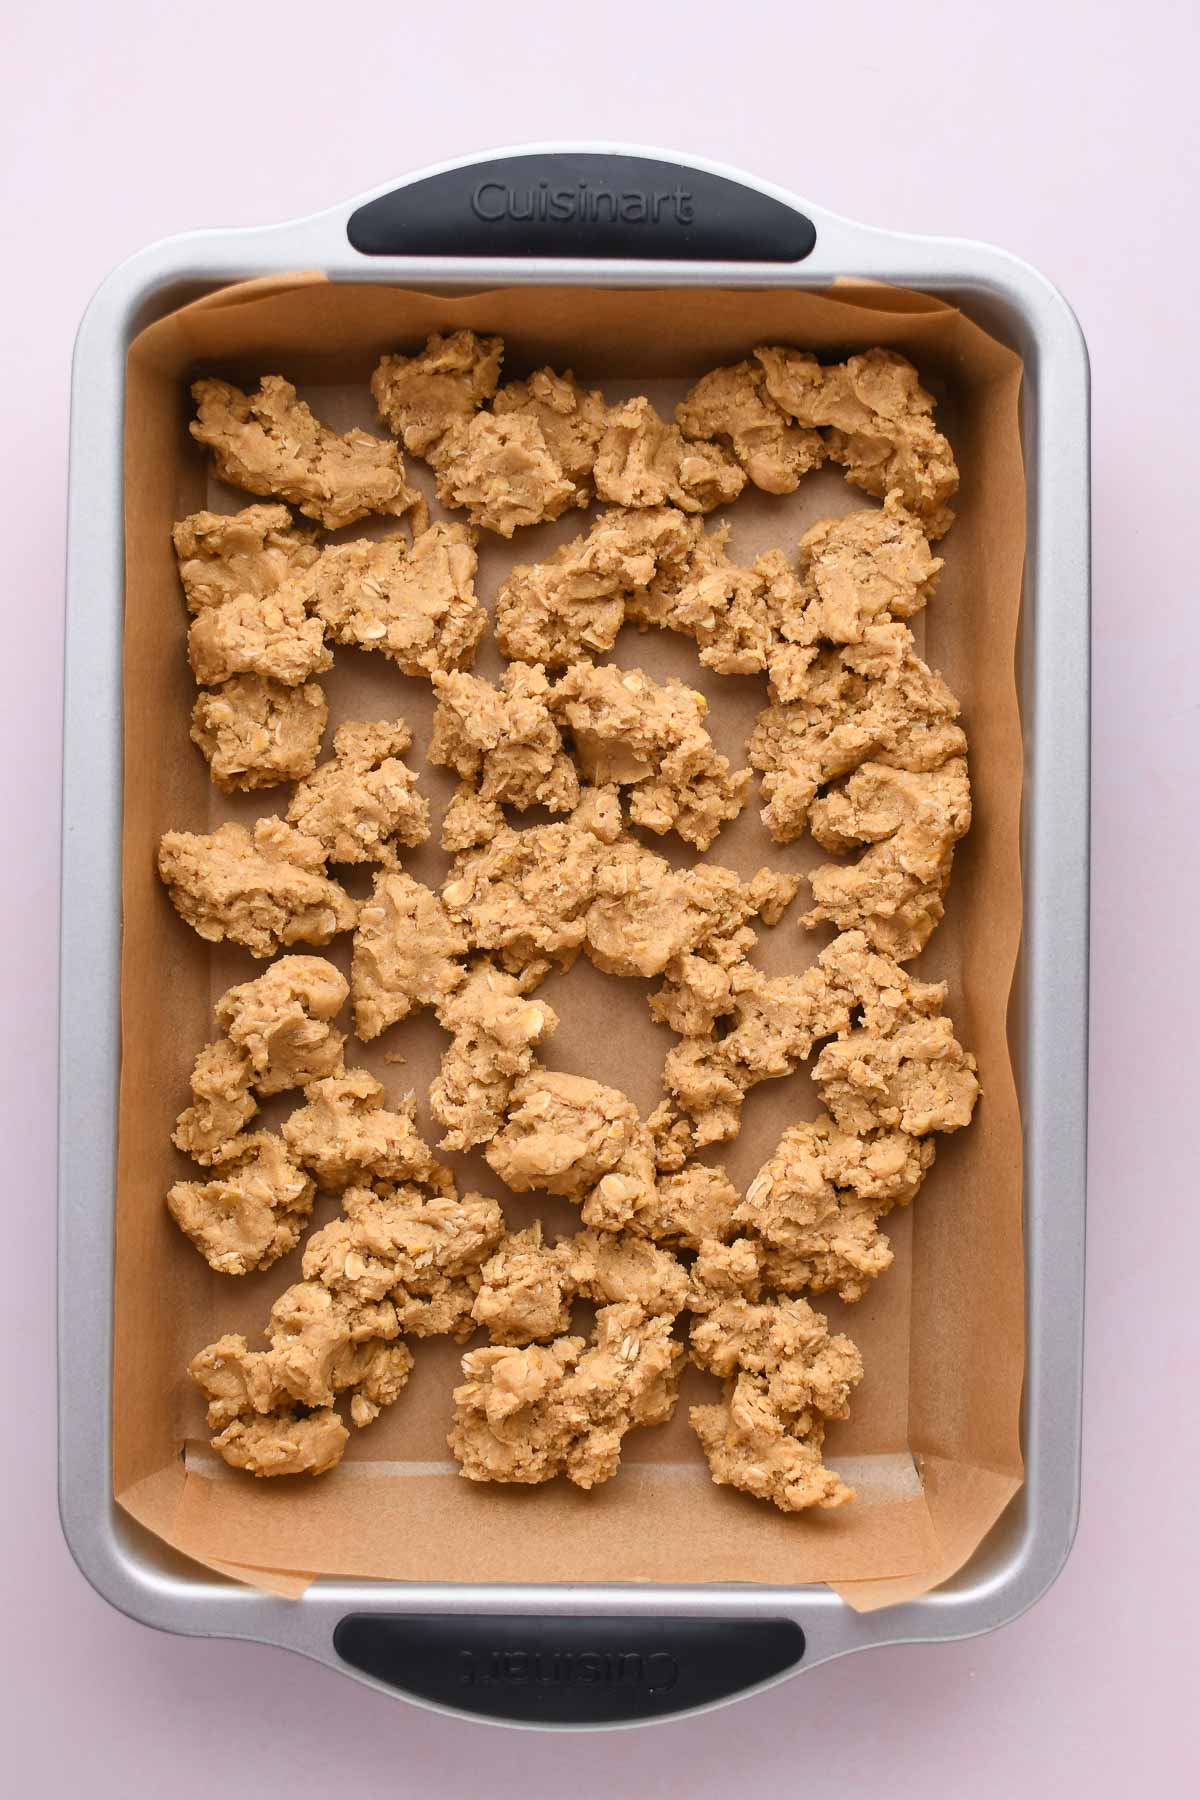
You’ll have a soft and thick cookie dough like this.
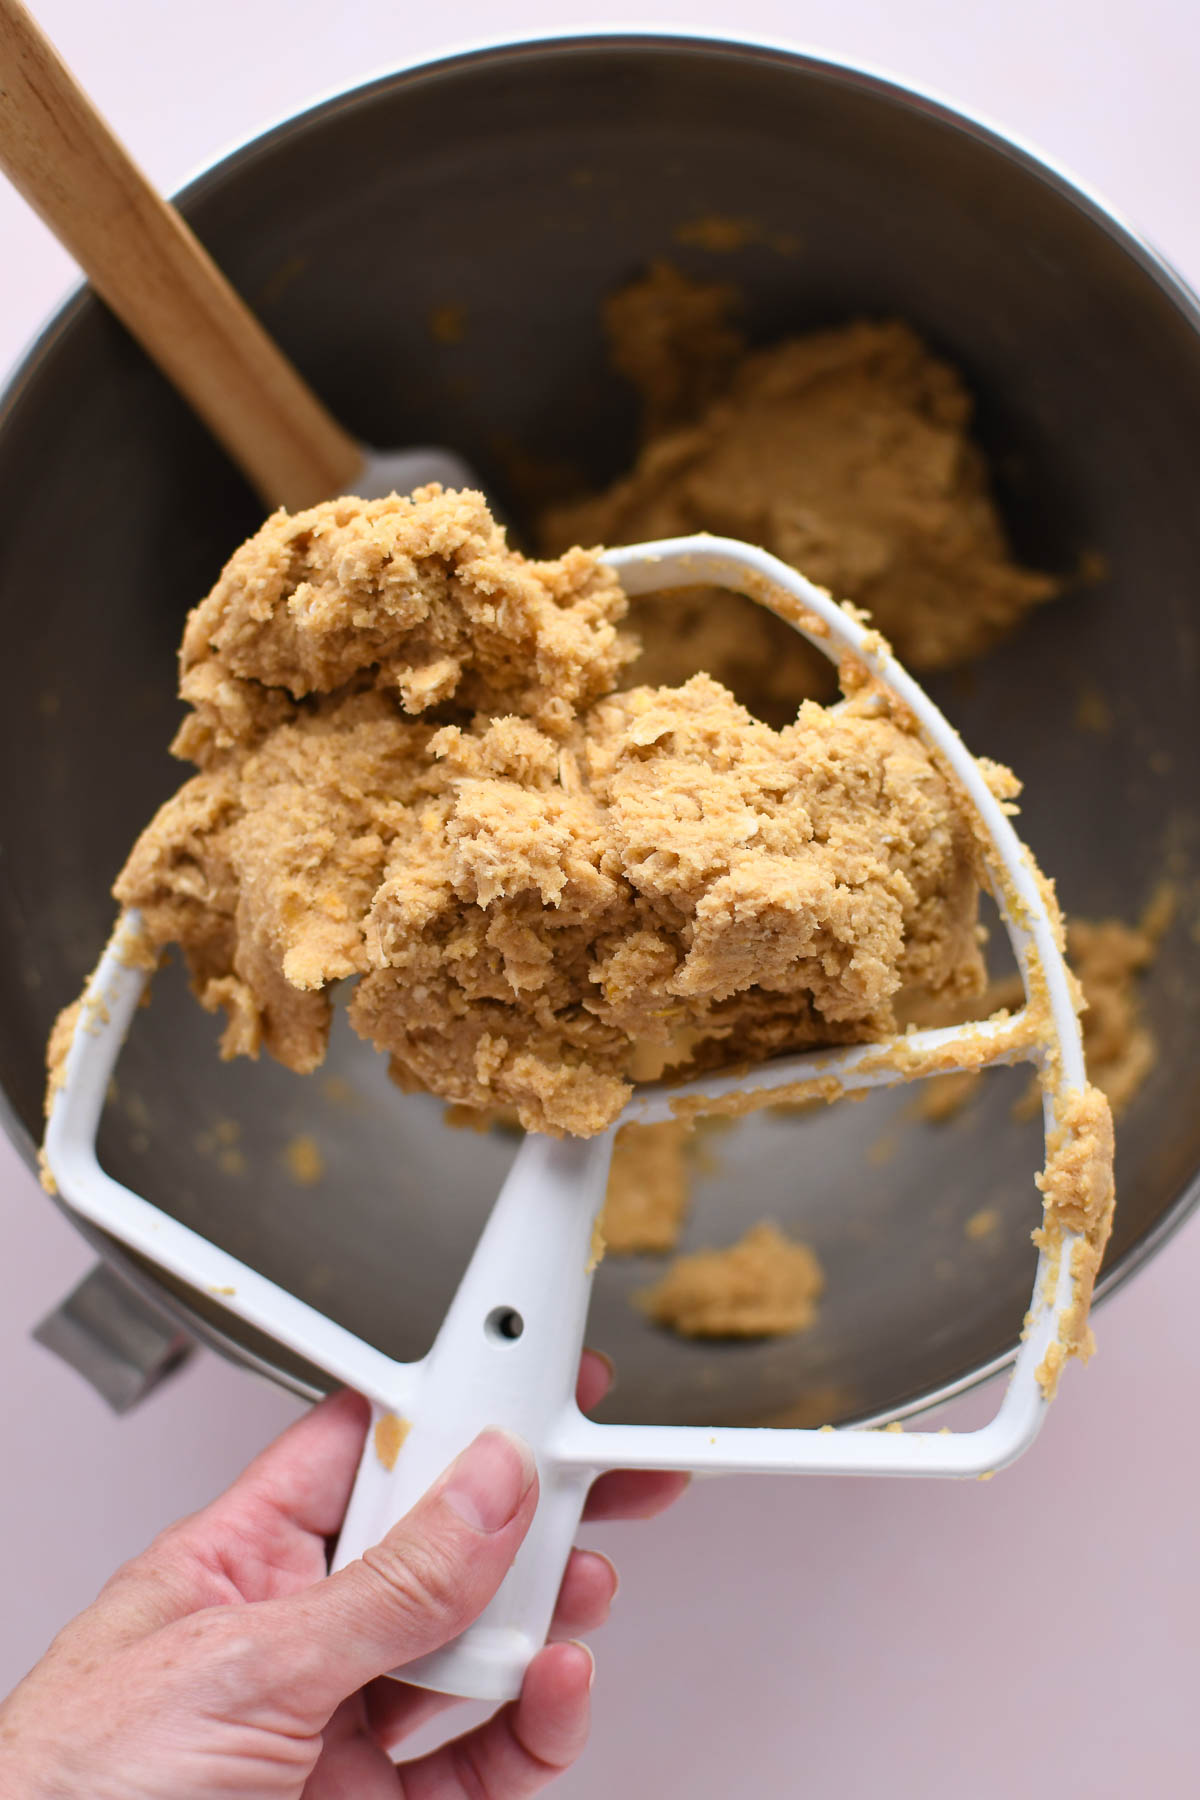
It might not look like enough, but this amount of dough will fit a 9×13 pan. These bars are meant to be thin! To help press evenly, don’t pour the whole ball of dough in. Instead, grab small clumps and fill in around the pan, then use your hands to press it in an even layer.

Bake the cookie for 15-18 minutes or until the edges look set and slightly shiny toward the middle. We don’t want it overbaked! It’ll turn out dry, crunchy and crumbly.
Tip for smoothing edges: As the cookie bakes, the edges will rise up higher than the middle. This is more noticeable if these are baked in a glass pan. To fix this, as soon as you get out it of the oven, take an offset spatula or back of a spoon and press the edges down lightly.
Chocolate and Peanut Butter Layers
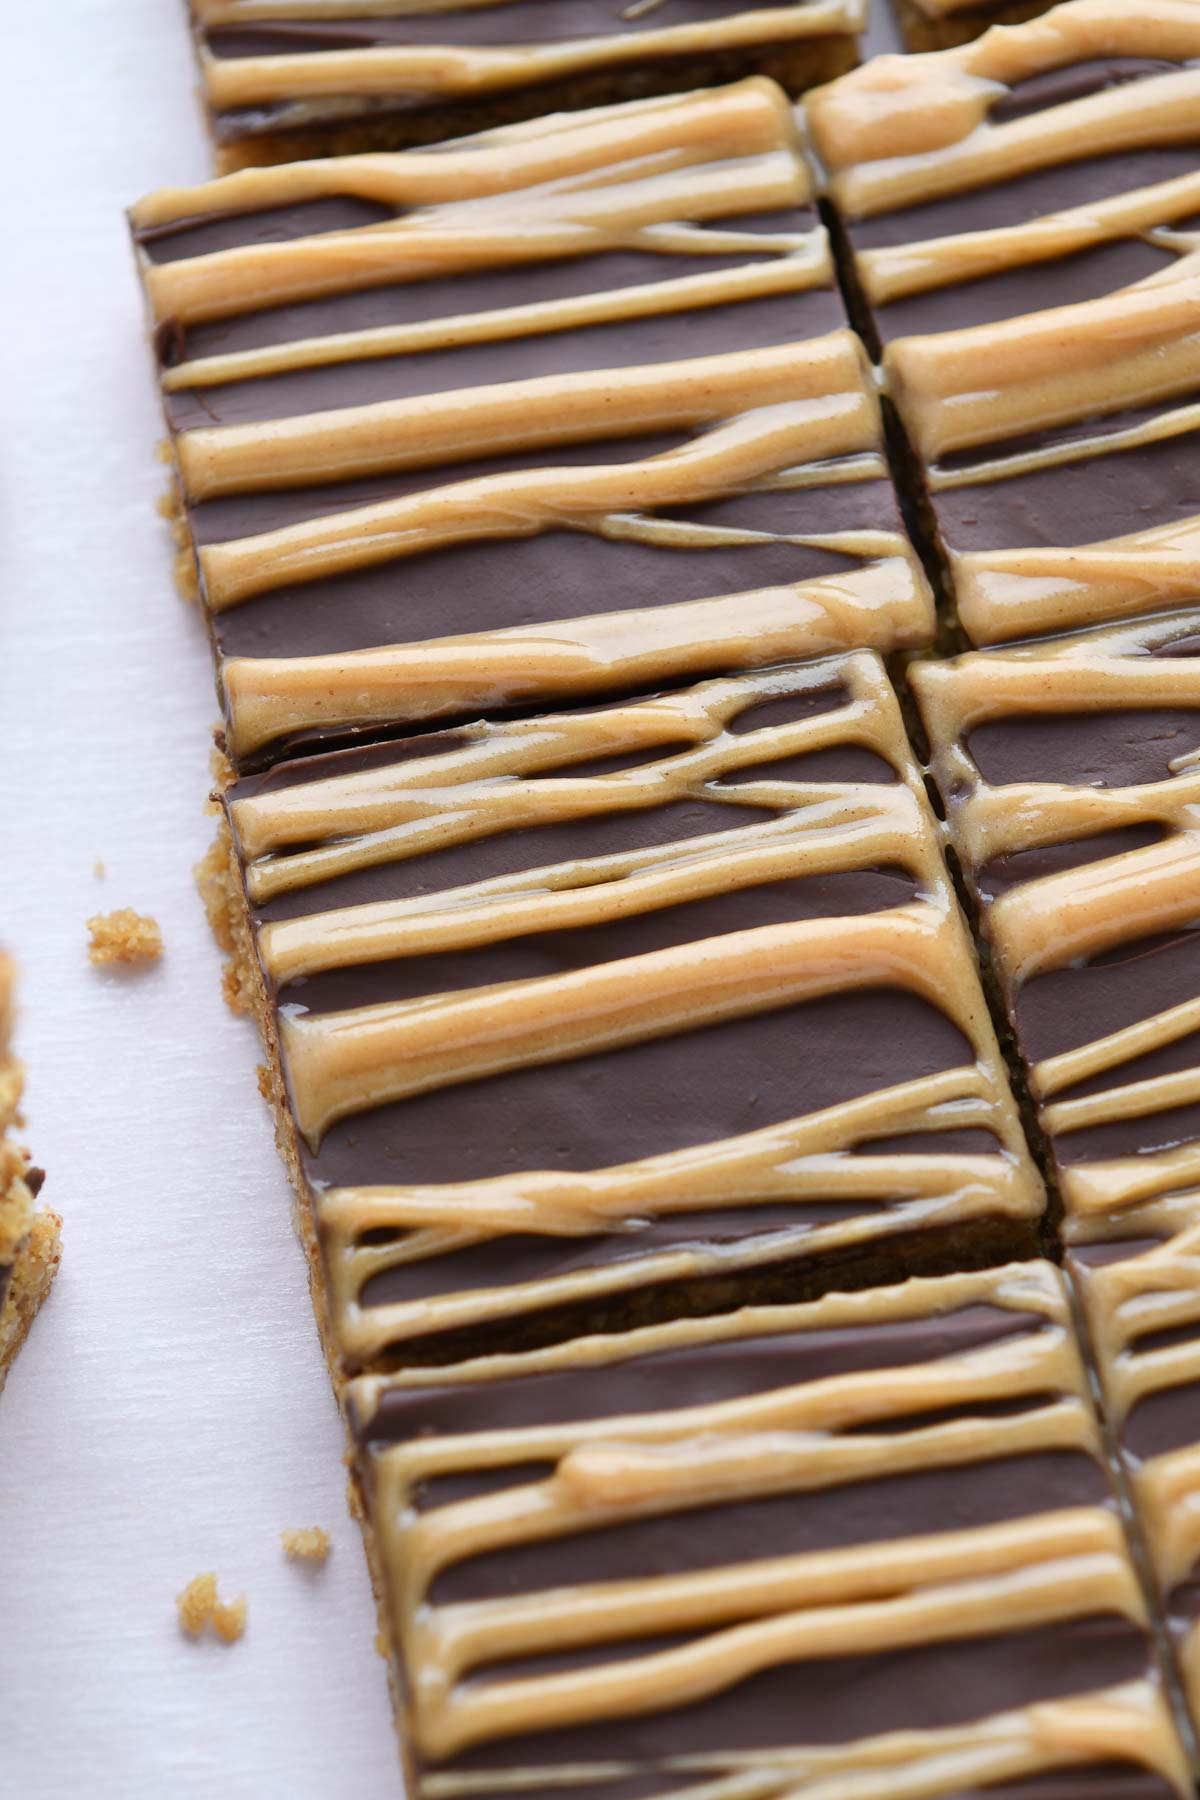
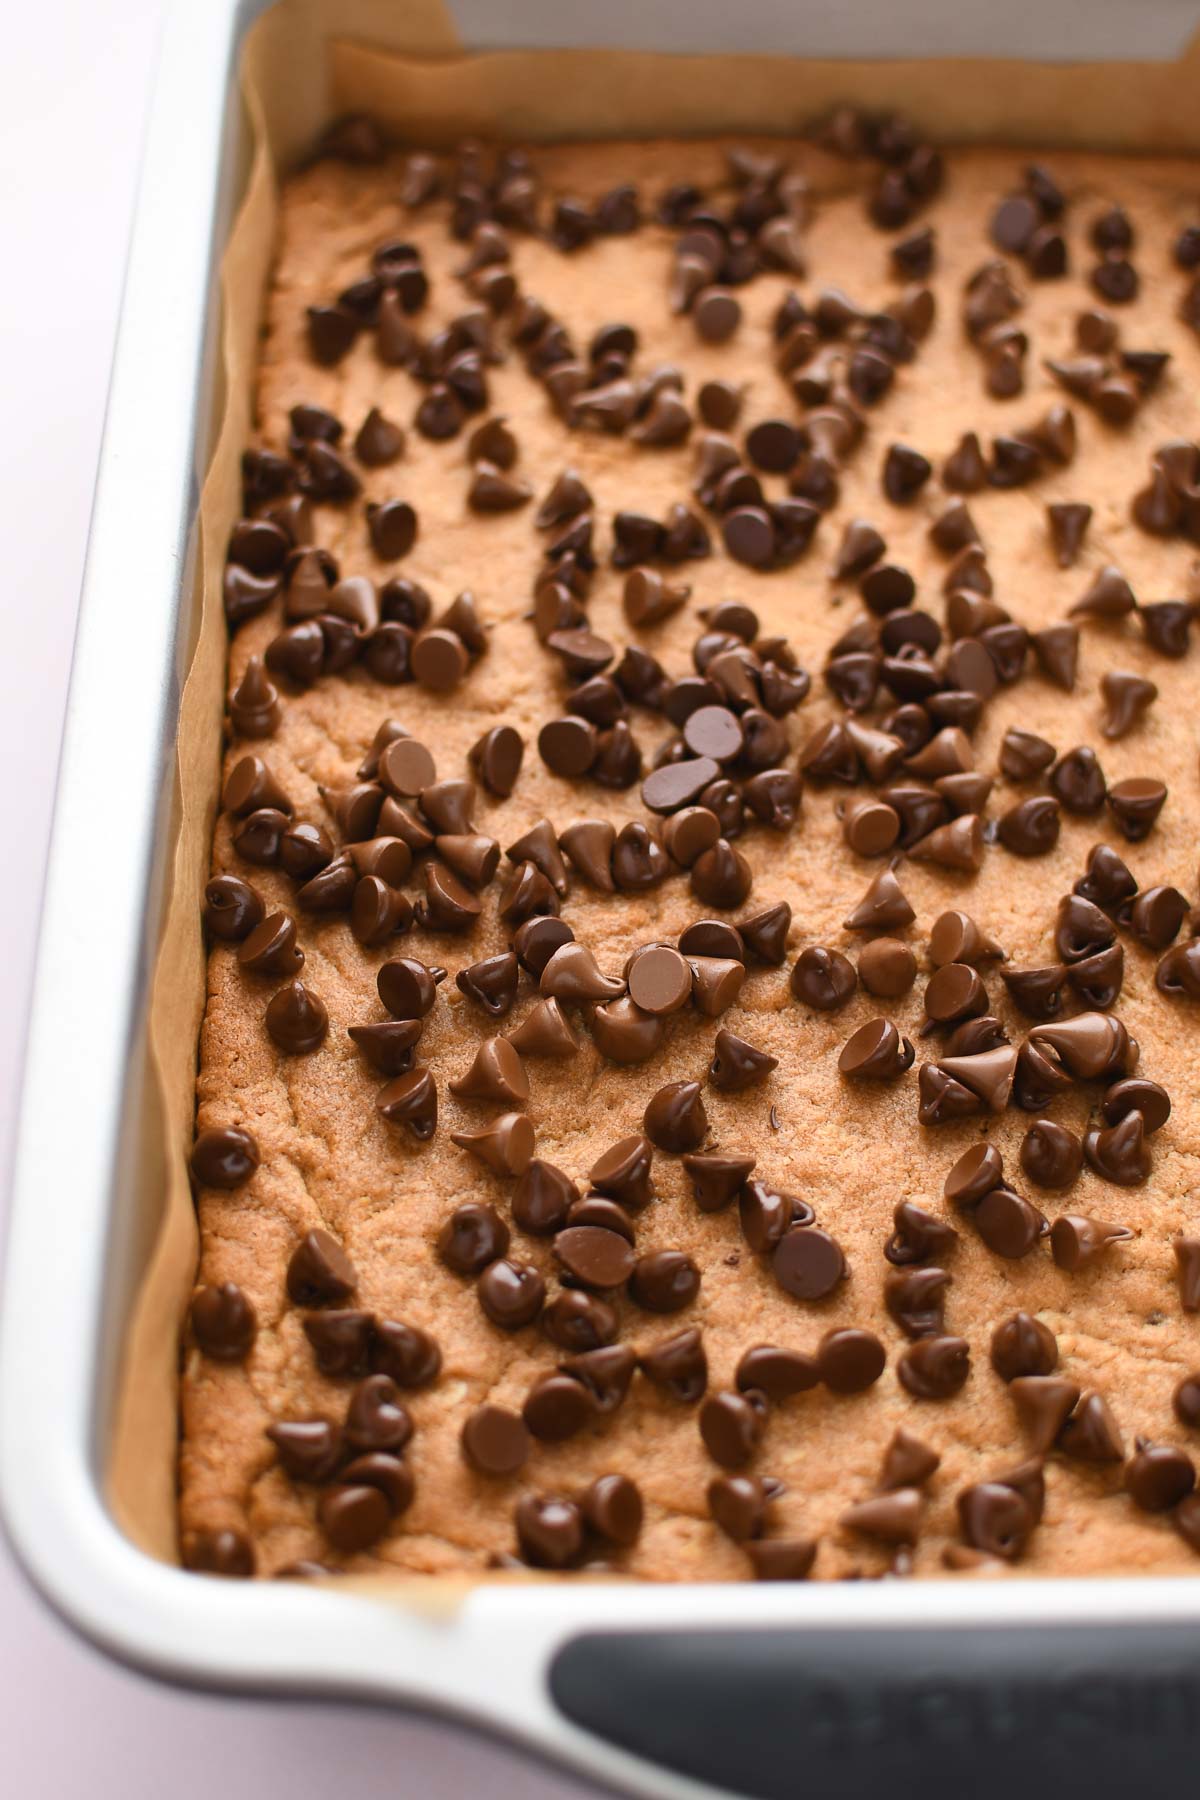
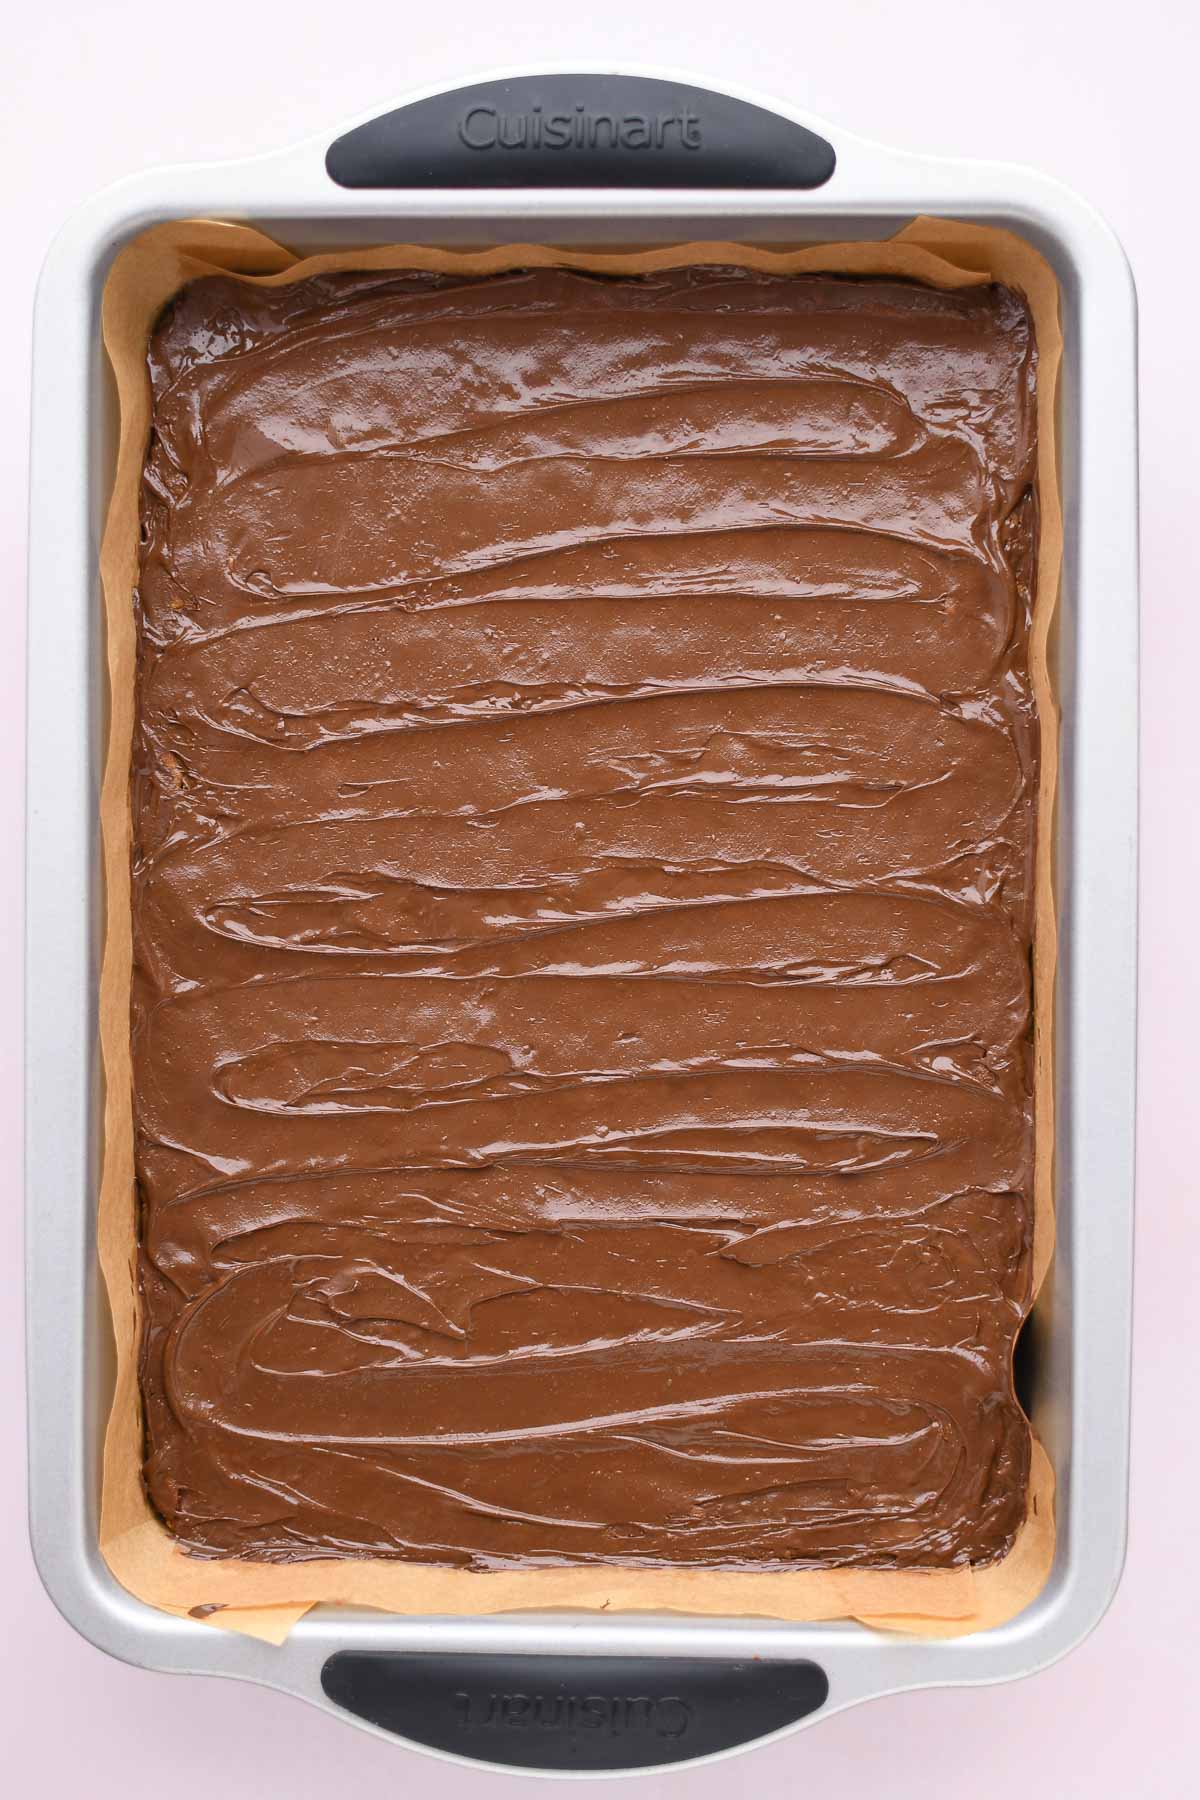
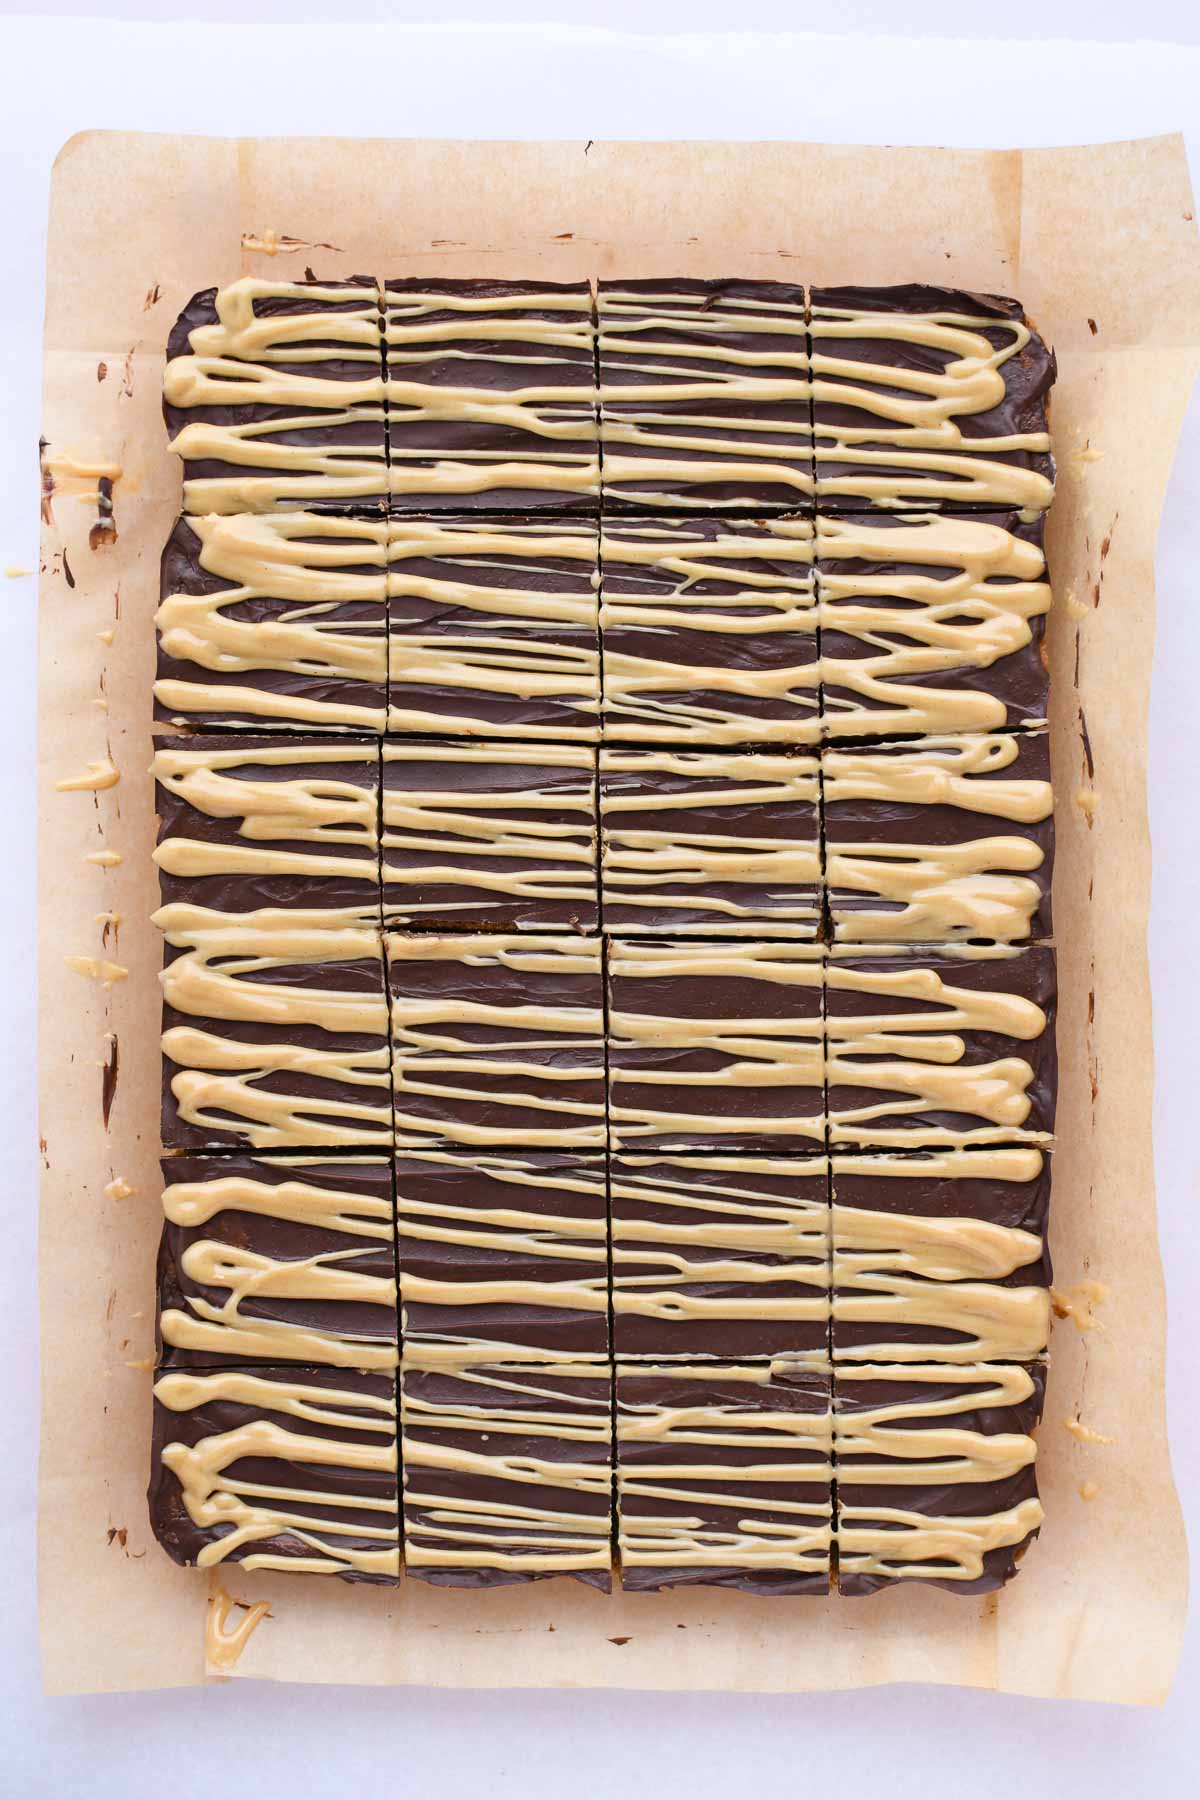
For the chocolate layer: Sprinkle chocolate chips across the pan, and place back in the oven (turn the oven OFF) for a minute or so until the chocolate chips are shiny and melted. Spread the chocolate with an offset spatula until the whole cookie is covered. Let the bars cool until the chocolate has set.
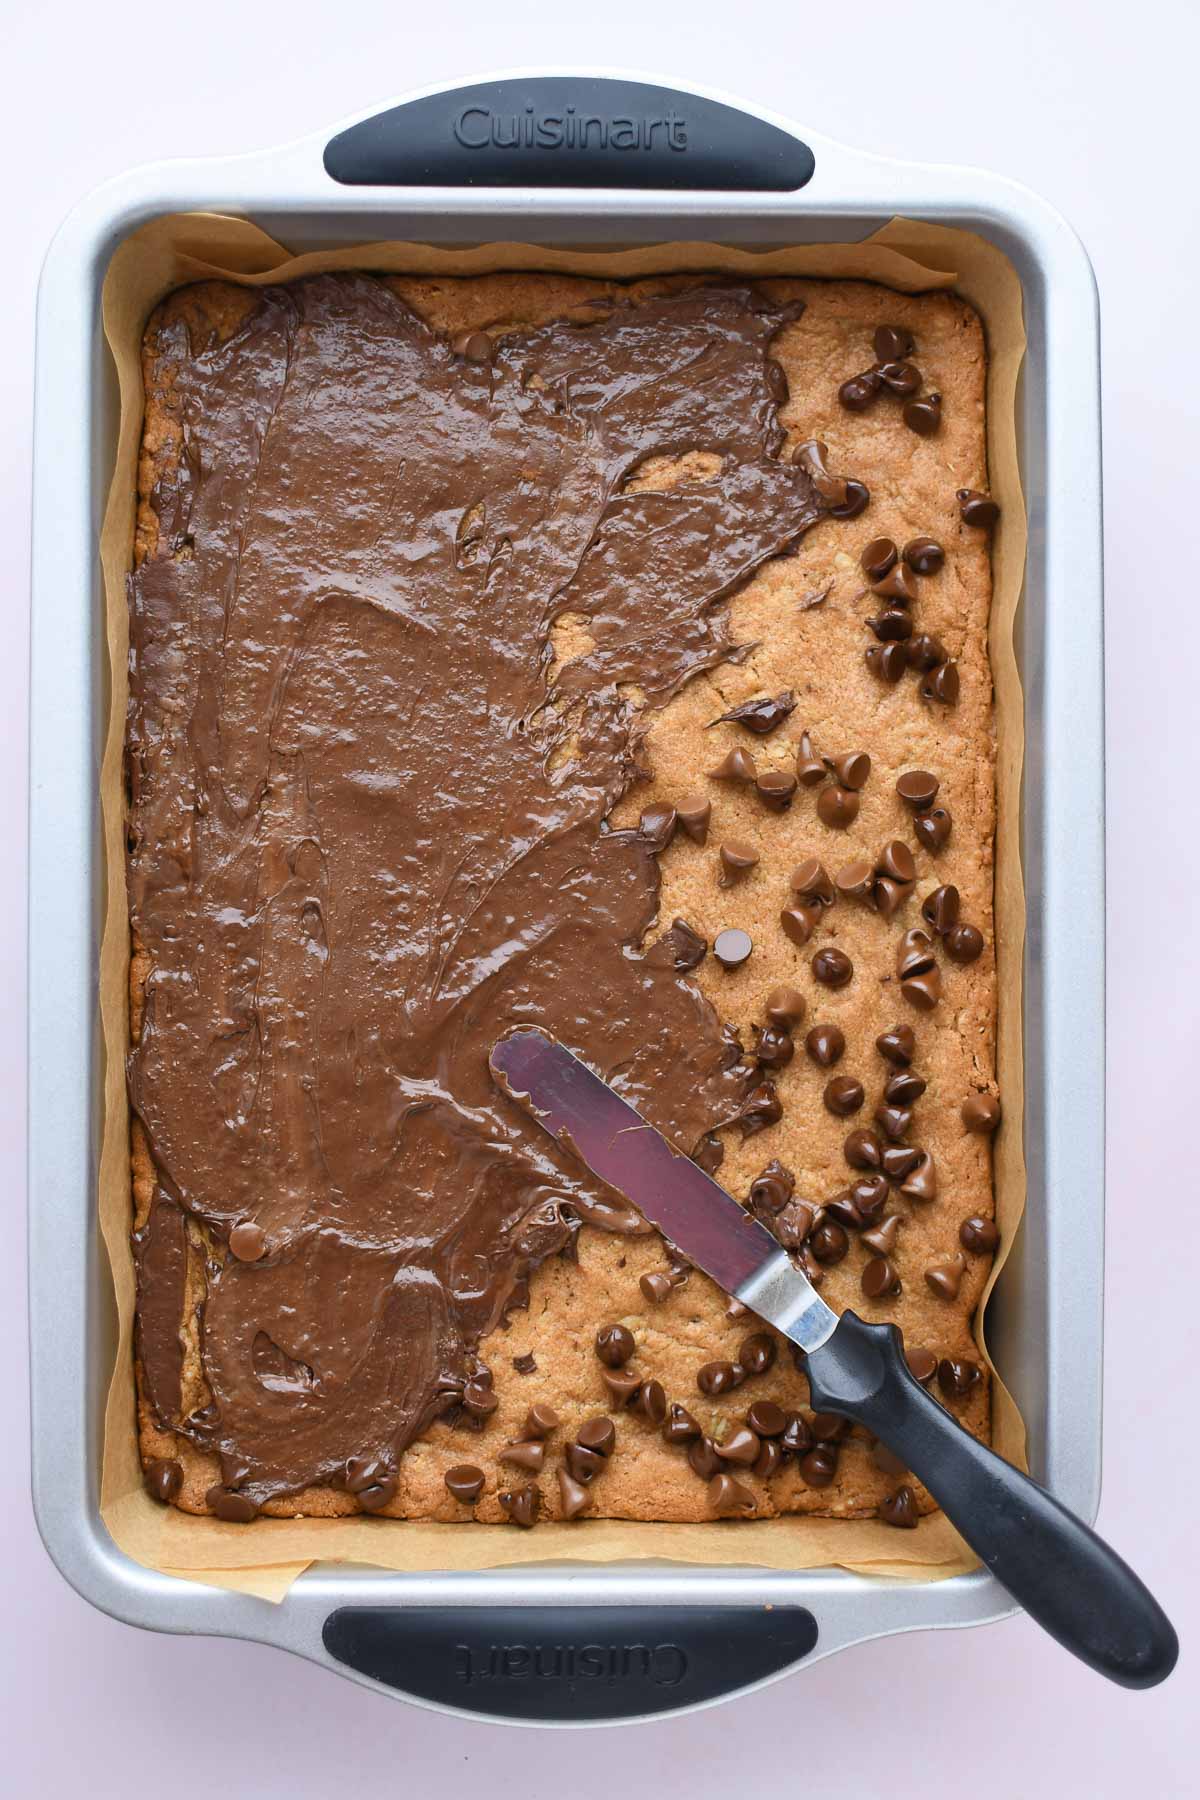
If you’re impatient like I am sometimes, you can also add the icing now and swirl it together it with the chocolate, but the chocolate won’t set completely and this will be a bit messier to cut and eat.
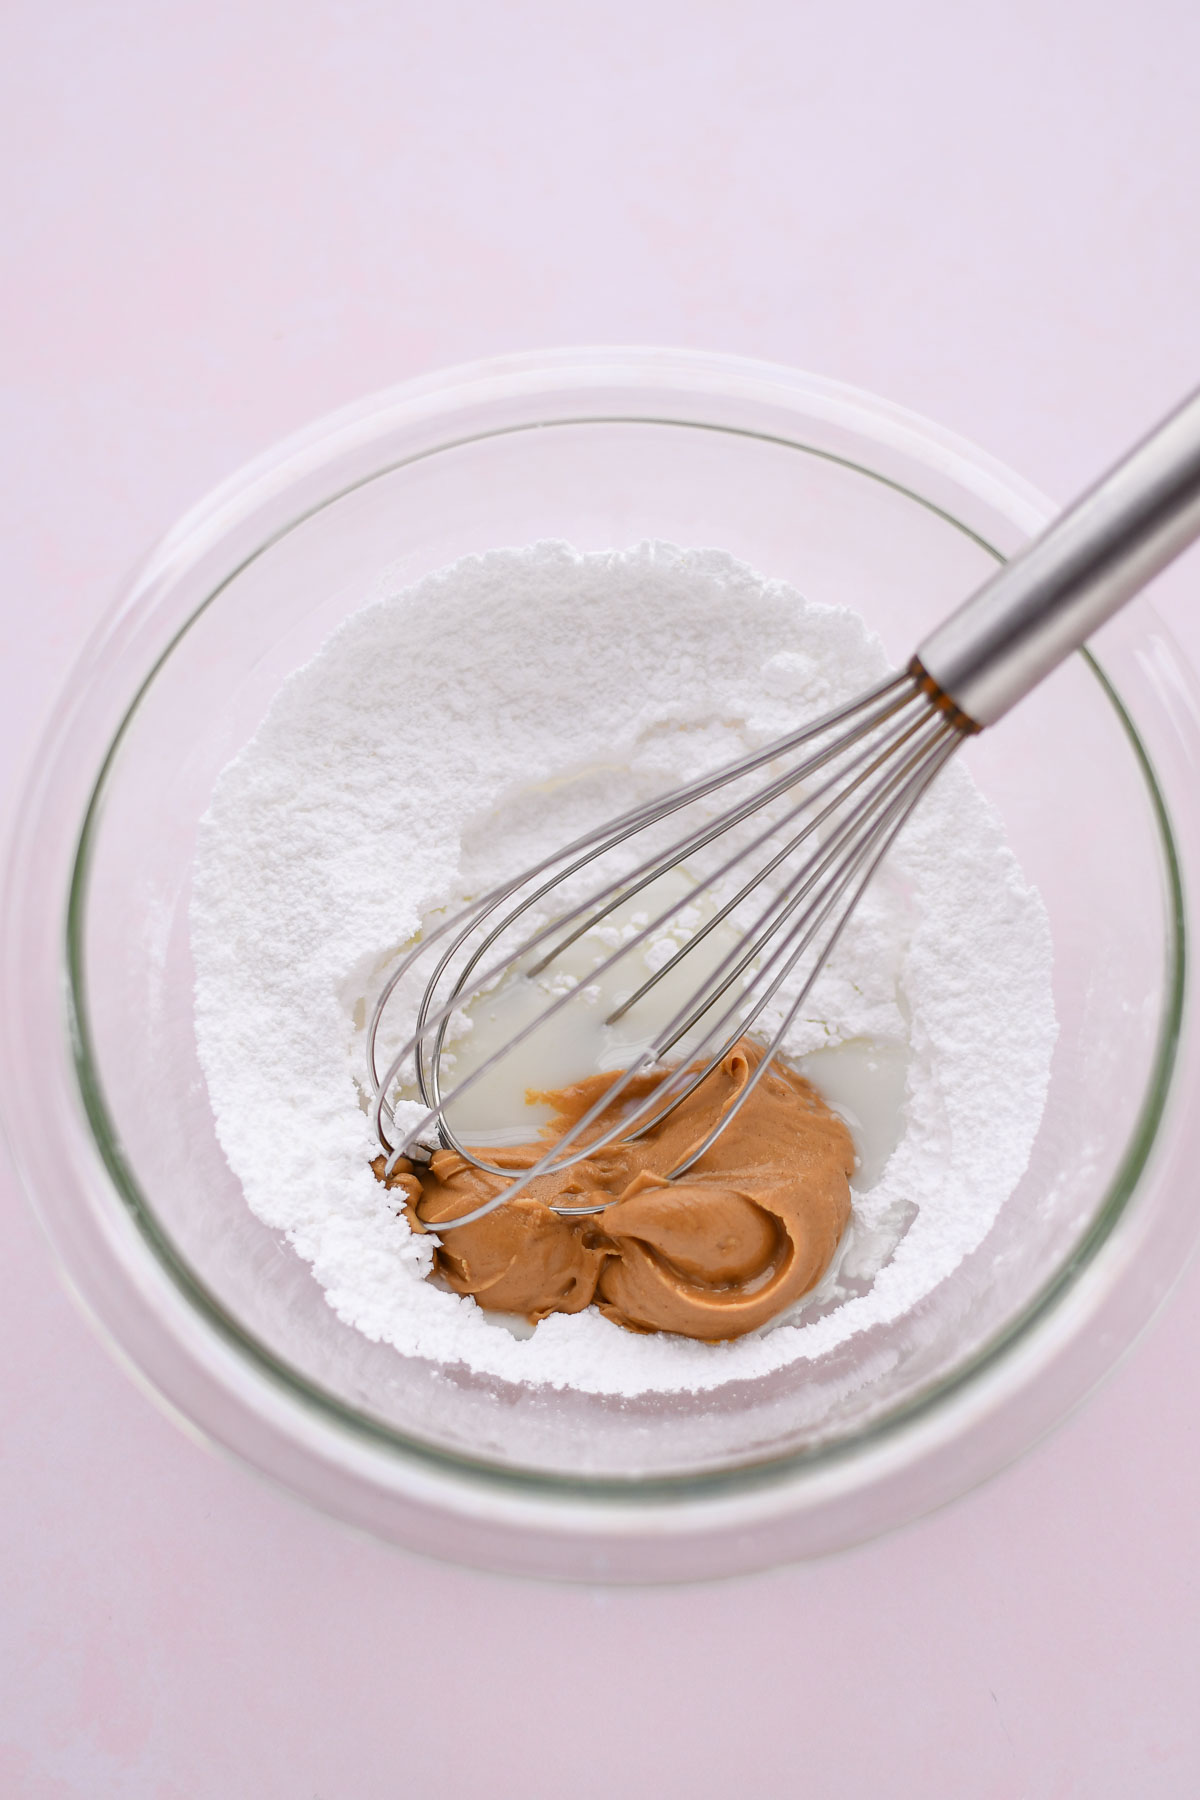
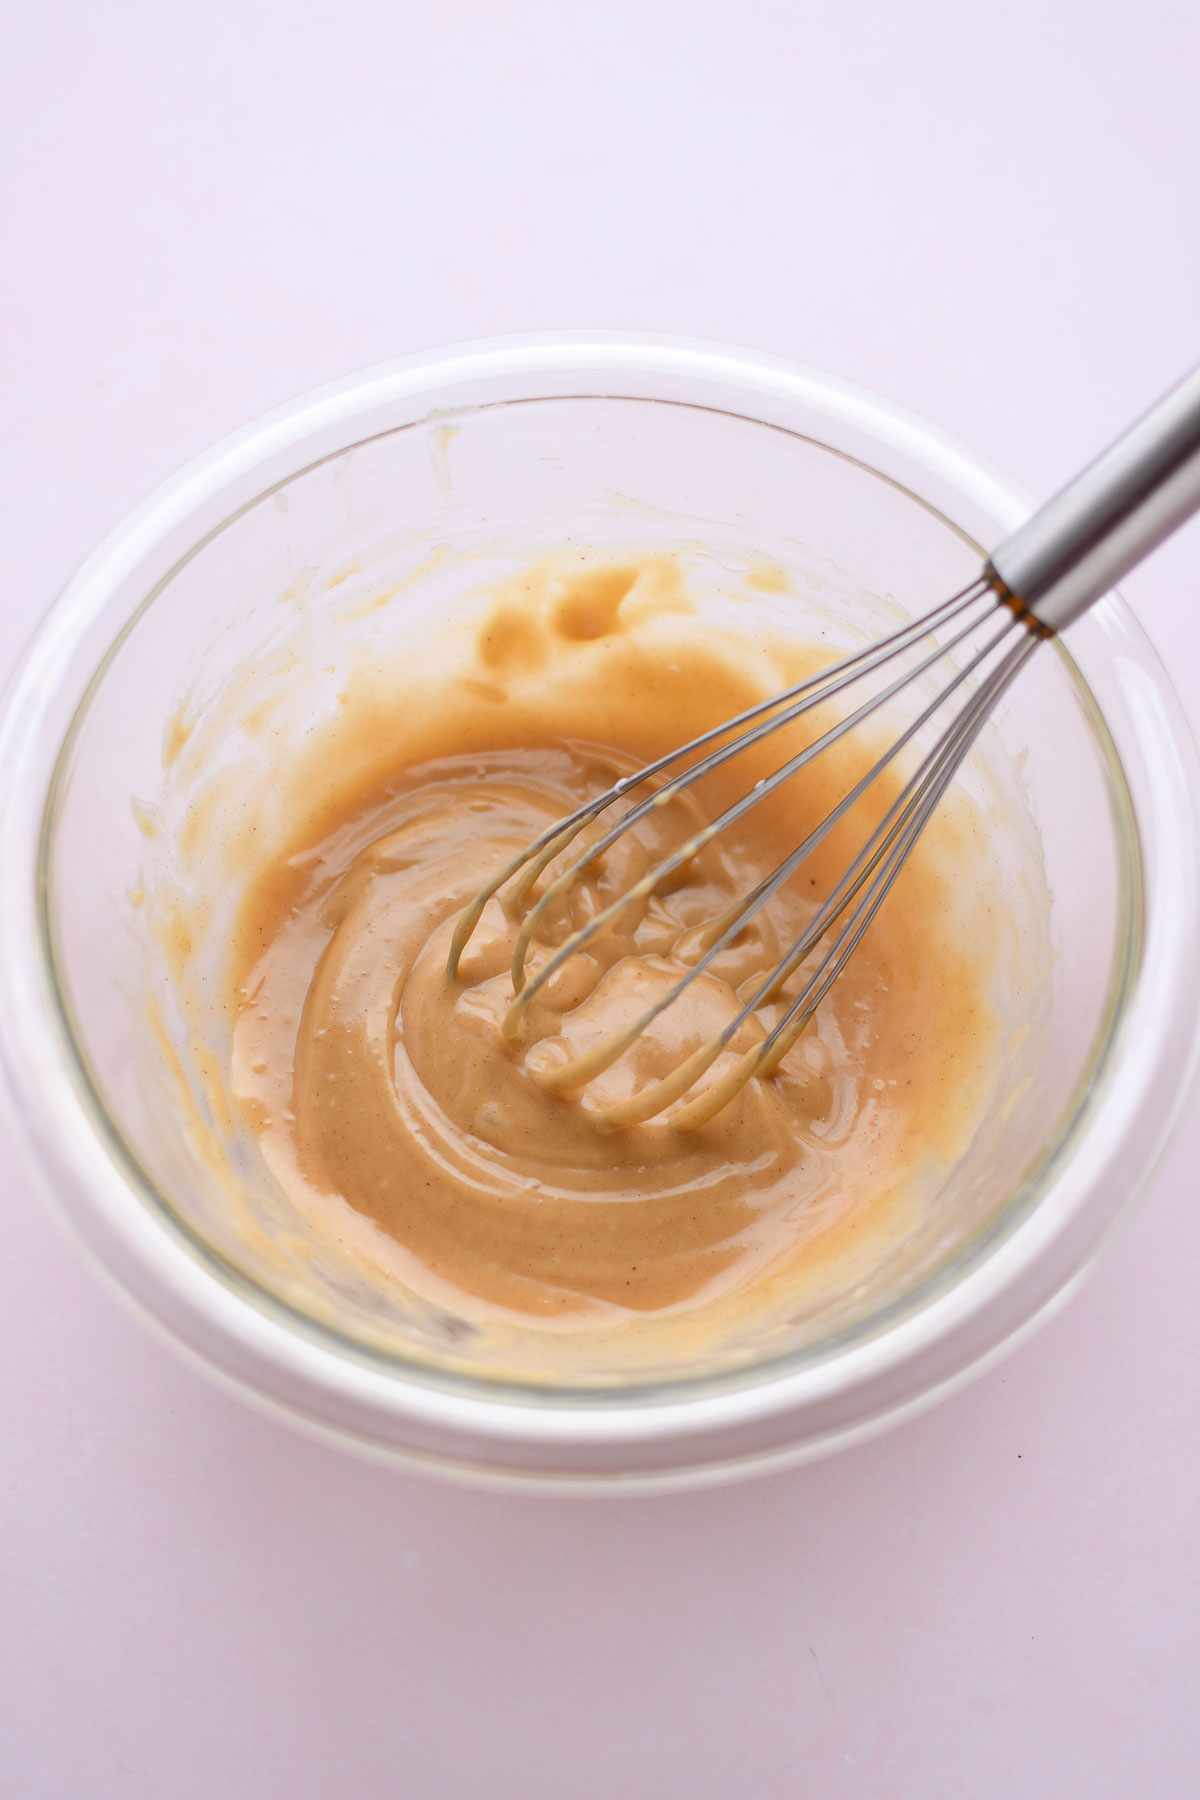
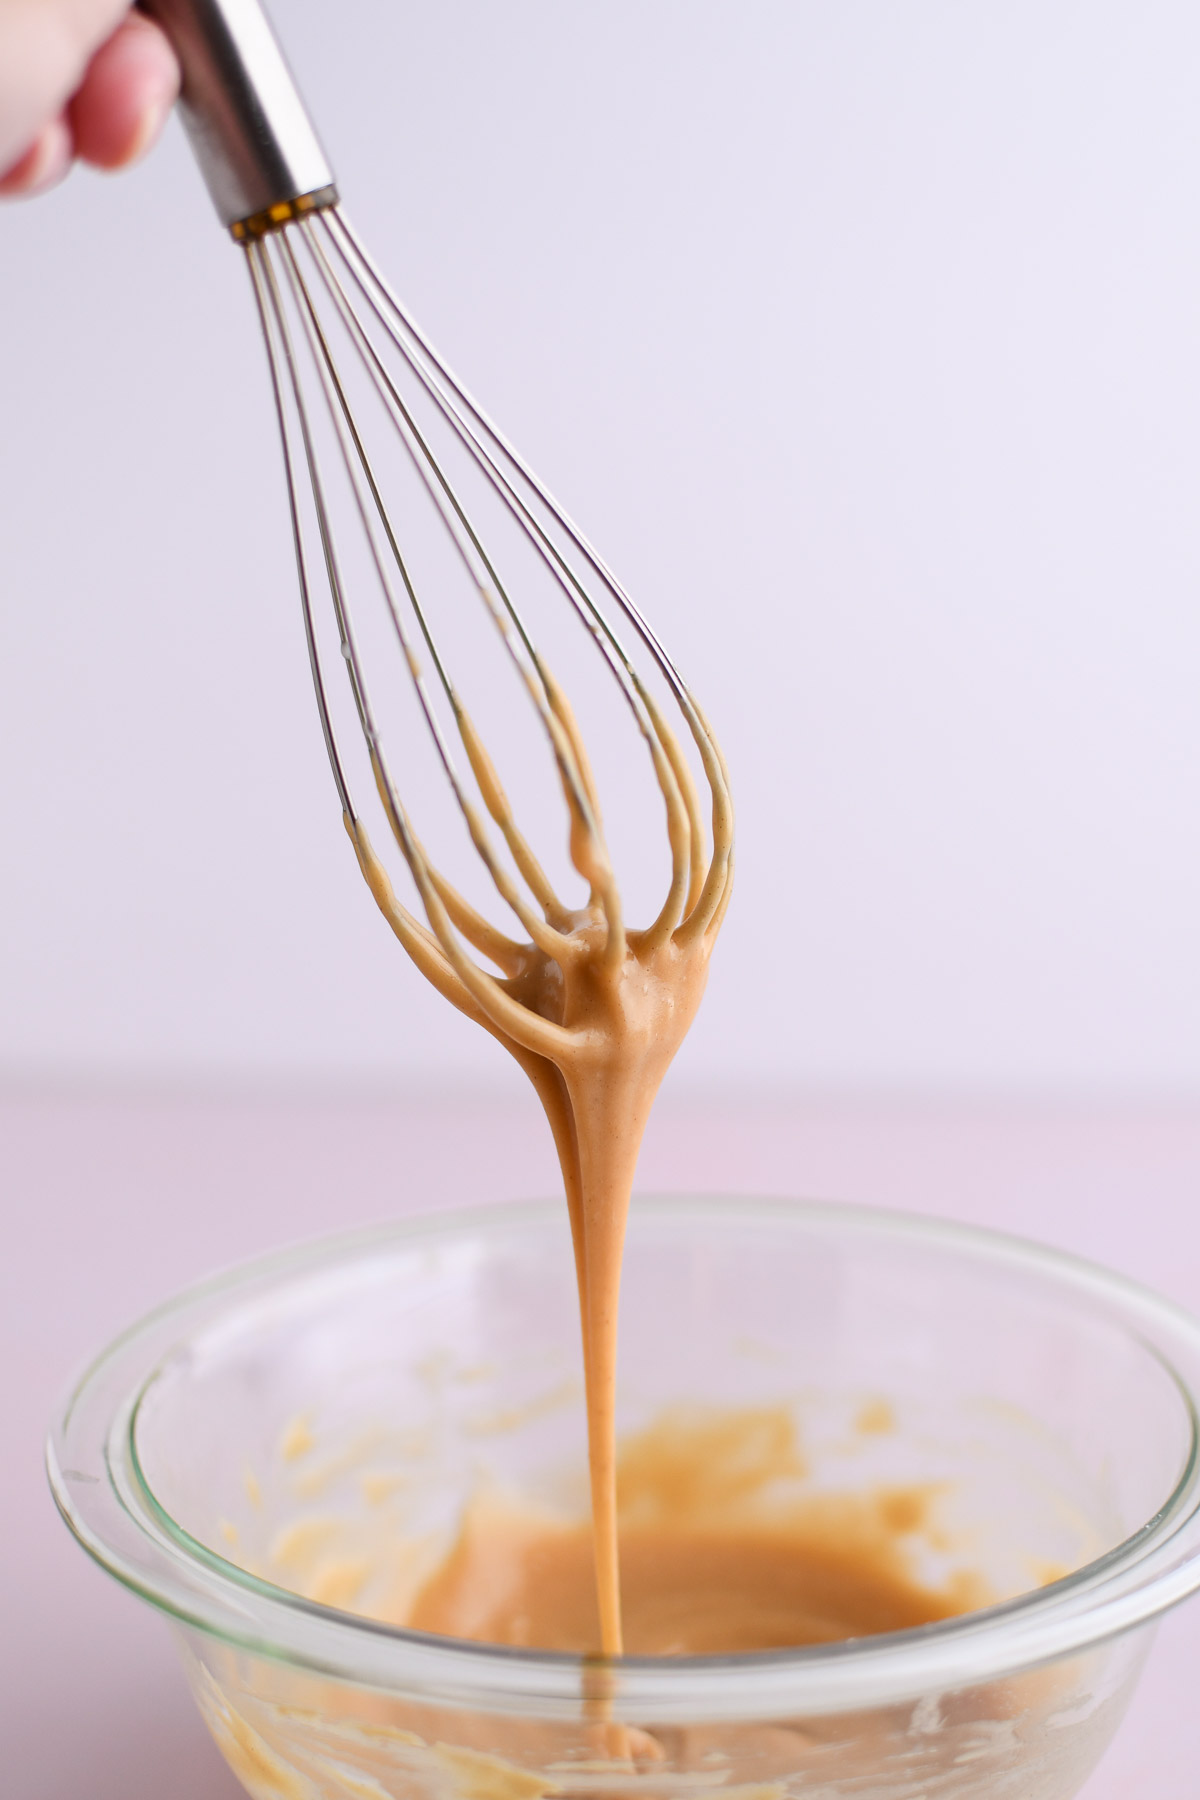
Make the icing. Add the peanut butter and confectioner’s sugar to a small bowl. Start with just one tablespoon of milk, whisking the mixture until you get a thick icing. Add a tablespoon of milk at a time until it’s the right consistency to drizzle. It should fall off the whisk in a smooth line like this when it’s ready.
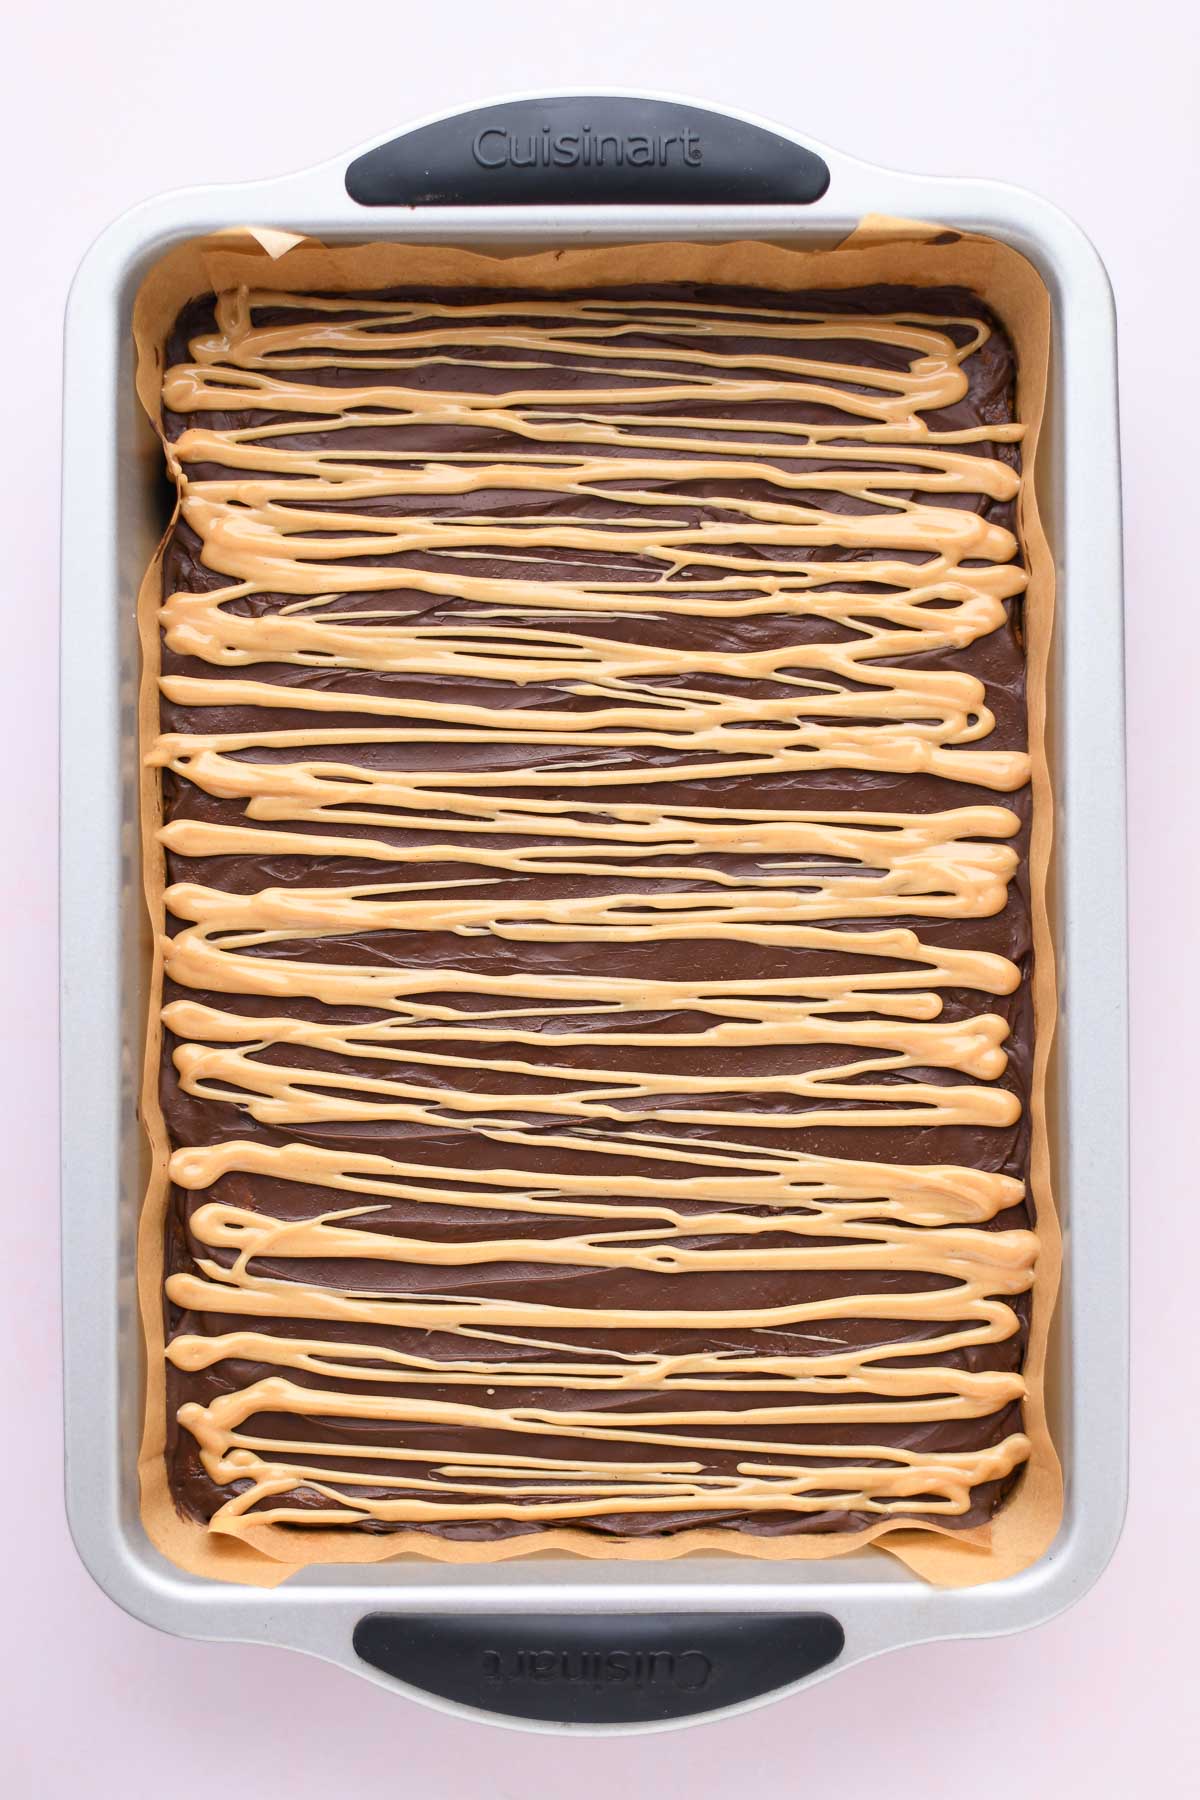
Drizzle the icing over the bars, you can use a whisk or spoon or even pour it on if you like. I used a ziploc and cut a small hole and piped it on.
If you used parchment paper you can lift them easily from the pan and cut them into squares. Go enjoy your delicious bars! You’ll need a giant glass of milk!
Notes about this recipe
- These cookie bars aren’t meant to be as thick as a brownie or blondie. They’re a made with cookie dough, not batter. Instructions are below for making a thicker bar.
- The original recipe from Miss Brenda calls for a 20 minute baking time, but in my oven this was too long. Watch yours carefully.
- If you overbake your bars, don’t worry! They will be crunchy rather than soft and chewy, but they taste great dipped in milk!
To make these thicker or smaller batch:
For a thicker bar, you can double the cookie recipe and bake it in a 9×13 pan. These will need extra baking time, 20-30 minutes depending on your oven. The chocolate and icing recipe stays the same.
OR for a smaller batch, use the same recipe in the card and instead bake it in an 8×8 pan for 15-20 minutes. You’ll need less chocolate chips and only a half batch of the icing.
I’d love to hear from you!
If you try this recipe and love it, please leave a comment and a star rating and let me know how it went. Happy Baking!
Peanut Butter Fingers
Ingredients
Bars
- 1 cup (136 grams) all purpose flour
- ½ cup (96 grams) granulated sugar
- ½ cup (87 grams) brown sugar
- ½ tsp baking soda
- ¼ tsp salt
- ½ cup butter, softened
- ⅓ cup (90 grams) peanut butter
- 1 egg
- 1 cup (93 grams) old fashioned oats
Topping
- chocolate chips (12 ounce package) semi sweet or milk chocolate
Icing
- ½ cup (45 grams) confectioner's sugar
- ¼ cup (62 grams) peanut butter
- 2-4 tbsp milk
- pinch of salt
Instructions
- Preheat the oven to 350℉. Grease a 9×13 pan or line it with parchment paper and set aside.
- Make the cookie dough: In the bowl of a stand mixer, add 1 cup (136 grams) all purpose flour, ½ cup (96 grams) granulated sugar, ½ cup (87 grams) brown sugar, ½ tsp baking soda, ¼ tsp salt, ½ cup butter, softened, ⅓ cup (90 grams) peanut butter, 1 egg, and 1 cup (93 grams) old fashioned oats. Mix on low until everything is combined.
- Add small chunks of dough around the pan, then use your hands to press it an even layer. Bake for 15-18 minutes or until the sides are set and the bars look slightly underbaked in the center. Turn off the oven and remove the cookie.
- Chocolate layer: Sprinkle chocolate chips (12 ounce package) on top of the bars and place them back in the oven for 1 minute until the chocolate is shiny and melting. Spread the chocolate evenly across the top. Let the bars cool and the chocolate set before adding the icing. **You may not need the entire package of choc chips to cover**
- Make the peanut butter icing: Add ½ cup (45 grams) confectioner's sugar, ¼ cup (62 grams) peanut butter, a pinch of salt, and 2-4 tbsp milk (1 tablespoon at a time) in a small bowl and whisk until the icing is thin enough to fall from the whisk in a smooth line. Drizzle or pipe over the chocolate layer, then cut into bars.
- Store bars in an air tight container at room temp. Bars can be frozen in a freezer safe container and thawed in the fridge or at room temp when ready to serve.
Notes
- You can use creamy or chunky peanut butter. I used regular creamy style, not natural unsweetened peanut butter.
- For a thicker bar, you can double the cookie recipe and bake it in a 9×13 pan. These will need extra baking time, 20-30 minutes depending on your oven. Chocolate and peanut butter layers are the same, do not double those.
- OR for a smaller batch, use the same cookie recipe in the card and instead bake it in an 8×8 pan for 15-20 minutes. You’ll need less chocolate chips and only need a half batch of icing if you make it in a smaller pan.


How far in advance can I make these? We used to make these years ago but I lost the recipe. If I store them in the fridge will they last until Christmas?
Hi Linda, I haven’t tried keeping them in the fridge, but they do freeze and thaw well. If you’re planning to make them now and store them until Christmas, I’d put them in a freezer safe container and thaw them when you’re ready. Happy baking!