Chocolate Chip Sourdough Bread Mini Loaf
Easy to make overnight chocolate chip sourdough bread in a mini size! This is a wonderful breakfast loaf, perfect paired with coffee.
So you’ve made your sourdough starter and you’re a semi-pro at making bread. But, you might be ready to branch out beyond the basic loaf…..(I mean there’s only so many sandwiches we can eat, right?) Let’s try something fun!
This is a traditional artisan style loaf with an unexpected addition: chocolate chips! Sounds weird, but it’s amazing. Imagine the crusty exterior and the chewy interior with the traditional tang of sourdough and bursts of deep chocolate flavor. Sourdough, but make it dessert.
Let’s bake!
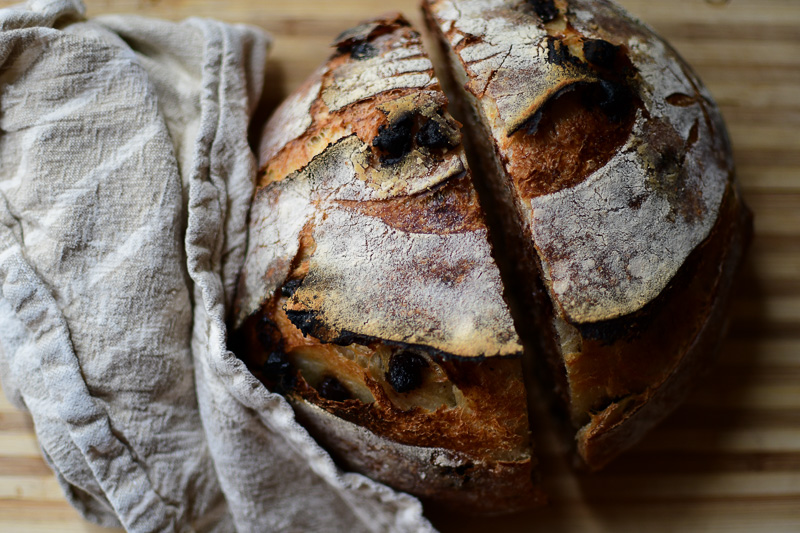
Chocolate Chip Sourdough Bread
Ingredients
- 50 g (1/4 cup) bubbly active starter
- 175 g (3/4 cup) water
- 8 g (1 tsp) salt
- 250 g (2 cups + 2 tbsp) bread flour (White Lily)
- 1/2 c chocolate chips up to 3/4 cup
- 8 g sugar (1/2 tbsp)
Instructions
- In a medium size mixing bowl, mix starter and water.
- Add flour, salt, and sugar. Mix together with a fork until you get a shaggy dough, then continue using your hands until a rough ball forms. Cover and let rest for 30 minutes.
- After the dough has rested, add the chocolate chips. Mix well. A few of the chocolate chips might pop out, that's fine. Using your hands, continue to fold the dough until a smooth ball forms.
- Cover and let rise overnight, 8-12 hours. The longer the dough ferments, the tangier the flavor in the final bread.
- Once the dough has risen and is doubled in size, flour the counter and carefully remove the dough from the bowl.
- Gently shape the dough into a round loaf, flip it over (seam side down), cover and let rest for 10 minutes.
- After the dough has rested, tighten the dough into a circle and place into a bowl lined with a flour towel, seam side up. Cover loosely and let rise for an 30 minutes to an hour. The dough should look puffy and have risen just slightly, not doubled in size.
- Preheat the oven to 450° F.
- Turn the dough onto a piece of parchment paper cut to size to fit in your dutch oven. Add extra flour to the top of the dough, score and place into the dutch oven and cover with a lid. Bake for 20 minutes covered, then remove lid and continue to bake for another 25 minutes (this time is dependent on your oven, mine is done after 25, but it could take up to 30 minutes.)
- Remove from the oven, and let the loaf cool on a wire rack for 30 minutes to an hour before slicing. Enjoy!
Here’s what you’ll need to make this chocolate chip sourdough bread
Ingredients: Fed & active sourdough starter, bread flour, water, salt, sugar, and chocolate chips
Tools: Digital kitchen scale, medium size bowl for mixing & the dough to rise in, smaller bowl or proofing basket with a flour lined towel, sharp blade or bread lame for scoring the dough, Dutch oven with lid, and parchment paper.
Baker’s Timeline
*Note* Your beginning time depends on how long your starter takes to become fully active. My starter takes around 4 hours, so this is a general timeline to follow.
Evening
Feed starter & prepare dough
3 pm: Feed starter. How much I feed my starter depends on what I’m making. This recipe only needs 1/4 cup of active starter, so I will take 2 oz starter, feed it 2 oz water, and 2 oz all purpose flour. This makes about 2/3 cups of starter. This is enough for my bread, plus plenty left to keep my starter going.
7 pm: Once the starter is doubled in size and ready to use, pour starter and water in a mixing bowl & stir. Add salt, sugar, and flour. Form a shaggy ball with the dough (this dough will be very soft and sticky). Cover and let rest for 30 minutes.
Bulk Rise (Bulk fermentation)
7:30 pm: Add the chocolate chips to the dough, and stretch and fold until a smooth ball forms. To stretch and fold, pull one side of the dough up and over and gently press to the middle, rotate the bowl, and continue all the way around. Cover with a damp towel or plastic wrap, and let rise overnight. 8-12 hours. I let mine rise for at least 12 hours most of the time. The longer the dough ferments, the more tangy the final bread will taste. A shorter, 8 hour bulk rise will not have a lot of sourdough flavor in it. Experiment with these time frames in your baking to find the flavor of the dough that you like best!
The next morning
7-9 am: Check to see if the dough is doubled. If it has and you are ready to bake, flour the counter and gently pull the dough from the bowl onto the counter. Form the dough into a ball, cover and let rest for 10 minutes.
Final Rise
Get the proofing bowl or basket ready. I use a small pyrex bowl for a miniature loaf, lined with a linen towel that has been coated with flour. Again, gently here, shape the dough into a ball and place in the proofing bowl, seam side up. Cover and let rise for 30 minutes to 1 hour.
Bake
During the last rise, preheat the oven to 450. Once the dough has risen slightly (we aren’t doubling in size here), place the parchment paper over the bowl, and flip the dough onto the parchment paper. Add extra flour to the top, and score the dough. Place the dough into the dutch oven, and bake for 20 minutes with the lid on, then remove the lid and continue baking for another 25 minutes.
I don’t like deep brown color to my loaves, so I tend to bake for less time. If you prefer a dark color, you can bake longer, and then remove the loaf from the dutch oven and place back into the oven to bake on the rack directly for an additional 5-10 minutes. I don’t do this step-as I think it makes loaves much too tough on the outside.
Cooling your loaf
Remove the loaf from the dutch oven and let rest on a wire cooling rack for an hour or so (if you can wait that long!) before slicing. The longer you wait, the easier the loaf will be to cut. Allowing the loaf to rest lets moisture escape through the crust- and softens it just enough for easier cutting. It also means that the interior of the bread won’t be gummy. If you’re interested in the science here-this is a great read about cooling sourdough.
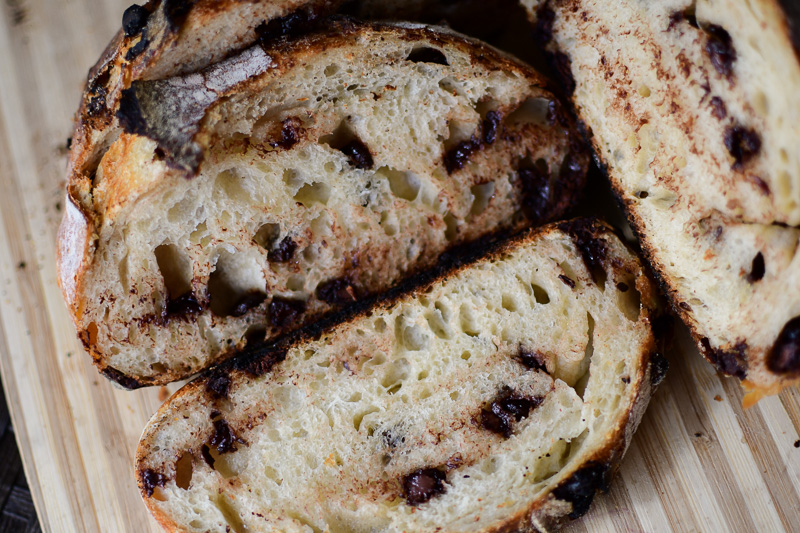
Chocolate Chip Sourdough Q & A
Do I really need a kitchen scale to bake this bread?
I highly recommend it! Using a scale adds so much precision to your baking. Because everyone measures a bit differently when using cups & spoons but grams are grams! It’s also easier-just put your bowl on the scale and weigh everything, no getting extra dishes dirty. When baking sourdough bread like this, I always rely on a scale.
Can this recipe be doubled for a larger size loaf?
Sure! Double the ingredients except for the starter. You’ll only need 50 grams for both the large or mini loaf. This miniature loaf is perfect for a small family or 2-4 people.
Can I make this with all purpose flour instead of bread flour?
All purpose flour can be substituted for bread flour in this recipe, just make sure to use less water than the recipe calls for. Try using 30 grams less to begin with. It’s an experiment-if the dough is too dry, add a bit more water until the dough is the right consistency.
What kind of chocolate chips should I use?
Any kind works here-I used semi sweet for a rich chocolate flavor, but I’ve also used espresso chips and milk chocolate. White chocolate chips work too. Try a combo of flavors! If you don’t have chocolate chips, you can also chop up a chocolate bar and try that!
A tip for burnt bread bottoms:
I was struggling with burnt crust on the bottom of all of my loaves until I found this tip. Fold up a piece of heavy duty aluminum foil and put in the bottom of your dutch oven before you add your parchment paper & bread. Bake as usual. The aluminum foil will prevent the bread from scorching on the bottom!
How long will this bread stay fresh?
This chocolate chip sourdough bread is best on the day that it is baked. This loaf is small and usually gets eaten so quickly that we rarely have leftovers, but I have found that it is still good up to 2 days after baking. The crust softens and won’t have that traditional crispness of the fresh out of the oven taste, but you can re-heat it in a toaster oven to add a nice crunch.
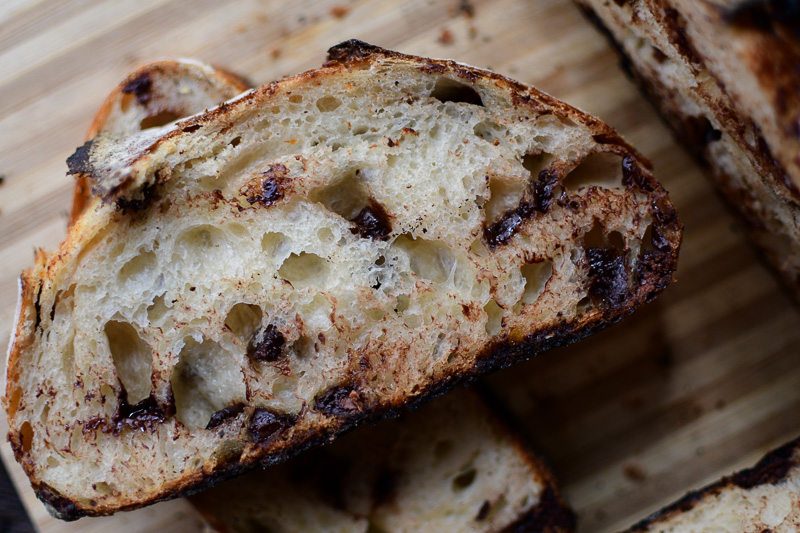
Rich and tangy sourdough bread studded with semi sweet chocolate chips. What could be better?
Looking for more sourdough recipes?
Try my sourdough cinnamon rolls recipe!
My favorite book on sourdough is Artisan Sourdough Made Simple by Emilie Raffa. You can find it here on Amazon. Today’s recipe was adapted from this book.




If I add cinnamon to your chocolate chip sourdough loaf, how much would you add for this recipe? Thank you!💜
I’d try 1 to 2 teaspoons of cinnamon. Good luck with the recipe!
Can you please provide the recipe for the starter? Thank you! I’m excited to try this bread ❤️
Hi Cindy, to make this bread you’ll need an active and bubbly sourdough starter. I don’t have instructions on my site to make the starter, but here is a great guide to get you going! https://www.theclevercarrot.com/2019/03/beginner-sourdough-starter-recipe/
Great recipe! This was a hit with my family. They have never had a sweet sourdough. I did double the recipe, even the starter! No issues with it being too much starter, and it had a great flavor. I also used my plant base chocolate chips. The only thing I will change in the future is the oven temp. Baking at 450 was too hot and burned the bottom. I will adjust that next time and all will be good. 😊
I’m so glad you liked the recipe! I’m sorry to hear that the temp was too hot. My oven is a bit finicky but I use a cast iron dutch oven to bake in now and I no longer get burned bottoms on my loaves. You could try that, or lowering the temp down to 425 instead. Good luck with your next bake!
Can I put in fridge after the 8-12 bulk(I didn’t read entire recipe first and will be baking this at 1:00am if not).
Hi Heather, if you need to, you can put it in the fridge before the bulk rise or a few hours into it as well. I’ve never put one in the fridge after the bulk rise, but I think it would be fine to buy you a few hours until you can bake.
I made this but not sure if it the rise was tbe best on it. It was on the smaller size and a little deflated. This was my second time making sourdough. I still have a lot to learn. I made it a longer loaf so maybe that’s why it’s so small.
Hi Lesley, thanks for trying the recipe! If your starter is still pretty new, it’s common to have loaves with less rise. As your starter gets stronger, it it’ll get easier to get loaves with a good oven-spring. Other common reasons for the rise not being great it your dough could be over-proofed or under-proofed. This loaf is a good bit smaller since it’s half the size of a normal recipe. But it should still have good rise on it. Good luck with your baking!